Creating an Essay question
An Essay question asks candidates to provide an extended written response to a prompt.
This article explains how to create Essay questions in Surpass, including details on how to enable different toolbars, a word counter, a diagram creator, and more.
In This Article
1. Choose your item type
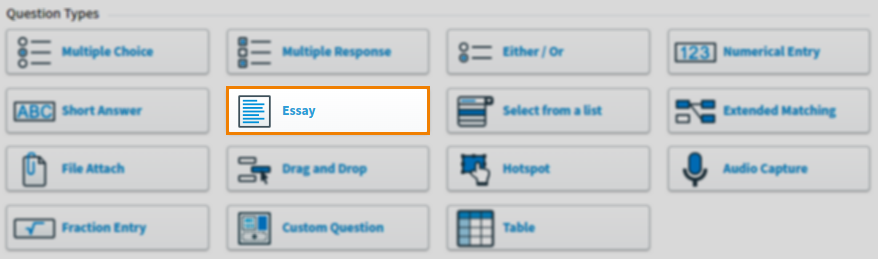
In your subject, select Create New Item to open the Question Types menu. Choose Essay to create a blank Essay item and go to the Edit screen.
2. Name your item
Enter the item’s name in the Name field.

3. Enter your question text
Enter your question text in the question stem. Select Add Text Area to add an additional question stem. You can have a maximum of five question stems per item.

Open Additional Options to add source material or assistive media to your question stem. In mixed subjects, you can also add a table to your question stem (in HTML subjects, tables can be added using the formatting toolbar).
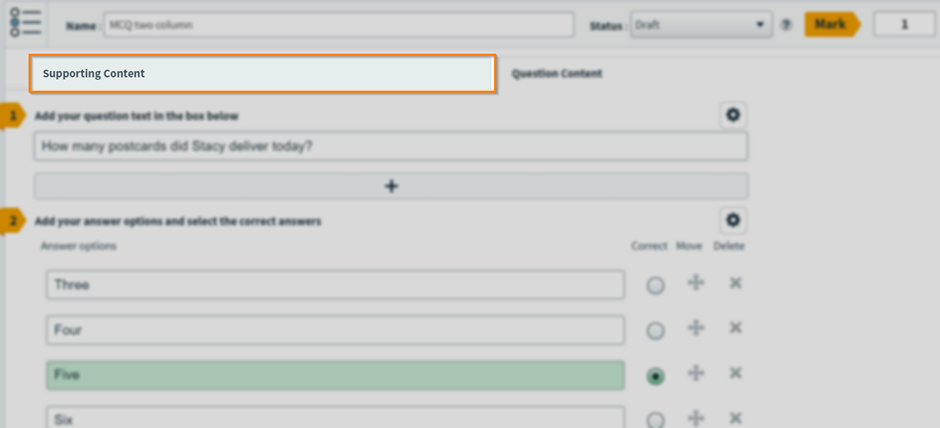
Two-column item layout
A two-column layout displays Supporting Content alongside the Question Content allowing the candidate to see all information provided without the need for scrolling.
Open the Item Settings panel.

Select Two Columns from the Layout Option.
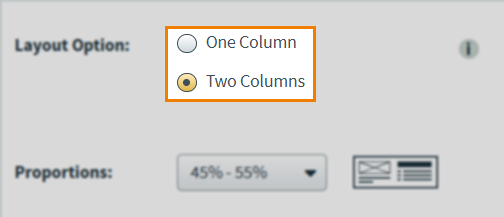
You can change the columns’ Proportions using the drop-down menu.
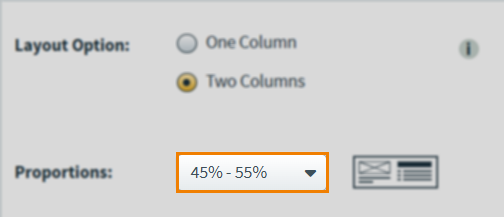
Select the Supporting Content tab to edit the second column. You can add up to 5 different supporting content stems, with a maximum of 1 piece of assistive media per stem.
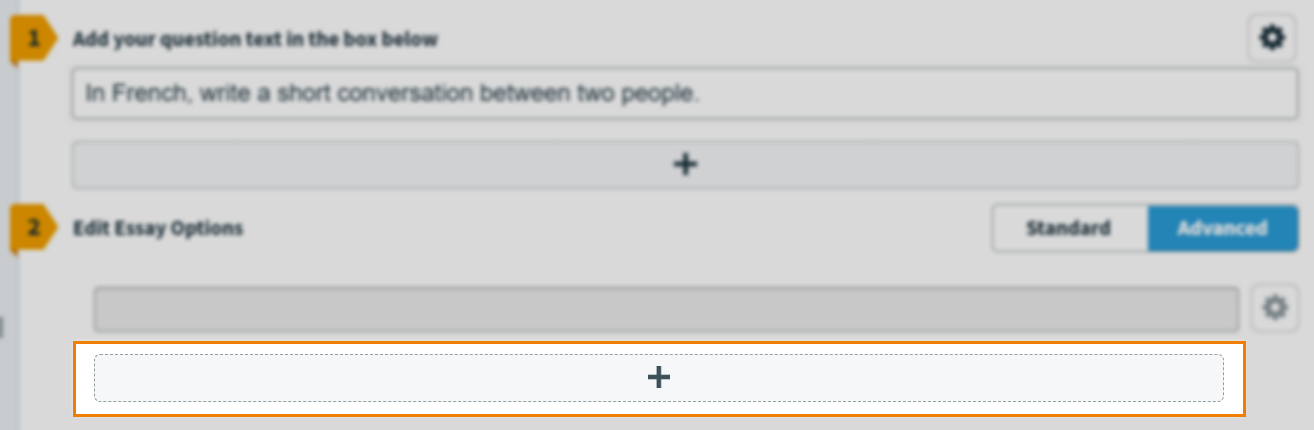
4. Choose between Standard and Advanced Essay
Standard Essay questions give candidates one response box, while Advanced Essay questions let candidates respond to questions via multiple response boxes.

Use the Standard/Advanced toggle to choose between the two options.

5. Add additional response boxes (Advanced only)
To add additional response boxes, select Add Essay Text Area.
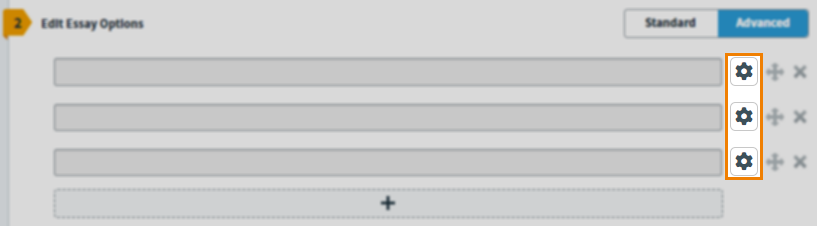
6. Configure your question settings
Configure the available settings to customise how the question will be presented to candidates in delivery.
For Advanced Essay questions, settings can be configured differently for each individual response box. To change the settings for a response box, select Additional Options .
Adding labels to response boxes (Advanced only)
You can add labels to each response box.
Select Label.

Once enabled, the text input field to enter your label is enabled. You can also choose the Label Position (Top, Left, or Right).
Setting the character limit
You can set a character limit for candidates.
Set the maximum characters that candidates can provide in their response in the entry field. The default value is 5,000 characters (approximately 800 words).

Setting the number of lines
You can set how many lines candidates have to write their response on.
This acts only as a suggestion for the size of the candidate’s answer. Candidates can continue to write if they use up all the lines provided.
On-screen test

The value entered in the Number of lines for candidate’s response determines how many lines are provided for this question’s response in an on-screen test.
Paper test

The value entered in the Number of lines for candidate’s response determines how many lines are printed for this question’s response in the test booklet.
For Advanced Essay questions, this setting is called Number of lines for candidate’s response for Paper test.

Setting the response box width (Advanced only)
You can change the width of each response box.

Choose between either Narrow, Half Page, or Wide.
Enabling the formatting toolbar
You can let candidates use formatting tools when writing their responses.

To allow candidates to use the formatting toolbar in a Standard Essay question, select Enable Text Formatting from the Answer Input Options.

This enables the following formatting options:
- Font size
- Bold
- Italic
- Underline
- Text align (left, centre, right)
- Undo
- Redo
- Indent
- Undo
- Redo
- Font
- Font colour
- Horizontal line
- Special characters
- Strikethrough
- Subscript
- Superscript
- Insert table (additional toolbar items)
- Bulleted list (additional toolbar items)
- Numbered list (additional toolbar items)
For Advanced Essay questions, you can choose between having no toolbar (None), a Basic or a Full toolbar.

The Basic toolbar includes only the following formatting options:
- Font
- Bold
- Italic
- Underline
- Text align (left, centre, right)
- Font size
Enabling a symbol bar
You can provide candidates with an additional toolbar that contains symbols relevant to the language in which they should be writing their response, such as the acute é and circumflexed ô on the French toolbar.
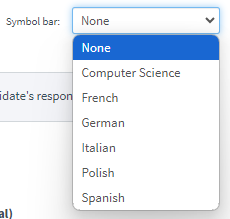
Choose from the following options in the Symbol bar drop-down menu:
- Computer Science
- French
- German
- Italian
- Polish
- Spanish

Enabling a maths keyboard
You can provide candidates with an additional toolbar that includes mathematical and financial symbols, advanced functions like logarithmic and trigonometric operations, and tools for calculating risk and performance metrics.
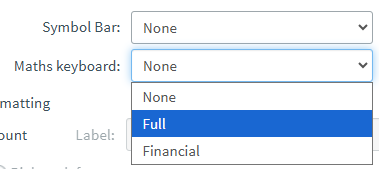
Choose from the following options in the Maths keyboard drop-down menu:
- None
- Full
- Financial
Candidates can access the Full or Financial keyboard by selecting the Math keyboard added to the formatting toolbar.

Displaying the word count
You can let candidates view their current word count when writing their response.
To allow candidates to see their word count when entering their responses, select Display Word Count.


Once enabled, you can change the word counter’s Label. The default label is Word Count.
Setting the answer input direction
You can change the direction of candidates’ inputs to accommodate right-to-left languages like Arabic and Hebrew. For more information on test driver languages, read About Surpass test driver languages.

By default, the answer input direction is set to Left to right. Select Right to left to update the answer input direction.
Enabling the diagram creator
A diagram creator can be added to Essay questions for candidates to use a variety of tools to create diagrams, such as pencil, line, text, shapes, and flowcharts.
Select Add Diagram Creator to add the diagram creator. Once enabled, you can change the diagram creator’s Label. The default label is Diagram Creator.

Candidates can open the diagram creator at the bottom of the Essay response box.

The diagram creator component works the same way as the Diagram Creator custom question. However, unlike the custom question, item authors cannot change any of its tools or settings, and they also cannot preconfigure the grid or canvas. Candidates always start with a blank canvas and can use all available tools.
For more information on the tools and functionality available in the diagram creator, read Creating a Diagram Creator custom question.
7. Set the marking type
Essay items are set to Human marking be default. If you want to mark candidates’ responses in either the Surpass Mark screen or SecureMarker, leave the Marking Type as Human. For more information, read Setting the marking type.
8. Set the question’s marks
Set the item’s total marks in the Mark field.

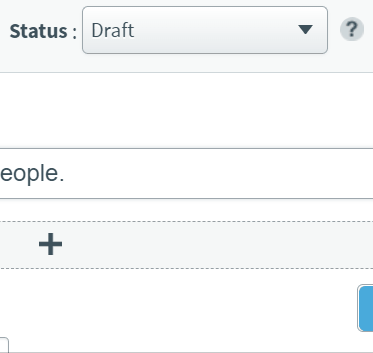
9. Select a workflow status
Set the item’s workflow status in the Status drop-down menu. Only items set to Live can be used in a test.
10. Preview your question
To see your item from a candidate’s perspective, select Preview .

In Mixed subjects, you can preview your item in the HTML test driver. Use the Preview arrow to open the Preview Options menu and select Preview in HTML . Any custom CSS is applied in the Preview screen. For more information on custom CSS, read ‘About Subject settings’ in About Site Settings options.

If you need to continue working on the item, select Edit to return to the Edit screen.

11. Saving and closing your item
Select Save to save your item to your subject.

To see additional saving options, use the Save arrow to open the Save Options menu. Select Save & Close to save the item and return to the Subjects screen. Select Save & New to save the item and create another Essay item.

Select Close to leave the Edit screen. If you have unsaved changes, you are prompted to either save or discard them.

Further reading
You can do much more with Essay items in Surpass. For more information, read the following articles: