Setting up tag groups
In Surpass, you can attach metadata (known as ‘tags’) to items and then use these tags to organise items when authoring content, creating tests, and viewing results. Tags are made up of ‘tag groups’ and ‘tag values’.
Tag groups are categorised containers for tag values. You can create tag groups in the Subjects screen of Setup. Tag groups are subject-specific.
This article explains how to set up tag groups in the Subjects screen of Setup, including how to edit a tag group.
In this article
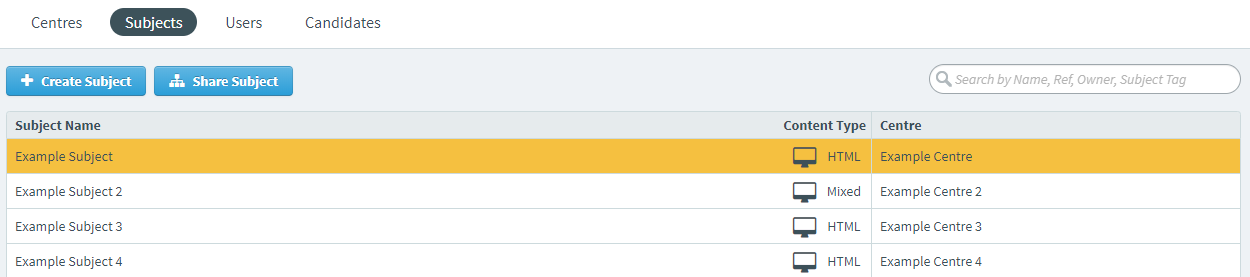
1. Go to the Subjects screen in Setup
To view the Subjects screen in Setup, go to Setup > Subjects.

2. Choose a subject in the Subjects list
Choose a subject in the Subjects list.
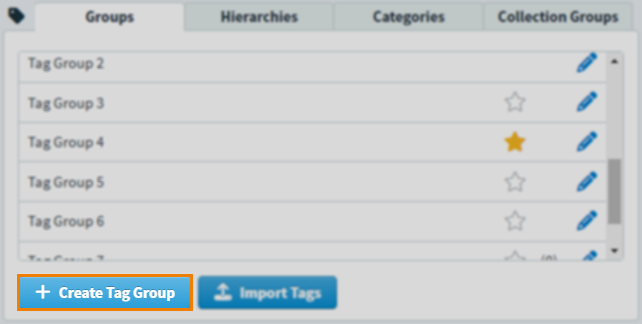
3. Select Create Tag Group in the Tag Groups panel
The Tag Groups panel displays the chosen subject’s existing tag groups.
Select Create Tag Group to create a new custom tag group.
4. Create your tag group
Enter a name for the tag group in the Create Tag Group dialog.
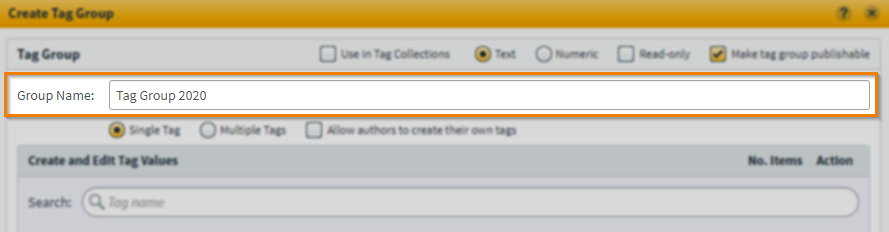
Refer to the following table about the available settings in the Create Tag Group dialog.
| Setting | Description |
|---|---|
|
Use in Tag Collections |
Determines whether this tag group will be available to select when creating a tag collection group. For more information, read Setting up tag collection groups.
NOTE: Only one tag value can be created if this tag group is part of a tag collection. If the tag group is being used in tag collections, only the tag values in the tag collection marked as the latest tag collection are reflected in the No. Items count. For more information, read 'Creating a new tag collection' in Using tag collections in items.
|
|
Read-only |
Prevents users without the Read-only Tag Groups permission from editing this tag group. For more information, read About roles and permissions. |
|
Publish to Test Creation |
Determines whether tags in this tag group are published from Item Authoring to Test Creation.
NOTE: For existing subjects with items, changes do not take effect until changes are made to a live item in Item Authoring as this triggers a republish of the tag group.
IMPORTANT: Item pools that are generated from item lists still include all tags even if the Publish to Test Creation checkbox is deselected.
|
|
Allow authors to create their own tags |
Allows users to create their own tag values in Item Authoring.
NOTE: Users can only select from predetermined tag values if Allow authors to create their own tags is not selected.
|
Setting up text tag values
Select Text in the Create Tag Group dialog to create a tag group containing text tag values.
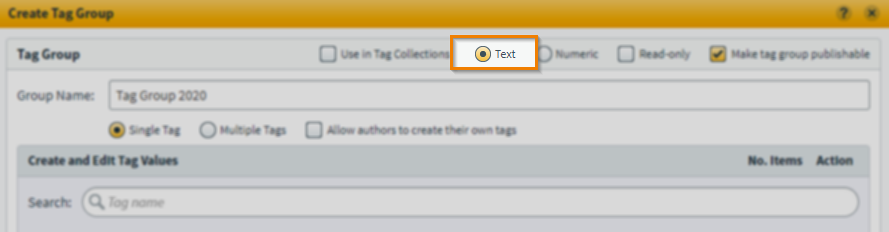
Before creating a tag value, choose whether you want users to only assign one tag (Single Tag) or any number of tags (Multiple Tags) to items from this tag group.
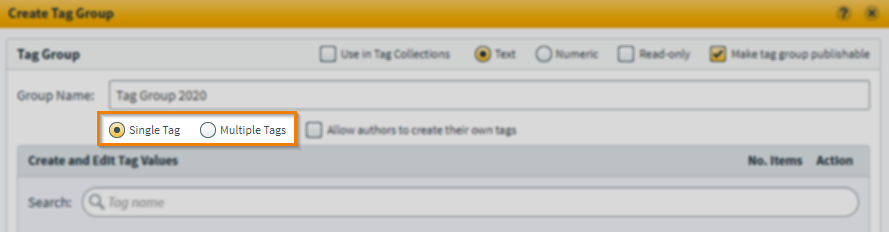
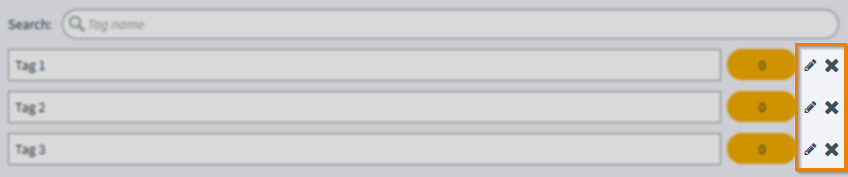
Select Add Tag Value to create a new tag value. You can add up to 100 tag values to a tag group.

Select Edit to edit a tag value in the entry field. Select Remove to delete a tag value.

Select Special Characters Ω to add special characters to your tag value. For more information, read About special characters.

Setting up numeric tag values
Select Numeric in the Create Tag Group dialog to create a tag group containing numeric tag values.

The Value menu determines the range of values available in the tag group. Choose one of the following options from the Value menu.
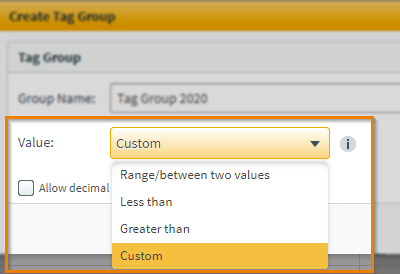
| Setting | Description |
|---|---|
| Range/between two values | Numeric tag values must be between two predetermined values (From and To). |
| Less than | Numeric tag values must be less than or equal to a predetermined value. |
| Greater than | Numeric tag values must be greater than or equal to a predetermined value. |
| Custom | Numeric tag values can be any value. |
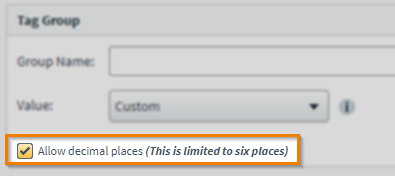
Select Allow decimal places to enable decimal places in tag values. This cannot be changed after the tag group has been created.
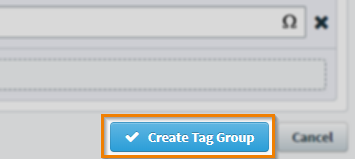
5. Save your tag group
Select Create Tag Group to create your tag group.
The new tag group appears in the chosen subject’s Tag Groups panel. For more information about how to use tags in items, read Using tags in items.
Editing tag groups and their values
Created tag groups and their values can be edited. Expand the following section for more information.
Select Edit next to a tag group in the Tag Groups panel to edit a tag group.
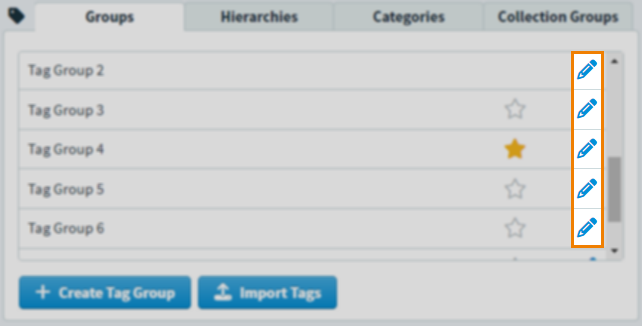
In the Edit Tag Group dialog, you can change the tag group’s name, settings, add new tag values, and edit and delete existing tag values.
To edit a tag value, select Edit (or Remove ) next to a tag value.
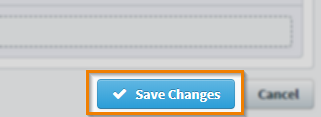
Select Save Changes to update your tag group.
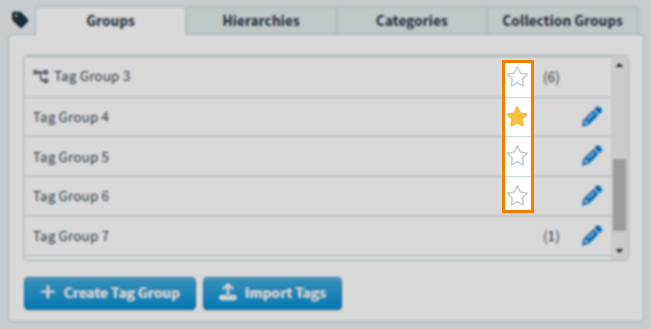
Featuring tag groups
Up to three tag groups can be selected as a subject’s designated featured tag group. All tag values in featured tag groups are visible on items in Item Authoring and Tasks.
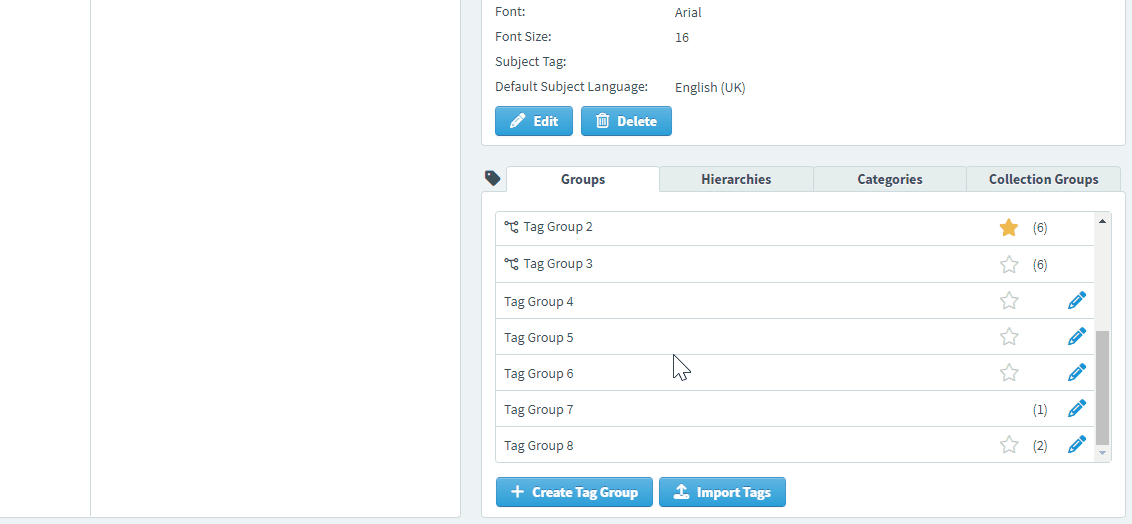
Select the Set featured tag group button next to the tag group you want to feature.
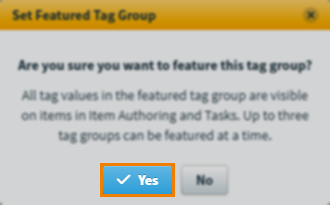
Select Yes in the Set Featured Tag Group dialog to set the tag group as one of your subject’s featured tag groups.
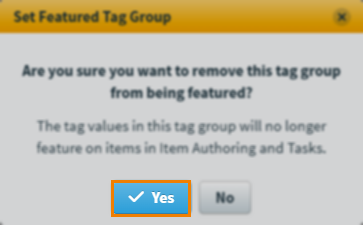
To remove a tag group as a featured tag group, select to Remove featured tag group next to the featured tag group and then select Yes .
To see how featured tag values display on an item in the subject’s item tree, read ‘Viewing featured tags’ in Managing items in a subject. Featured tag values also display within items, for more information read step ‘4. Check tag values’ in Using tags in items.
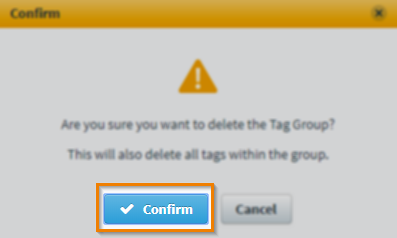
Deleting tag groups
Created tag groups can be deleted. Expand the following section for more information.
Select Edit next to a tag group in the Tag Groups panel to edit a tag group.
Select Delete Tag Group in the Edit Tag Group dialog to mark the tag group for deletion.
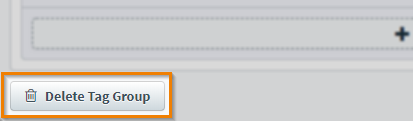
Select Confirm in the Confirm dialog to confirm you want to delete the tag group.
Further reading
To learn more about working with tags in the Subjects screen, read the following articles: