Managing items in a subject
In Surpass, a subject is where you create and manage items for use in tests. Subjects can hold folders and sub-folders of items as well as item sets, allowing for flexible organisation of your test content. You can also upload media to your subject’s media library for use in its items.
This article explains how to manage items in your subject, including how to navigate the item tree, create and use folders, move items, duplicate items, and delete items.
In this article
Navigating to your subject
To enter your subject, go to Item Authoring > Subjects and select your subject in the subject list.

For more information about the Subjects screen, read About the Subjects screen in Item Authoring.
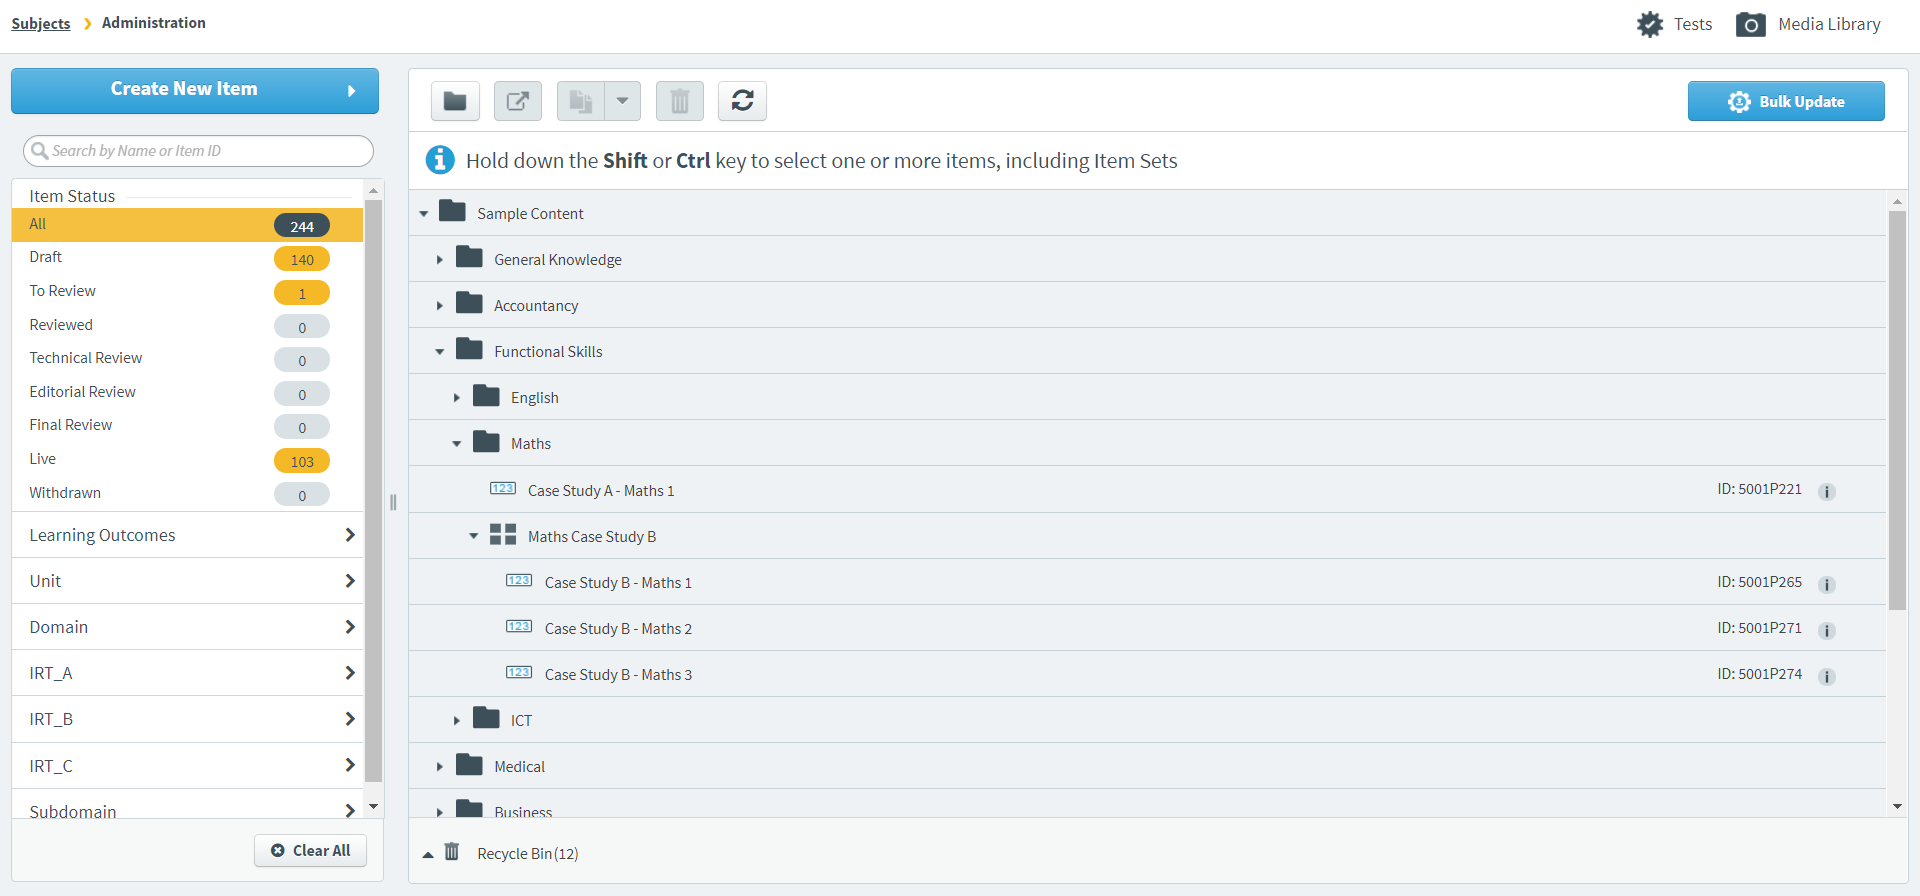
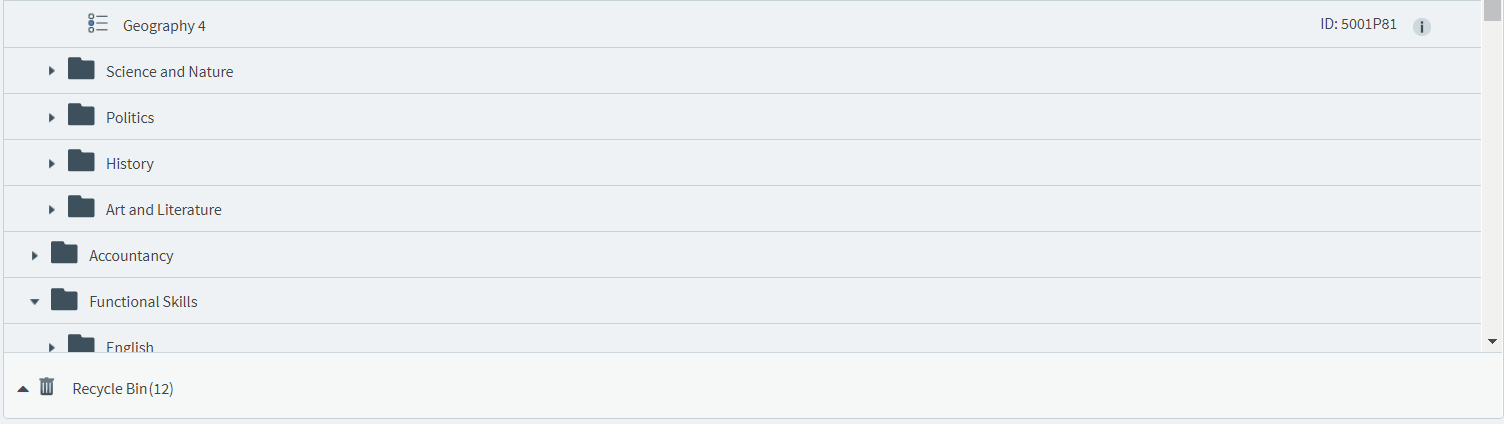
About the item tree
The item tree contains all of your subject’s items. These items may be organised into folders or item sets. You can expand () and collapse () folders and item sets to show and hide items. Select an item to open its Edit screen, where you can work on its content and settings.
Viewing featured tags
If a subject has one or more featured tag groups, any tag values assigned to items from featured tag groups are displayed in the item tree on the corresponding item(s). For information on setting up featured tag groups, read ‘Featuring tag groups’ in Setting up tag groups.
If the subject has a featured tag group, the first tag value assigned to an item from the featured tag group appears in the item tree.
Subjects can have up to three featured tag groups; multiple featured tag groups are separated by a pipe (‘|‘) symbol. If more than one featured tag value has been assigned to a group, hover over the ellipsis icon to display all of them.
Featured tag values also display within items, for more information read step ‘4. Check tag values’ in Using tags in items.
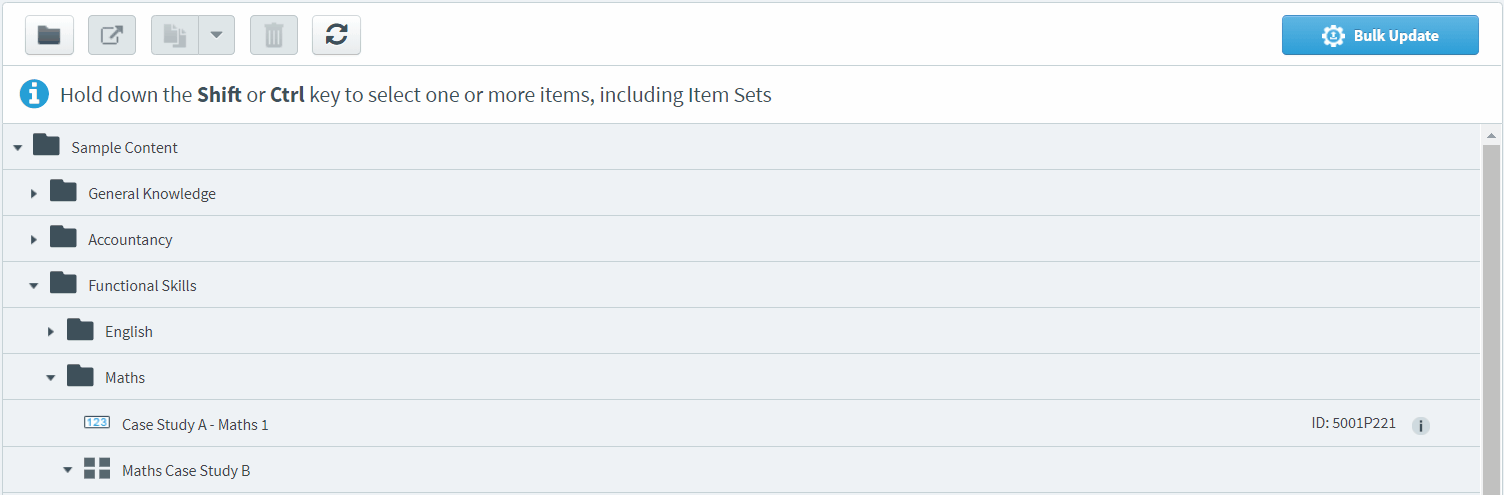
Using folders
To improve the organisation of your subject, you might find it useful to put your items in folders and subfolders.
Select New Folder to create a new folder. The folder’s name field is automatically enabled, allowing you to rename the folder immediately.

With the folder selected, select Create New Item to add a new item to the folder. You can also create subfolders by selecting New Folder with the folder selected.
To add an existing item to a folder, drag the item over the folder until an orange line appears through the folder’s name. Release the item to add it to the folder. You can drag items within a folder to rearrange their order.
Moving items
You can move multiple items to a folder in another subject, or to a folder in the same subject at the same time without having to drag and drop them into the folder.
Use Shift or Control to select multiple items in the item tree and select Move Items .

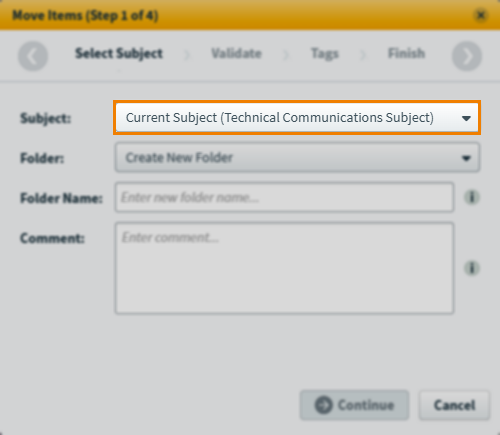
Select a subject
Select which subject you want to move your items to.
Select a folder
Select which folder you want to move your items to.
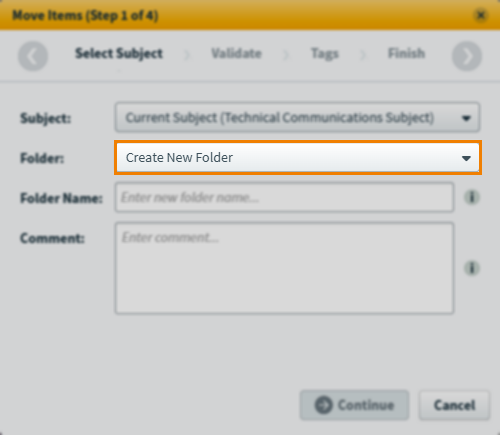
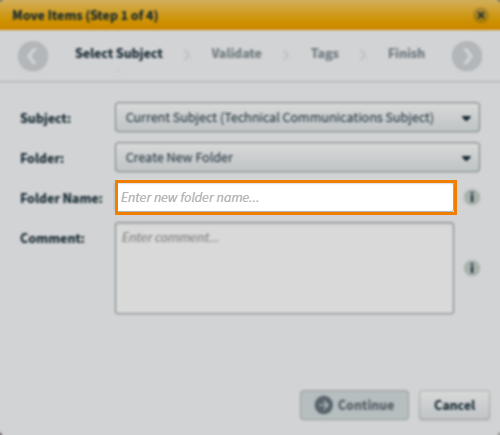
If you select Create New Folder (selected by default), you can enter a Folder Name. New folders not given a name are named ‘Items moved from [subject name]’.
If moving items within the current subject, you can select Recycle Bin to move items to the subject’s recycle bin instead.
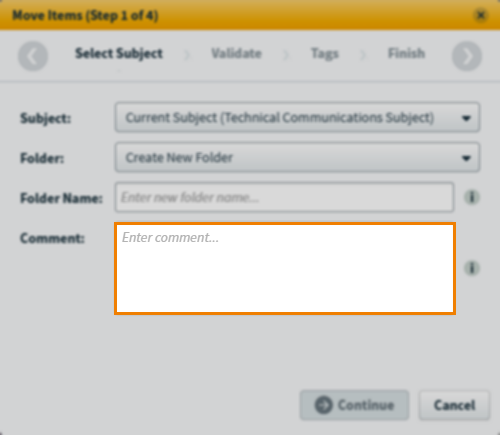
Enter a comment
Explain why you are moving the item(s) in the Comment field. This information is available in item history.
Select Continue to proceed to the next step of the wizard.
Validate your items
The validation summary displays how many items are available or unavailable to be moved to another subject.
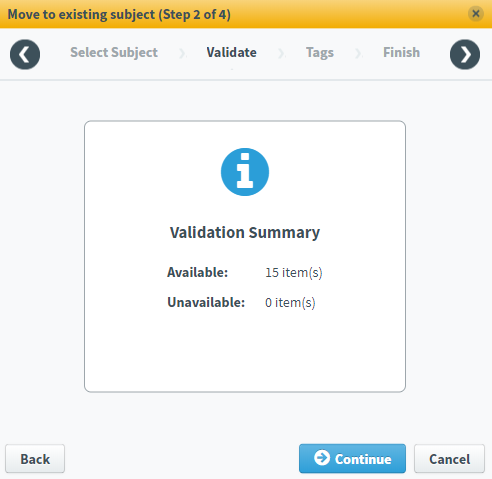
If some items cannot be moved, select More Details to see which items cannot be moved and the reasons why.
Select Continue to proceed to the next step of the wizard.
Select tags
If any of the items you are moving to another subject have tags, select which tag categories and tag groups you want to move to the new subject.
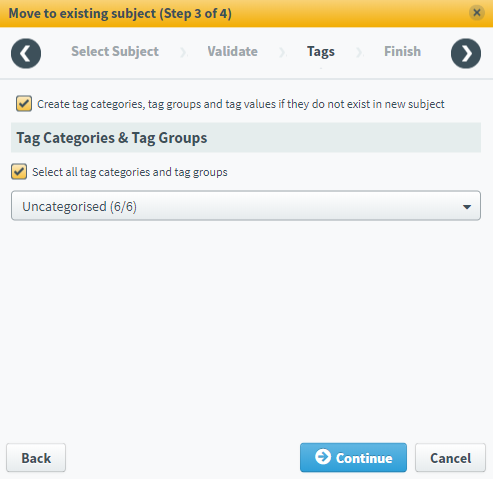
Select Continue to proceed to the final step of the wizard.
Complete the wizard
The Finish tab displays a summary of the items you are moving.

If any of the selected items are set to Live, you must select I understand the consequences of moving live items in order to confirm the move.
Select Move to move your items.
Select Cancel to exit the wizard process without moving any items or select Back to return to a previous step in the process.
Duplicating items
You can create copies of items in your subject. This can save time if you are creating multiple items that are very similar.
To create a copy of an item, choose the item in the item tree and select Duplicate .

The new copy appears under the original item in the item tree. The copy takes the original item’s name and prefaces it with Copy of.

The duplicate item contains all the original item’s settings, media, enemies, tags, and tools. However, all duplicate items’ workflow statuses are set to Draft. The user that copied the item becomes the duplicate item’s owner. For more information, read About item owners.
Use the Duplicate expander to see the Duplication Options menu and set your default duplication behaviour. Duplication options include:
- Duplicating enemy items (including acquired enemy items)
- Making the duplicated item an enemy of the original item
- Duplicating tag categories
- Duplicating tag groups and/or read-only tag groups
- Duplicating tag collections (if enabled in Site Settings)
- Duplicating language variants (if item language variants are enabled)
Duplicating an item with language variants
Duplicated items’ language variants inherit all their content, including item settings, media, enemies, tags, and tools from the selected source variants in the list.
To select specific language variants, clear the All checkbox and select one or more variants’ corresponding checkboxes.
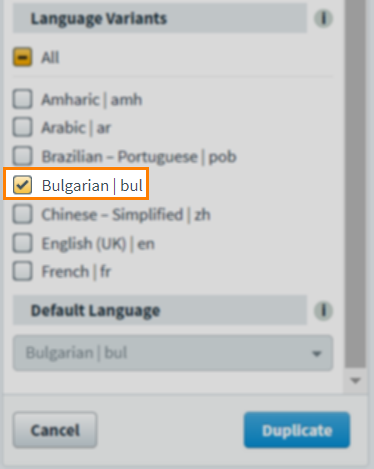
The default language of the item is changed if you do not select to duplicate the current parent item’s default language. You can change the new item’s default language if duplicating more than one variant of it.
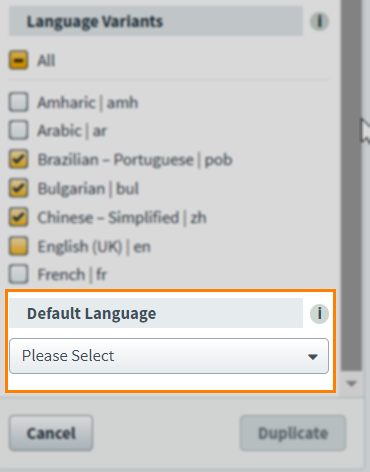
Select the new Default Language for the new item from the drop-down list of selected languages.
Deleting items
To delete an item, choose the item and select Delete . This sends the item to the Recycle Bin .

To view the items in the Recycle Bin , select the expander . In the Recycle Bin , you can right-click an item to view options to Restore Item(s) or Permanently Delete Item(s).
Refreshing the item tree

If multiple people are working in the same subject, or if you are working in multiple tabs in your browser, you can select Refresh item tree to update the item tree with the latest data.
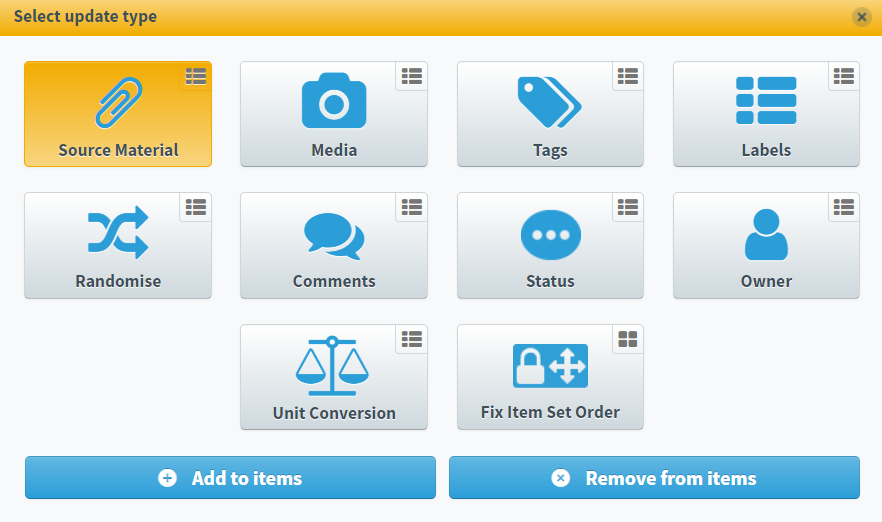
Bulk updating items
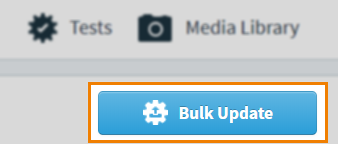
You can use bulk update to update multiple items simultaneously. Select Bulk Update to open the Select update type dialog. For more information about how to use these different update types, read Using bulk update.
Filtering items
To find a specific item, you can search and filter the item tree.
Searching for items
Type in the search bar to filter the item tree in real time. Surpass looks up your search string in items’ Name and ID fields.
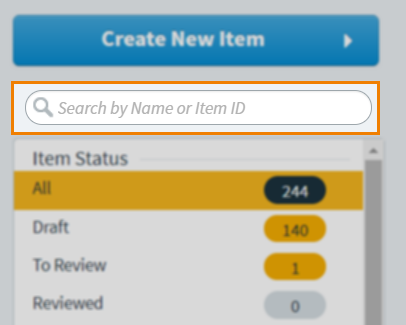
Filtering items
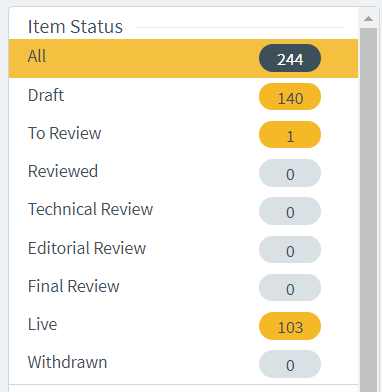
To filter the visible items on the item tree by workflow status, select a status under Item Status in the filter panel.
To filter items based on their tags, open the tag group and select Add next to the tag values you want to filter. Select Back to return to the filter panel.
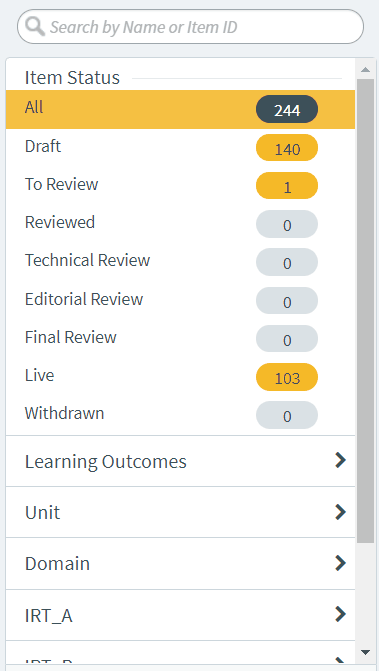
To filter items based on their numeric tags, open the tag group and use the slide bar to control the search range. Drag to change the minimum and maximum value of numeric tag values.
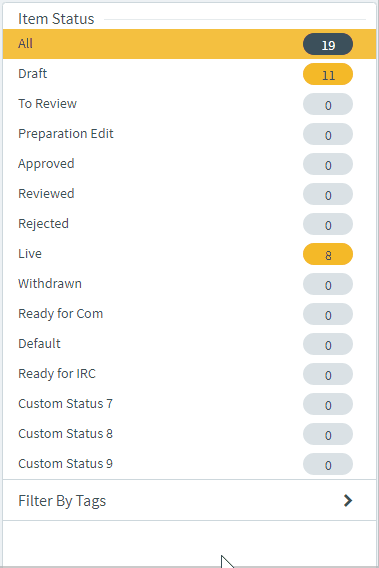
All currently active filters are visible on the filter panel.

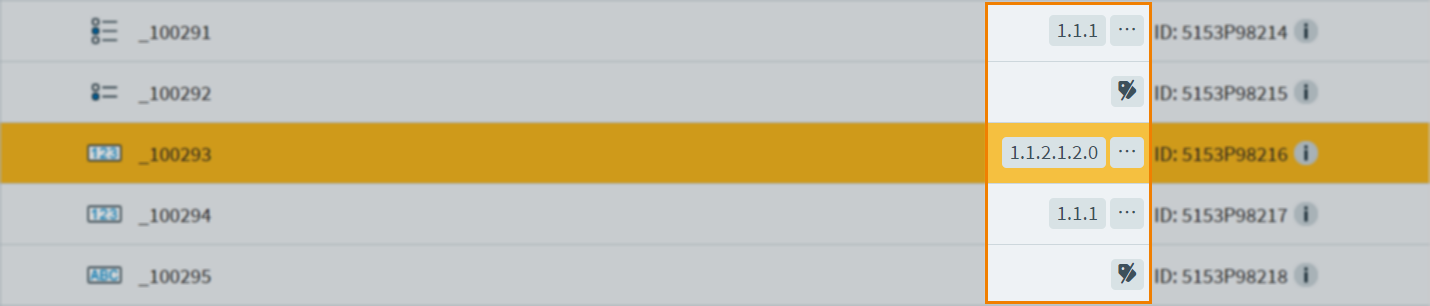
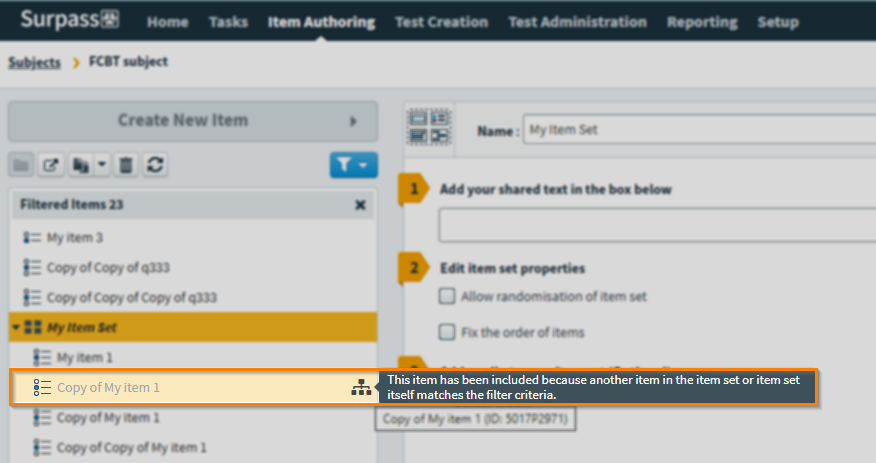
Any item set’s child items are visible when a filter is applied. Child items that do not fall into the filter criteria are identified with the following icon: . For more information on item sets, read About item sets.
To clear filters, select Clear All .
Creating new items
To create a new item, select Create New Item .
For more information on creating items, read Creating items and Setting up items.
Using the Test Wizard
To create a basic test using the Test Wizard, select Tests to open the Test Wizard menu and select Create New Test.
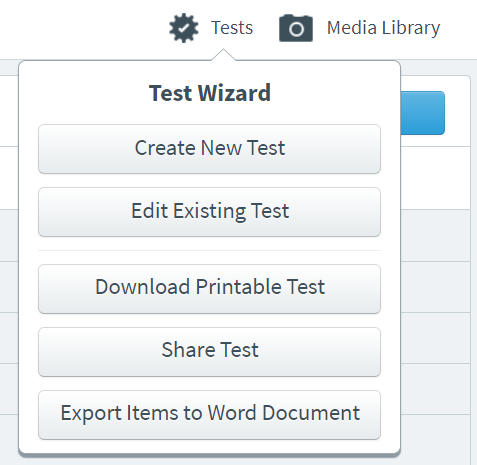
For more information, read Creating a test in the Test Wizard.
Accessing the media library
To view, add, edit, and remove the media associated with your subject, select Media Library to open your subject’s media library.
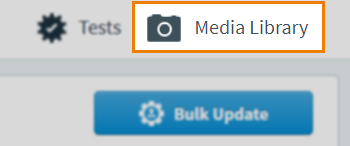
For more information, read Using media.
Further reading
To learn more about working with subjects in Surpass, read the following articles: