Creating a Spreadsheet custom question
The Spreadsheet custom question type lets you create, configure, and enter data into a spreadsheet.

In this article
1. Choose your item type
In your subject, select Create New Item to open the Question Types menu. Choose Custom Question to create a blank Custom Question item and go to the Edit screen.

2. Name your item
Enter the item’s name in the Name field.

3. Enter your question text
Enter your question text in the question stem. Select Add text Area to add an additional question stem. You can have a maximum of five question stems per item.

Open Additional Options to add source material or assistive media to your question stem.
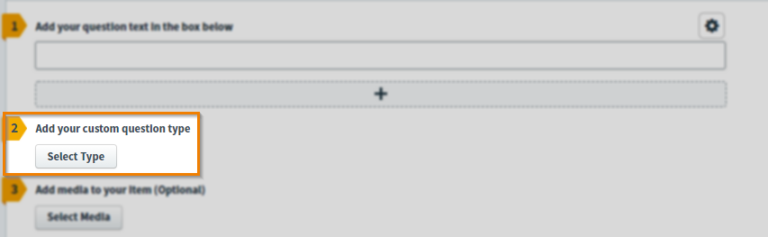
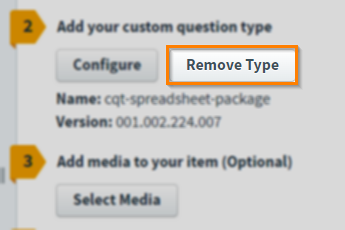
4. Add your custom question type
Select Select Type to open the Select Type dialog.
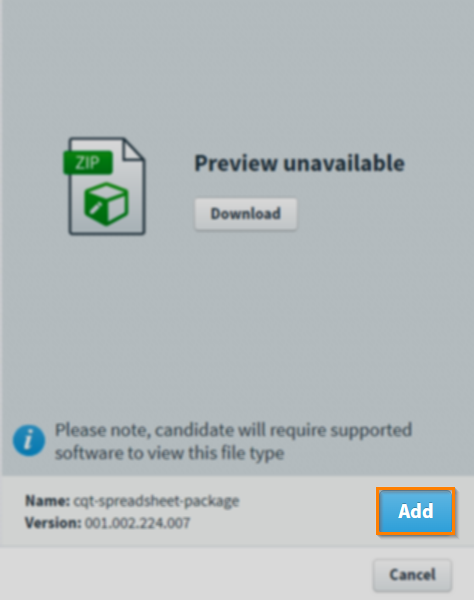
Select the ZIP file you want to add to your item.
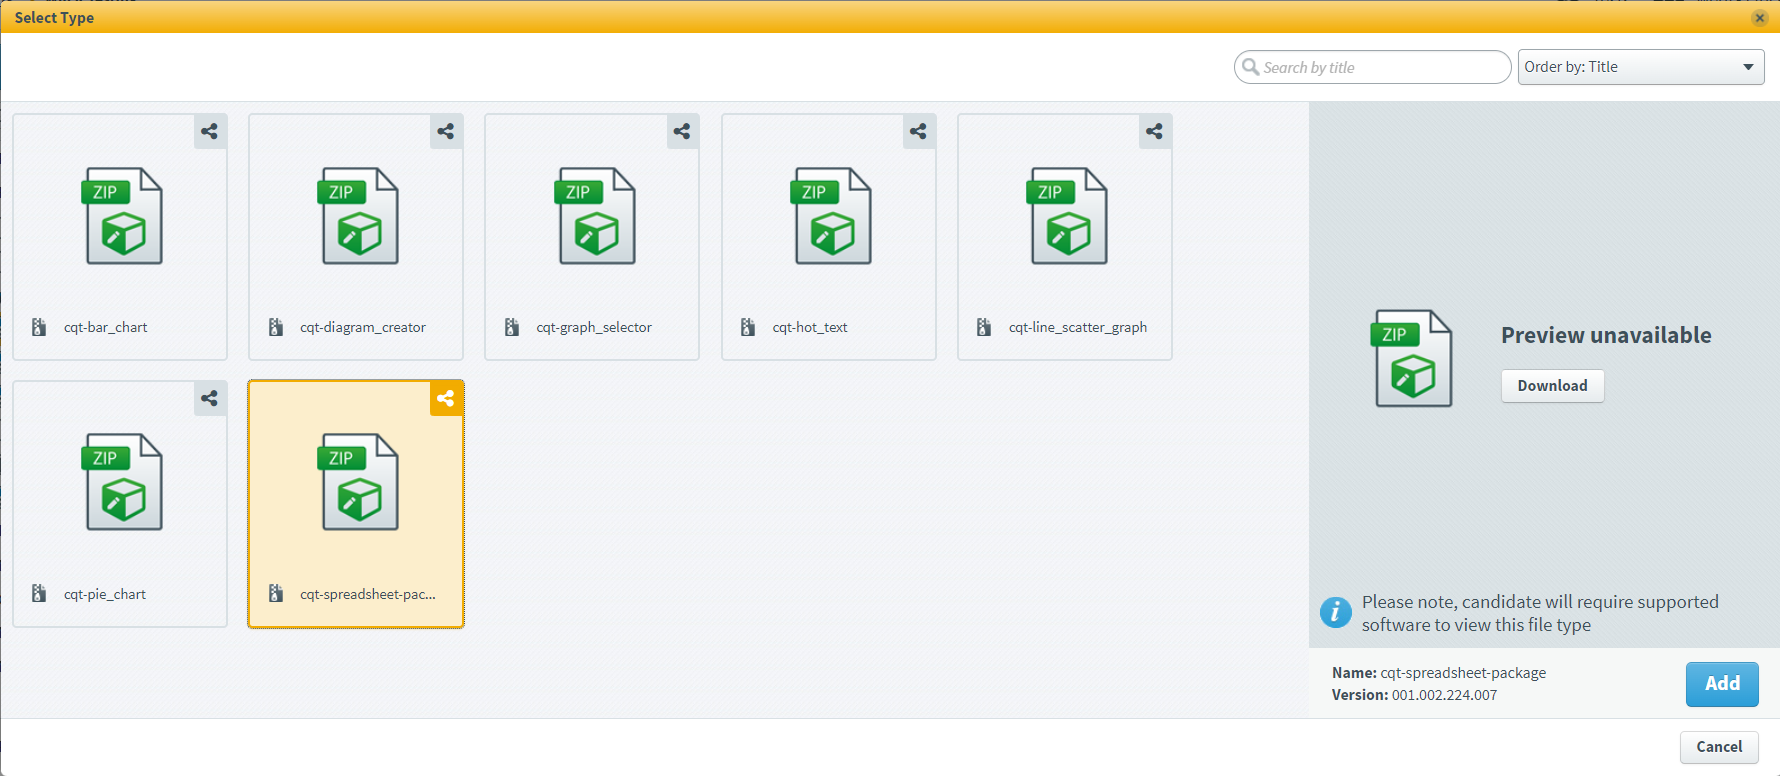
Select Add to add your Custom Question type to the item.
Uploading custom question ZIP files to the Media Library
Custom Question type ZIP files must be uploaded to the Media Library.
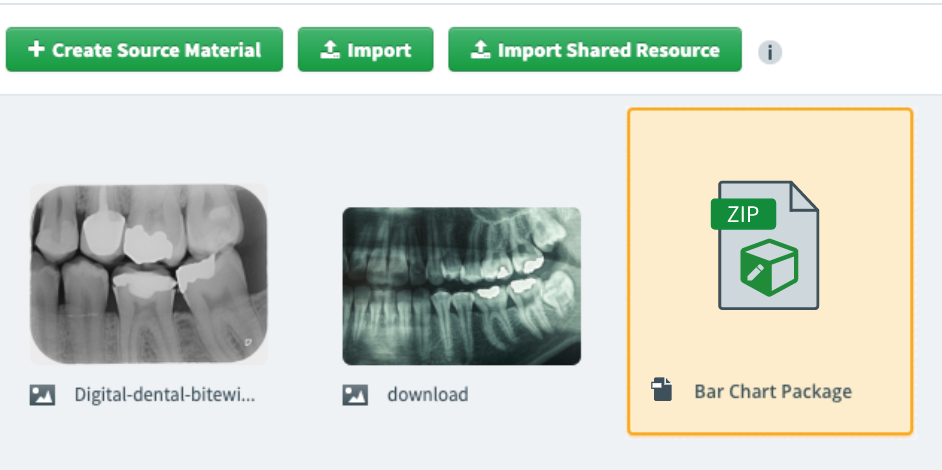
Go to Item Authoring and select your subject.
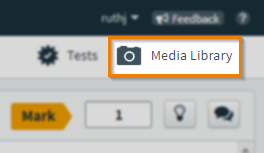
Select Media Library .
Select Import Shared Resource .

In your device’s file explorer, choose the file and select Open.
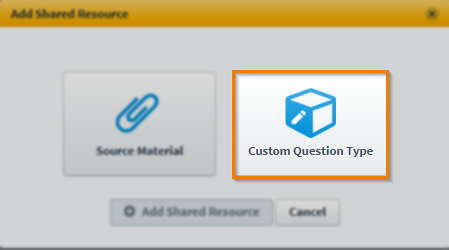
In the Add Shared Resource dialog, select Custom Question Type.
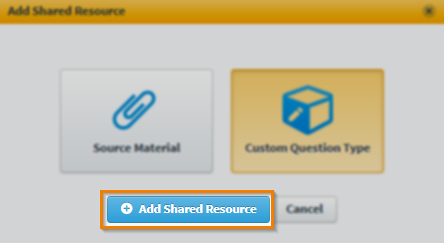
Select Add Shared Resource .
The ZIP file is now in your subject’s Media Library.
5. Configure your Spreadsheet custom question
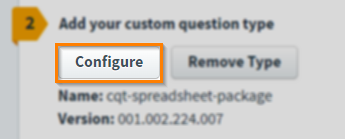
Select Configure to open the custom ZIP file. This allows you to change how the item displays in delivery.
The Spreadsheet custom question type lets you create, configure, and enter data into a spreadsheet.
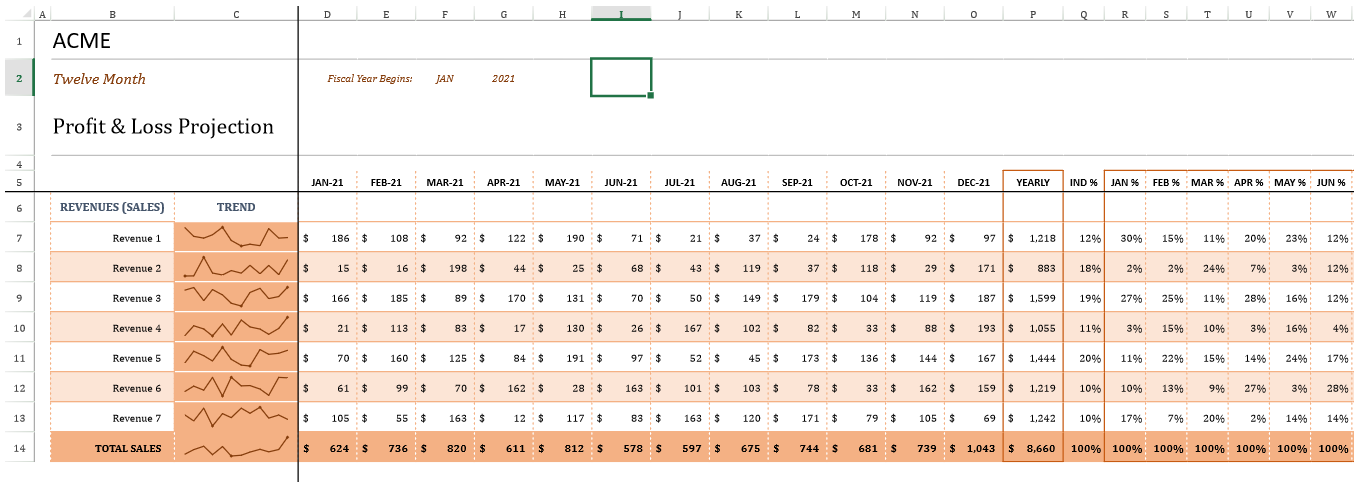
The spreadsheet displays 200 rows and 20 columns of blank cells on one worksheet.
To enter data into the spreadsheet, select a cell, then type directly into the cell or enter the data into the text entry bar. Select Accept or press Enter to commit the data to the cell, or select Reject or press Delete to delete all data entered into the text entry bar or cell.
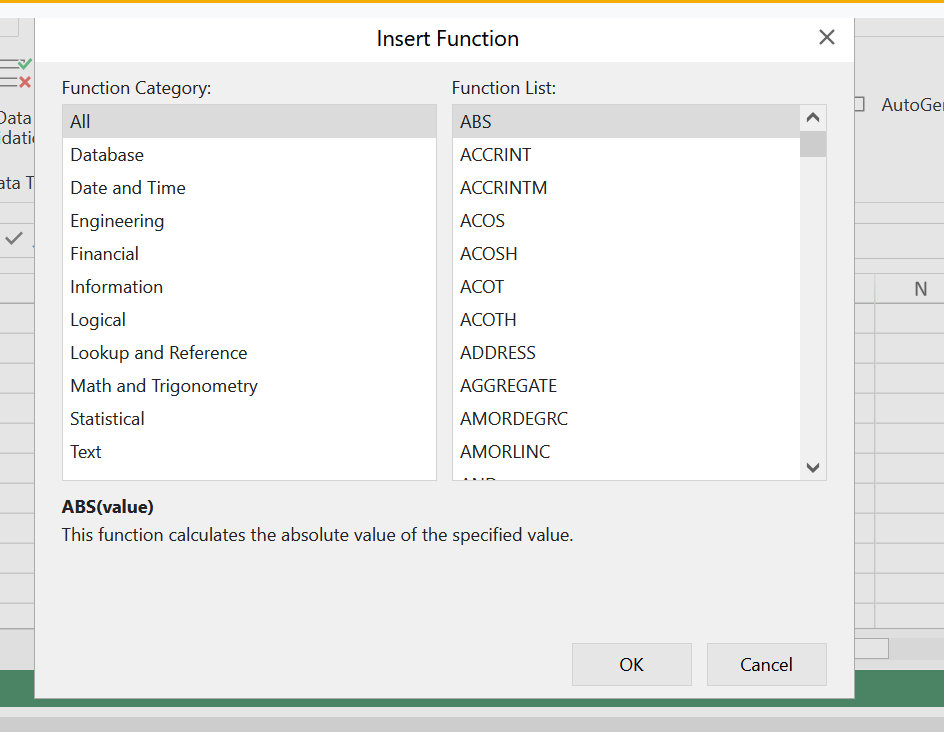
Select Insert Function fx to bring up the Insert Function menu, where you can choose a function from a list sorted by function category.
The nine menu ribbons in the spreadsheet dialog contain the following features:
- File and Home menus.
- Insert, Formulas, and Data tools.
- View and Settings options.
- About information.
- Design options for any inserted media.
File
Select File to access the Import function.
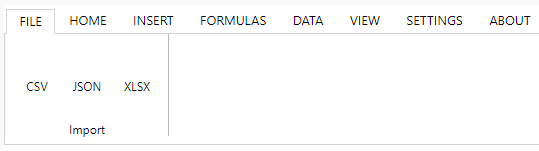
This allows you to import data from a pre-created spreadsheet. Select the file type of the spreadsheet to be uploaded (CSV, JSON, or XLSX), then select Import.
Home
Select Home to access formatting tools for cells and text.

The Home ribbon contains the following tool sections:
|
Section
|
Description |
|---|---|
| Undo | Enables Undo and Redo actions. |
| Clipboard | Accesses the Cut, Copy, and Paste actions, including further paste options. |
| Fonts | Changes the font, font size, font colour, and font effects. Adds cell borders and cell fill colour. |
| Alignment | Changes the text alignment within cells. Enables text wrapping and cell merging. |
| Numbers | Formats numeric text entry, including percentage adjustment, decimal adjustment, and data type. |
| Cell Type | Cell Type adds pre-set functions to cells, including Button, Checkbox, and Hyperlink. Cell Dropdowns embeds spreadsheet functions into a cell, including Colour Picker, Calculator, and Slider. |
| Styles | Adds formatting styles to cells and tables, cell rules, and cell states. |
| Cells | Enables the Delete and Format cell options. |
| Editing | Accesses the Sum function, the Fill Cells function, and the Clear Cells function. Accesses Sort and Filter options, and the Find function. |
Insert
Select Insert to access options for inserting media into your spreadsheet.
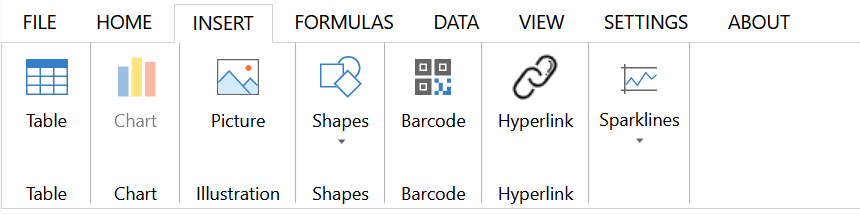
The Insert ribbon contains the following tools:
|
Section
|
Description |
|---|---|
| Table | Creates a table of selected cell data. |
| Chart | Creates a chart of selected cell data, chosen from several chart types including Line, Pie, and Graph. |
| Illustration | Inserts an image file uploaded from your computer into the spreadsheet. |
| Shapes | Adds basic shapes which can be configured by size, colour, and dimensions. |
| Barcode | Allows you to insert readable codes, including QR codes, into the spreadsheet. |
| Hyperlink |
Inserts a hyperlink as cell text. |
| Sparklines | Creates a graph of selected cell data at cell level, chosen from several types including Win/Loss, Cascade, and Variance. |
Formulas
Select Formulas to access options for inserting spreadsheet formulae.

The Formulas ribbon contains the Functions Library, which is sorted into the following categories:
|
Section
|
Description |
|---|---|
| Insert Function | Opens a list of all available functions sorted by function category. |
| AutoSum | Performs a simple sum calculation on numerical cell data, including Average, Count, and Min/Max. |
| Financial | Contains functions relating to financial data, including PRICE, RATE, and YIELD. |
| Logical | Contains functions to perform logical tests on cell data, including AND, IF, and OR. |
| Text | Contains functions to manipulate text-based data, including FIND, SEARCH, and UNICODE. |
| Date and Time |
Contains functions to manipulate data relating to date and time, including DATEVALUE, WEEKNUM, and YEAR. |
| Lookup and Reference | Contains functions to manipulate cell data organisation, including CHOOSE, INDEX, and VLOOKUP. |
| Math and Trig | Contains functions to perform mathematical and trigonometrical calculations on numerical cell data, including DECIMAL, ROUND, and SUBTOTAL. |
| More Functions | Contains the function categories for Statistical, Information, Engineering, and Database functions. |
The Name Manager tool allows you to add names to cell ranges, and opens the dialog box to manage all named cells and cell groups. The Show Formulas tool changes all cells containing data inputted via a formula to instead display the formula value.
Data
Select Data to access options for sorting and organising your spreadsheet content.

The Data ribbon contains the following tools:
|
Section
|
Description |
|---|---|
| Sort & Filter | Applies data sorting and filtering functions to cells, including alphabetising and rules-based filters. |
| Data Tools | Allows you to impose data rules on values entered into cells, and to verify that cell data follows those rules. |
| Outline | Allows row and column grouping and subtotaling, and contains display settings for row and column details and outlines. |
| Design Mode | Contains tools to design new templates and styles for your spreadsheet, including the Template Design function, the ability to load or save schema via a JSON file, and data label generation. |
View
Select View to access options for adjusting the display of your spreadsheet.
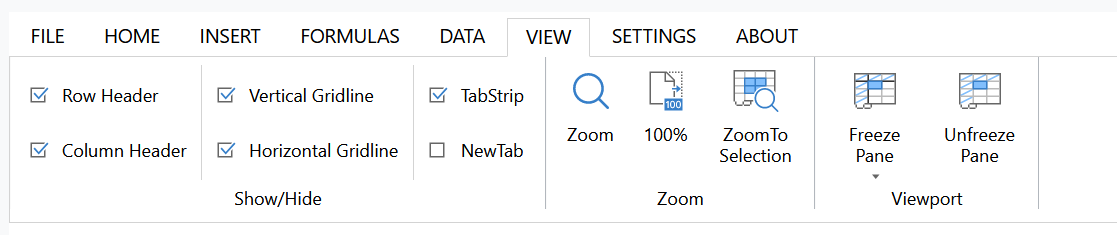
The View ribbon contains the following tools:
|
Section
|
Description |
|---|---|
| Show/Hide | Toggles the headers, gridlines, and tabs. |
| Zoom | Adjusts the zoom levels. |
| Viewport | Allows you to freeze sections of the spreadsheet so that they remain visible when scrolling. |
Settings
Select Settings to access options for changing general spreadsheet settings.
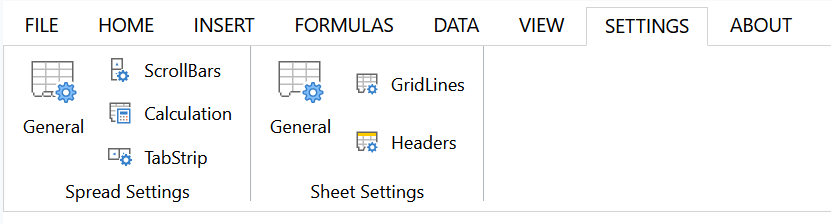
The Settings ribbon contains the following tools:
|
Section
|
Description |
|---|---|
| Spread Settings | Contains options to enable or disable various spreadsheet abilities including Drag and Drop, scroll bars, and the Clipboard. |
| Sheet Settings | Contains options to toggle the gridlines and headers, change the sheet tab colour, and add or remove rows and columns. |
About
Select About to view the version ID number of the spreadsheet package file.
Design
Select Design to adjust the appearance and properties of inserted tables, charts, or images. The contents of the Design tab depend on what type of media has been inserted. For multiple types of media, select an individual piece to display design options relevant to its type.
The Design ribbon for Tables contains the following tools:

|
Section
|
Description |
|---|---|
| Properties | Allows you to enter a name for the table and adjust the size. |
| Tools | Contains the Convert to Range function, the Auto Expand toggle, and the ability to insert a slicer. |
| Table Style Options | Contains various options to adjust the layout of the table, including row and column banding, filter buttons, and handle resizing. |
| Table Styles | Provides a dropdown of pre-designed table styles that can be applied. |
The Design ribbon for Charts contains the following tools:
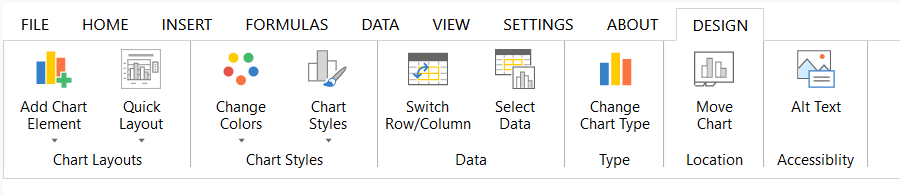
|
Section
|
Description |
|---|---|
| Chart Layouts | Add Chart Element contains additional elements that can be added to your chart, including axis options, gridlines, and labels. Quick Layout provides a selection of pre-designed chart layouts that can be applied. |
| Chart Styles | Allows you to add a colour scheme to your chart, and apply a pre-designed chart style. |
| Data |
Allows you to change the way the data is plotted on the chart axes. |
| Type |
Allows you to switch the selected data into a different chart type. |
| Location |
Creates new worksheets ands allows you to move the chart between them. |
| Accessibility |
Allows you to add descriptive text for screen readers. |
The Design ribbon for Shapes contains the following tools:

|
Section
|
Description |
|---|---|
| Insert Shapes | Allows you to insert a new shape, or to change the selected shape to a different one. |
| Shape Styles | Allows you to apply a pre-designed shape style or colour scheme. |
| Accessibility |
Allows you to add descriptive text for screen readers. |
| Rotate |
Allows you to rotate or flip the shape. |
| Group |
Allows you to group or ungroup elements. |
| Size |
Allows you to manually adjust the shape dimensions. |
The Design ribbons for Barcodes and Sparklines contain a Settings tool to edit aspects such as location, data values, and colours.
The Design ribbon for Images contains the Alternative Text accessibility tool to add descriptive text for screen readers.
6. Save your configuration
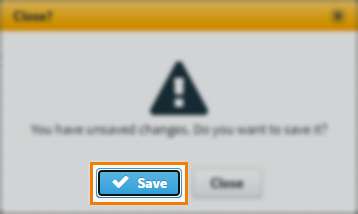
To save your configurations, select Close .
Select Save .
Removing custom question types
Once uploaded, Custom Question types can be removed from your item.
Select Remove Type to remove a Custom Question type.
7. Set the question’s marks
Set the item’s total marks in the Mark field.

8. Select a workflow status
Set the item’s workflow status in the Status drop-down menu. Only items set to Live can be used in a test.

9. Saving and closing your item
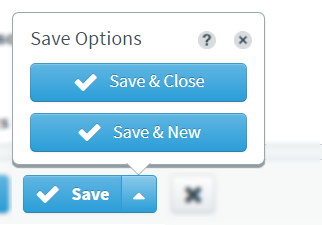
Select Save to save your item to your subject.

To see additional saving options, use the Save arrow to open the Save Options menu. Select Save & Close to save the item and return to the Subjects screen. Select Save & New to save the item and create another Custom Question item.
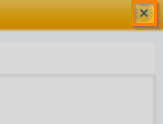
Select Close to leave the Edit screen. If you have unsaved changes, you are prompted to either save or discard them.

Further reading
For information on the other available Custom Question Types, read the following articles: