Importing candidates with a spreadsheet
Candidates (also known as “students” or “learners”) are people that take tests using Surpass. Unlike users, candidates do not log into Surpass. Candidates only access their tests in the test driver—either in a web browser or SecureClient.
You can use a spreadsheet to import up to 1,500 candidates in the Candidates screen.
This article explains how to use a spreadsheet to import candidates in the Candidates screen.
In this article
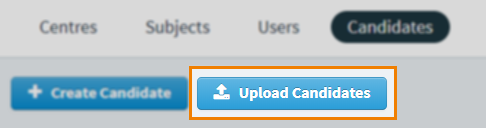
1. Go to the Candidates screen
To view the Candidates screen, go to Setup > Candidates.

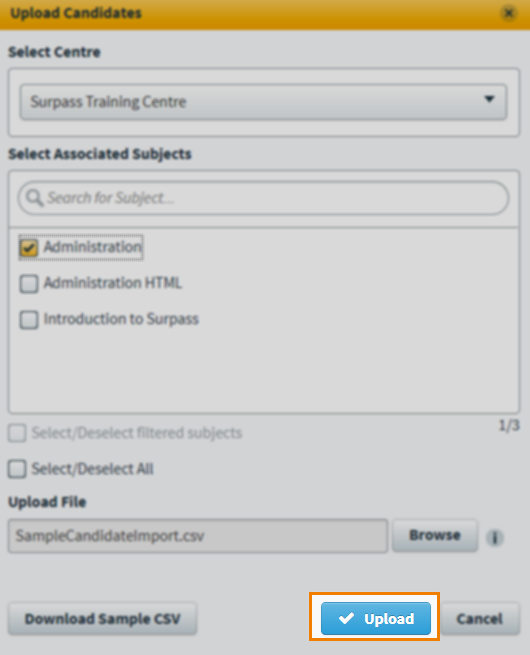
2. Select Upload Candidates
Select Upload Candidates to open the Upload Candidates dialog.
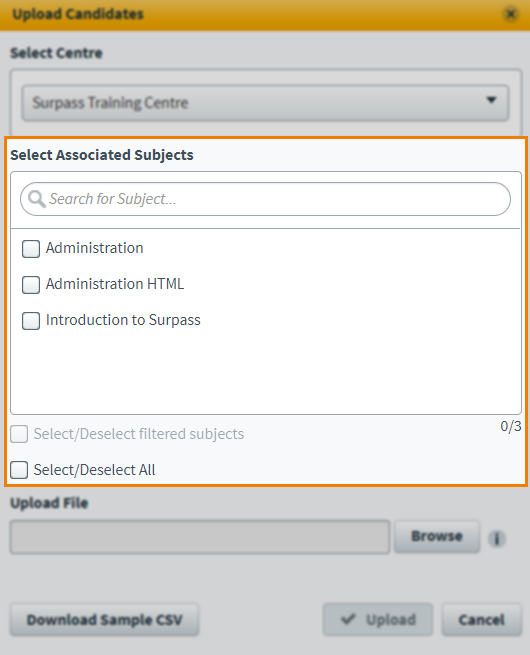
3. Set up centre and subject associations
Before you can upload your candidates, you must first define their parent centre and subject(s).
Use the Select Centre menu to choose a parent centre.
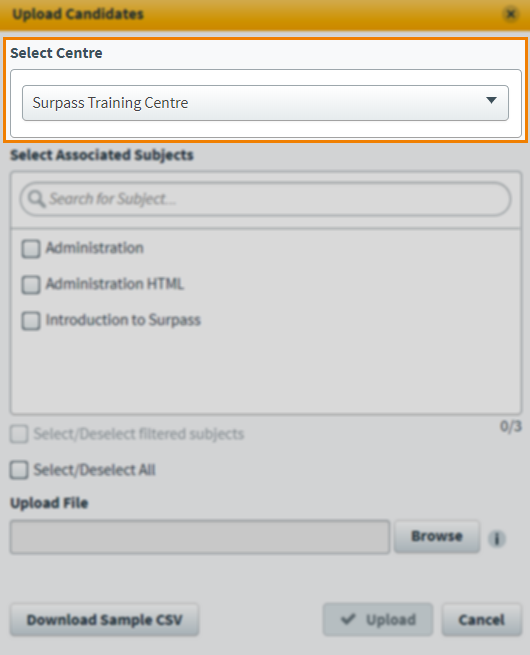
The chosen centre determines the available subjects. Select the subjects you want to associate the candidates with in Select Associated Subjects. Use Select/Deselect All to select or clear all subjects.
4. Create import spreadsheet
Select Download Sample CSV to download a template spreadsheet.
The following table lists all columns in the template spreadsheet. Use this information to populate your spreadsheet. Use one row for each candidate.
| Column | Description |
|---|---|
| SCN |
Enter the candidates’ unique reference codes.
NOTE: If this column is left blank, Surpass will automatically generate a reference code for each candidate.
|
| Forename* | Enter the candidates’ first names. |
| Middlename | Enter the candidates’ middle names, if available. |
| Surname* | Enter the candidates’ last names. |
| Gender |
Enter the candidates’ genders. Accepted values are M, F, U, Male, Female, and Unspecified. |
| Date of Birth* | Enter the candidates’ dates of birth in DD/MM/YYYY format. |
| Telephone | Enter the candidates’ telephone numbers, if available. |
| Enter the candidates’ email addresses, if available. | |
| Reasonable Adjustments |
Indicate whether the candidates should be granted extra time on their tests. Accepted values are Y and N. |
| % Increase of Reasonable Adjustments |
Provide a custom percentage of extra time given to the candidate. |
| Expiry date |
Enter the candidates’ expiry dates in DD/MM/YYYY format.
NOTE: If left blank, candidates' expiry dates are automatically set to ten years from the upload date.
|
Save the spreadsheet in CSV format when complete.
5. Upload spreadsheet to Surpass
Select Browse in the Upload Candidates dialog to open your device’s file explorer. Choose the spreadsheet to upload it to Surpass.
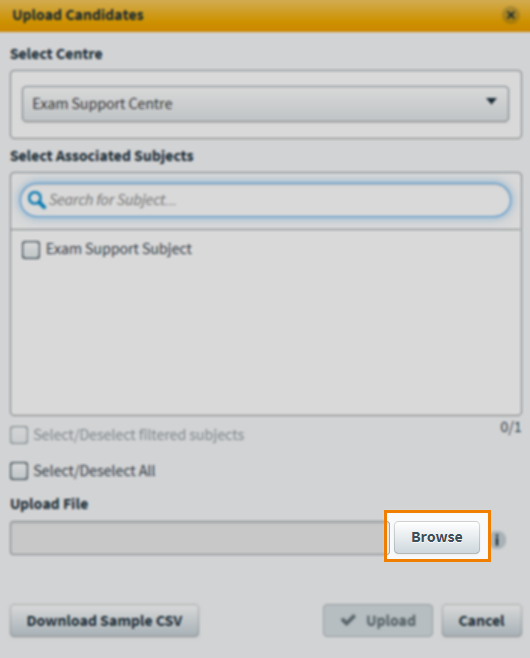
When the spreadsheet has uploaded, its filename appears under Upload File.

6. Import candidates
Select Upload to import the candidates to your chosen centre and subject(s).
Further reading
To learn more about working in the Candidates screen, read the following articles: