Creating a Drag and Drop question
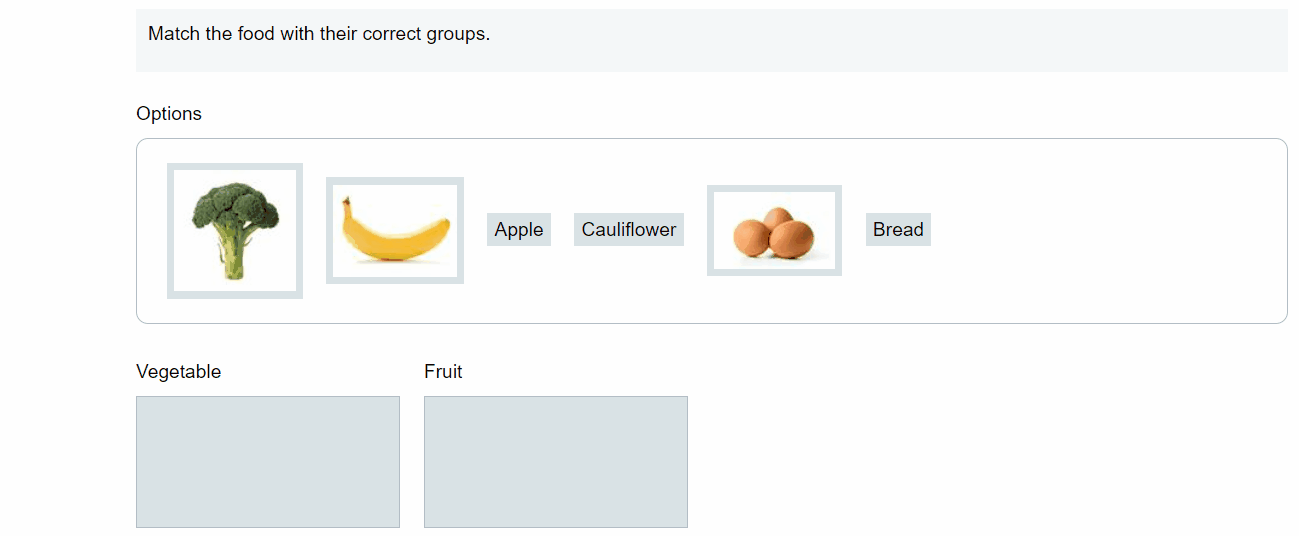
A Drag and Drop question consists of text and image-based “drag options” that candidates must place in the appropriate “drop zones”. The available drag options might include distractors that are not associated with any drop zone.
This article explains how to create Standard and Advanced Drag and Drop questions in Surpass, including details on how to include distractor drag options, set the maximum number of drag options per drop zone, and use absolute marking.
In This Article
1. Choose your item type
In your subject, select Create New Item to open the Question Types menu. Choose Drag and Drop to create a blank Drag and Drop item and go to the Edit screen.
2. Name your item
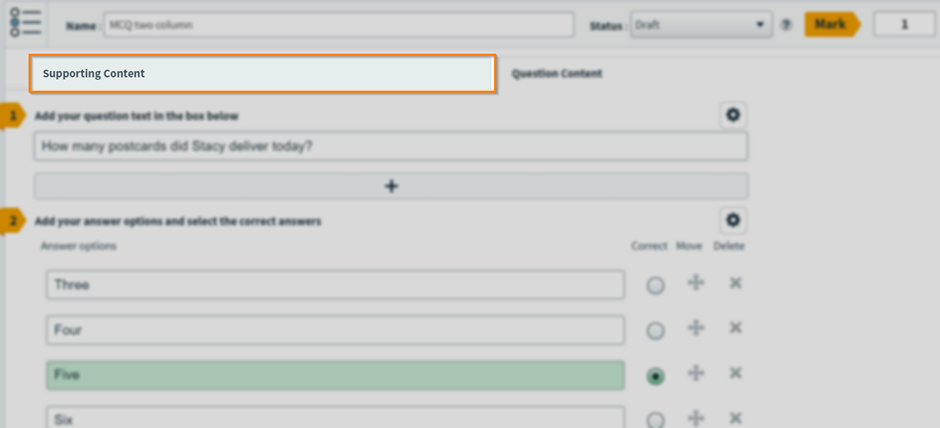
Enter the item’s name in the Name field.

3. Enter your question text
Enter your question text in the question stem. Select Add Text Area to add an additional question stem. You can have a maximum of five question stems per item.

Open Additional Options to add source material or assistive media to your question stem. In mixed subjects, you can also add a table to your question stem (in HTML subjects, tables can be added using the formatting toolbar).
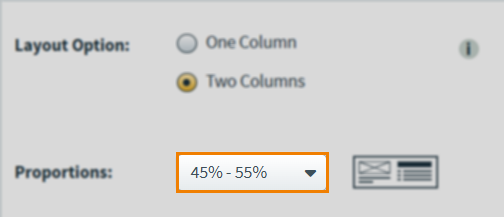
Two-column item layout
A two-column layout displays Supporting Content alongside the Question Content allowing the candidate to see all information provided without the need for scrolling.
Open the Item Settings panel.

Select Two Columns from the Layout Option.
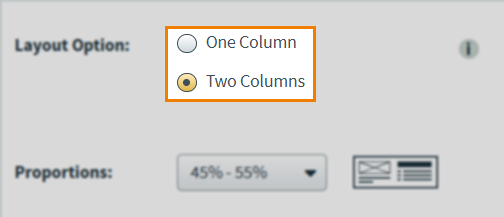
You can change the columns’ Proportions using the drop-down menu.
Select the Supporting Content tab to edit the second column. You can add up to 5 different supporting content stems, with a maximum of 1 piece of assistive media per stem.
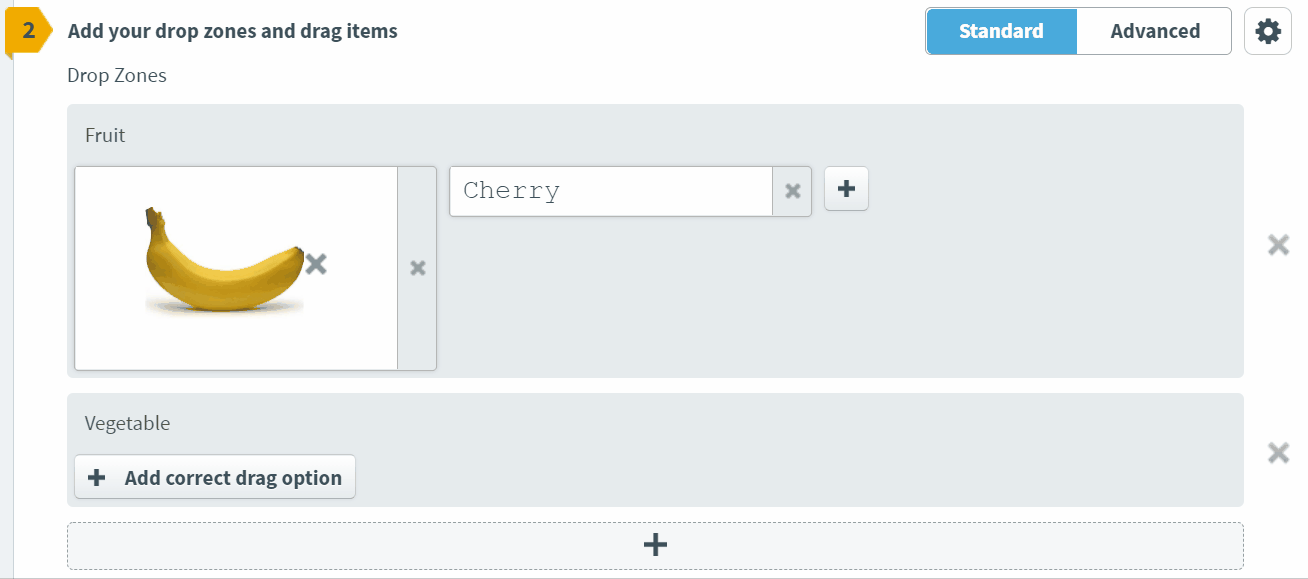
4. Add your drop zones
By default, Drag and Drop items have two drop zones. Select Add drop zone to add another drop zone. Select Remove drop zone to delete a drop zone. Drag and Drop items can have a maximum of six drop zones and a minimum of one drop zone.
Select Click here to add title to enable a drop zone’s text field. Enter the drop zone’s name.
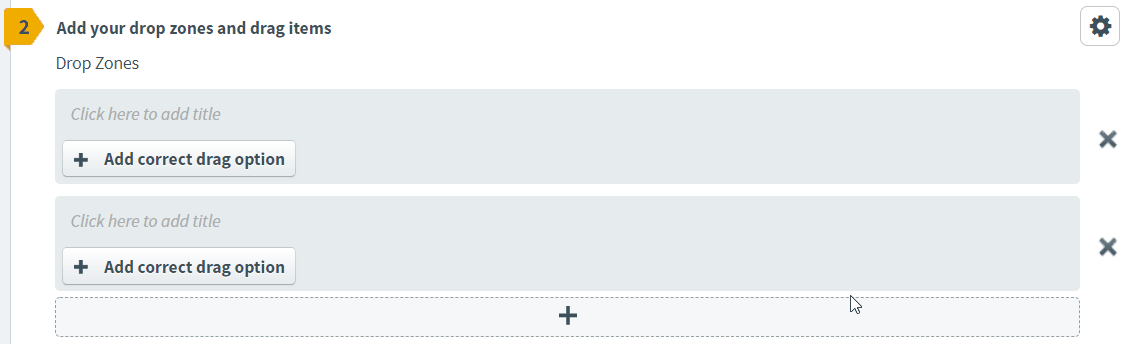
5. Add your drag options
Select Add correct drag option in a drop zone to add a correct drag option. Enter the drag option’s name in the entry field. To delete drag options, select Remove drag option .
In HTML subjects you can add media, special characters, superscript and subscript to your drag option. Refer to the following table for information on the different settings.
|
Icon |
Setting | Description |
|---|---|---|
 |
Superscript | Sets the character(s) above the line of type. |
 |
Subscript | Sets the character(s) below the line of type. |
| Special Characters | Opens the Select Special Character dialog. Select a special character to add it to the text. For more information, read About special characters. |
To add media to your drag option select the drop-down menu and then Image to import an image from the media library.

Setting the maximum number of drag options per drop zone
You can configure how many drag options candidates may place in a given drop zone.
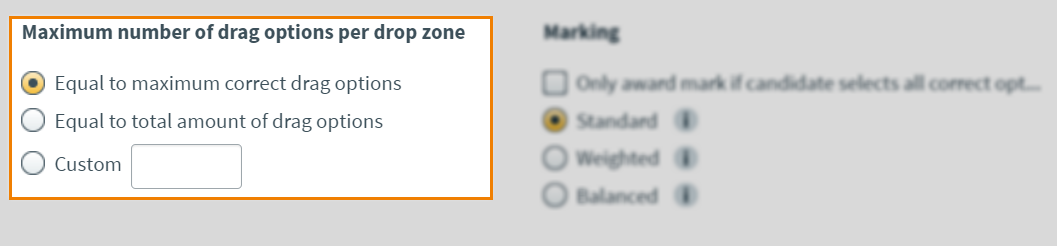
To see the Maximum number of drag options per drop zone settings, open Additional Options .
Choose from the following options:
- Equal to maximum correct drag options – Candidates are unable to exceed the number of correct options for a given drop zone. For example, a candidate will only be able to put three drag options into a drop zone with three correct options. If a candidate exceeds this number, the first drag option added to the drop zone is removed.
- Equal to total amount of drag options – Candidates are able to put as many drag options into a drop zone as there are correct drag options in the entire item. If there are no additional drag options, candidates are able to put all drag options into a single drop zone. For example, a candidate will be able to put six drag options into a drop zone with three correct options in a question with six correct drag options and no additional drag options.
- Custom – You can specify how many drag options candidates can put into drop zones.
Enabling absolute marking
You can set up your item to only award marks to candidates that give all the correct answers.
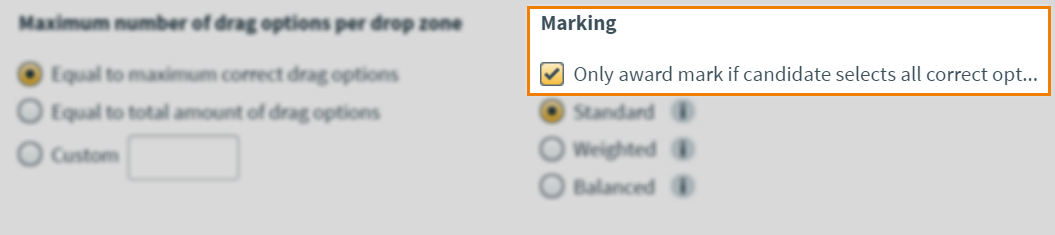
To see the Marking settings, open Additional Options . To enable absolute marking, select Only award mark if candidate selects all correct options.
Enabling weighted marking (HTML subjects only)
You can set up your item to award marks based on the accuracy of the candidate’s drag option choices.
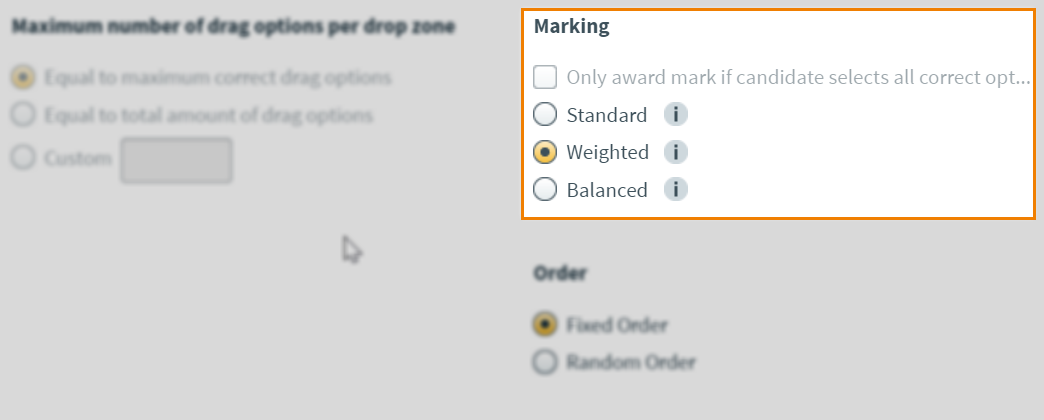
To see the Marking settings, open Additional Options . Select Weighted to enable weighted marking.
Select Add correct drag option to add a correct drag option. Enter the drag option’s name in the entry field. Set the mark for the drag option in each drop zone.

Re-ordering drag options
If weighted marking is enabled, you can manually re-order your drag options on an option-by-option basis.
Drag Move next to a drag option to change its order.

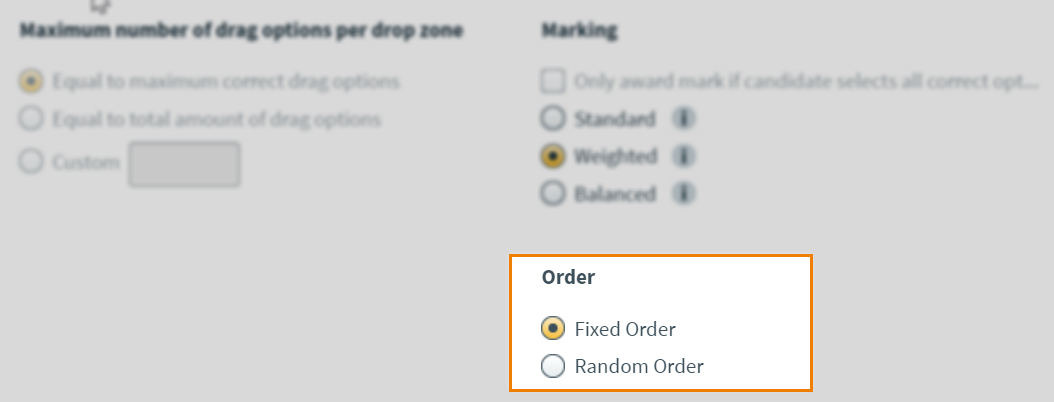
Order
If weighted marking is enabled, you can choose the order of drag options to be presented to the candidate in a fixed order. To do this, select Fixed Order.
Enabling balanced marking (HTML subjects only)
You can set up your item to award marks for correct answers without candidates losing marks for answering incorrectly.
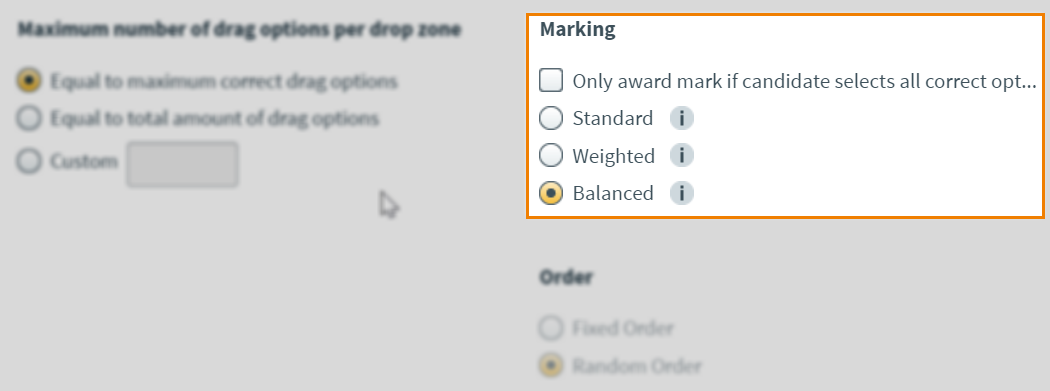
To see the Marking settings, open Additional Options . To enable balanced marking, select Balanced Marking. This setting can be applied to both Standard and Advanced Drag and Drop items.
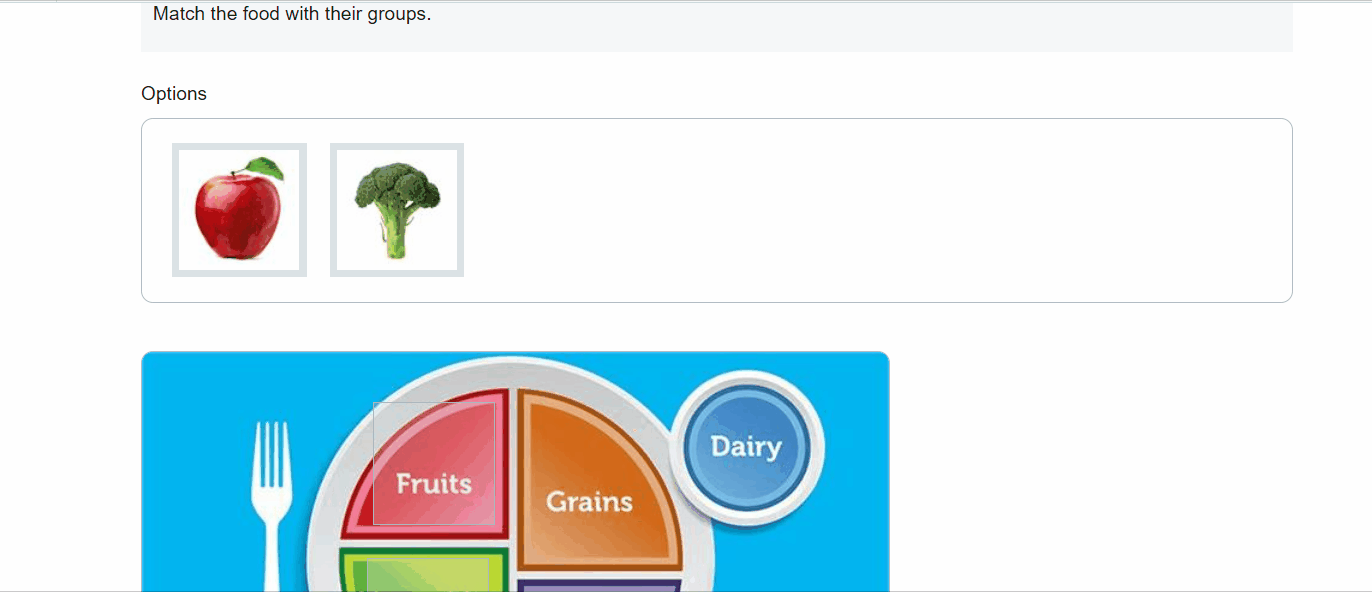
Advanced Drag and Drop (HTML subjects only)
Advanced Drag and Drop items allow multiple drop zones to be placed within a background image.
Select Advanced mode
Select Advanced on the Standard/Advanced toggle to enable Advanced mode.

Write your question and add background image
Enter your question text in the question stem. Select Add Text Area to add an additional question stem. You can have a maximum of five question stems per item.
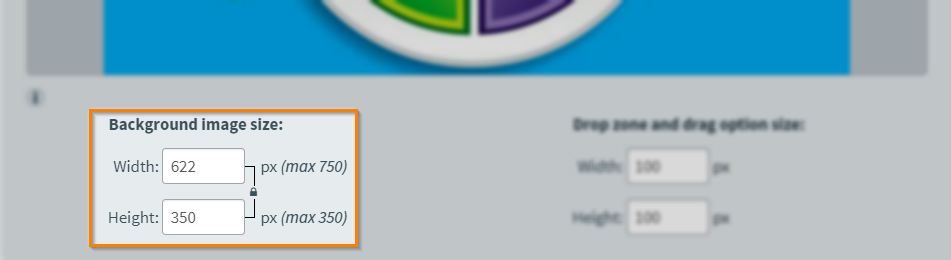
Select Add Background Image and insert chosen image from media library.

Enter the desired Background image size.
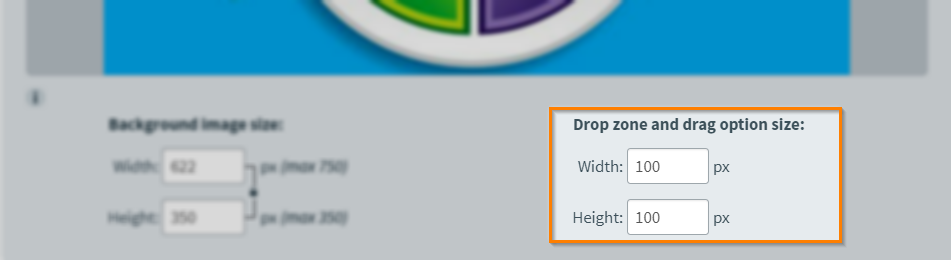
Enter the desired Drop zone and drag option size.
Add correct drag options
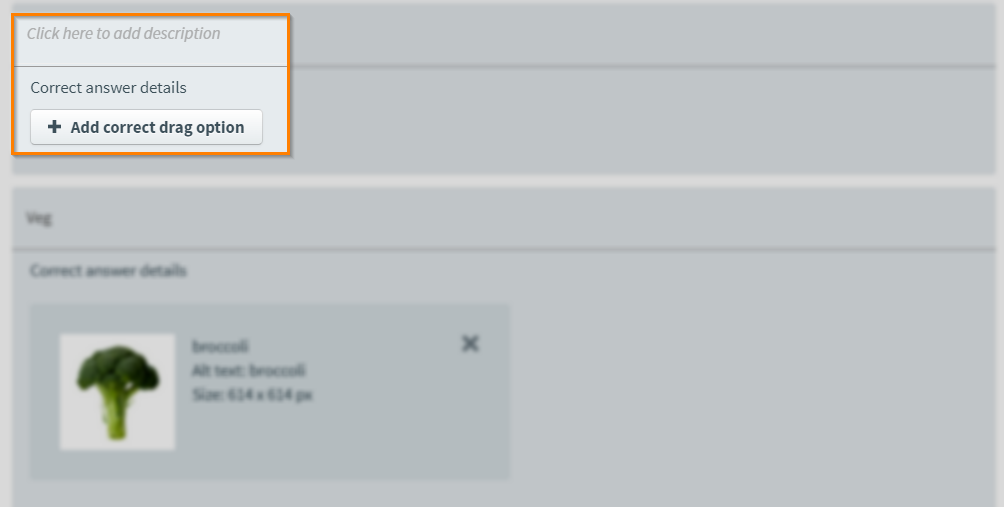
Type the name of the drop zone in the Click here to add description bar.
Select Add correct drag option to insert image to be used for drag option.
Select and drag the drop zone to move the position on the background image.
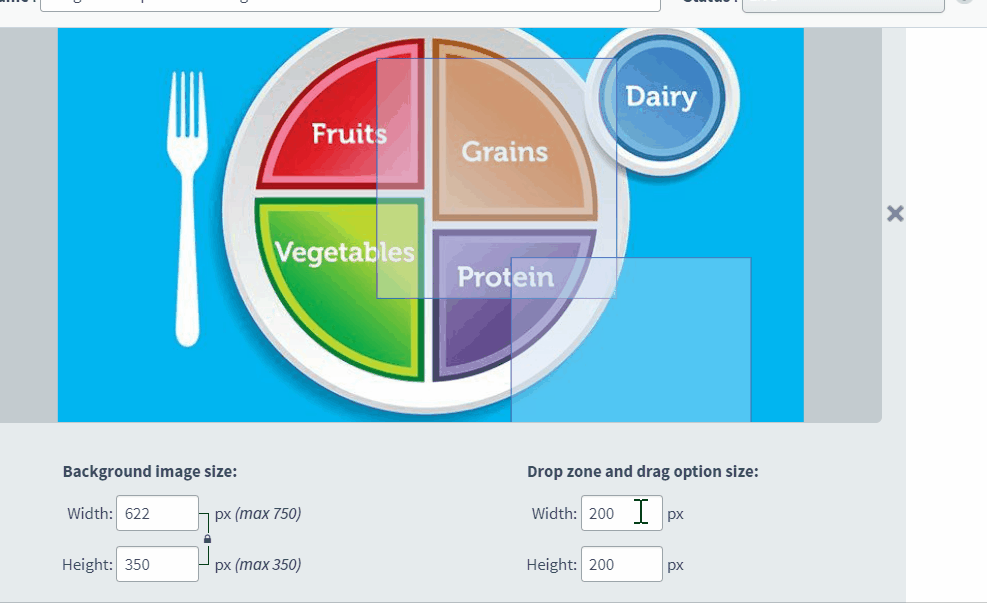
Select Add drop zone to insert further drop zones, with a maximum of four.
6. Set the question’s marks
Set the item’s total marks in the Mark field.

7. Select a workflow status
Set the item’s workflow status in the Status drop-down menu. Only items set to Live can be used in a test.

8. Preview your question
To see your item from a candidate’s perspective, select Preview .

In Mixed subjects, you can preview your item in the HTML test driver. Use the Preview arrow to open the Preview Options menu and select Preview in HTML . Any custom CSS is applied in the Preview screen. For more information on custom CSS, see Creating a Subject in Setup.

You can check your item’s marking behaviour in the Preview screen. Move drag options into drop zones to update the Mark field.
If you need to continue working on the item, select Edit to return to the Edit screen.

9. Saving and closing your item
Select Save to save your item to your subject.

To see additional saving options, use the Save arrow to open the Save Options menu. Select Save & Close to save the item and return to the Subjects screen. Select Save & New to save the item and create another Drag and Drop item.

Select Close to leave the Edit screen. If you have unsaved changes, you are prompted to either save or discard them.

Further reading
You can do much more with Drag and Drop items in Surpass. For more information, read the following articles: