Adding audio to an item
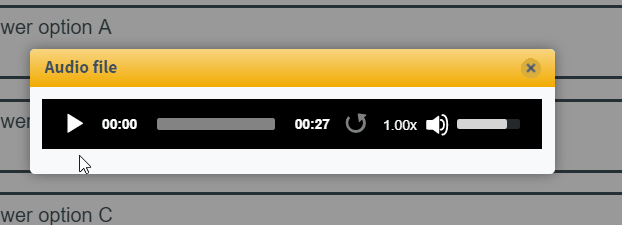
You can add audio to items in Item Authoring. Audio can be used to support question content or to aid candidates with accessibility requirements. Audio can be embedded on the page or opened using external apps.
This article explains how to add audio an item, including how to import audio into the media library and configure audio player options.
In this article
1. Go to your item’s Edit screen
Select an item in your subject to open it and go to the Edit screen.

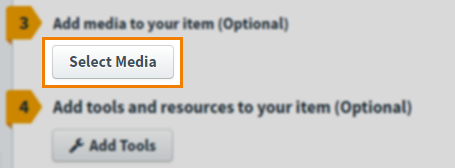
2. Open the Select Media dialog
Select Select Media on the Edit screen to open the Select Media dialog. The Select Media dialog is populated with media from your subject’s media library. For more information about the media library, read About the Surpass media library.
3. Choose your audio
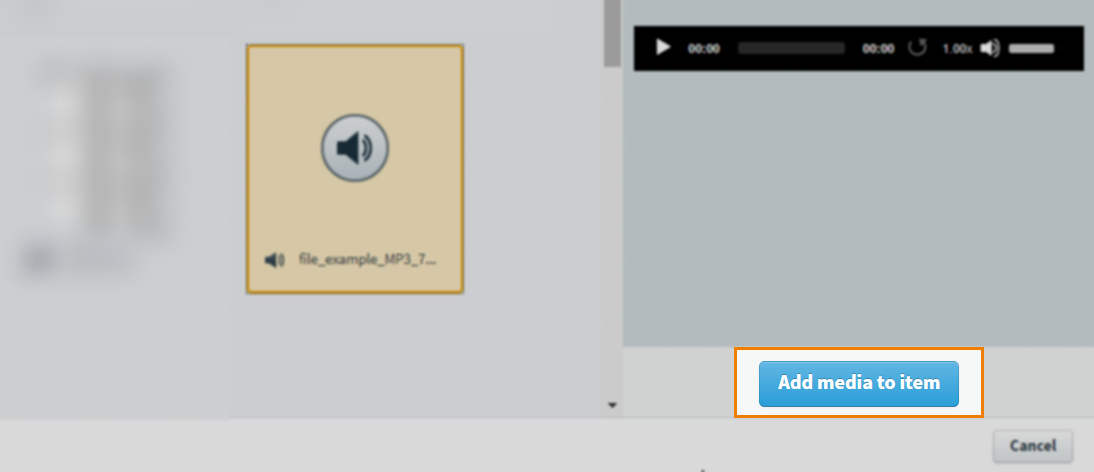
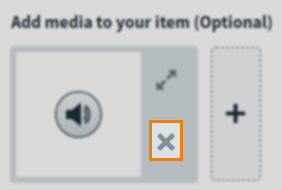
Choose an audio file in the Select Media dialog and select Add media to item to add it to your item.
If you want to add another audio file to your item, select Add Media Item on the Edit screen.
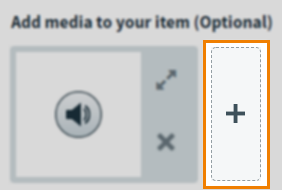
To delete an audio file from your item, select Remove media from this item on the Edit screen.
Finding media

By default, files in the Select Media dialog are ordered alphabetically by name. To find a specific media file, you can search or re-order files.
Type into the search bar to filter the Select Media dialog in real time. Surpass looks up your search string in media files’ names.
Use the Order by menu to re-order the contents of the Select Media dialog by the most recently updated first (Last Updated), file names in alphabetical order (Title), or file types in alphabetical order (Type).
4. Configure audio player
If you add an MP3 or MP4 file to your item, you can configure how the media player behaves in the test driver.
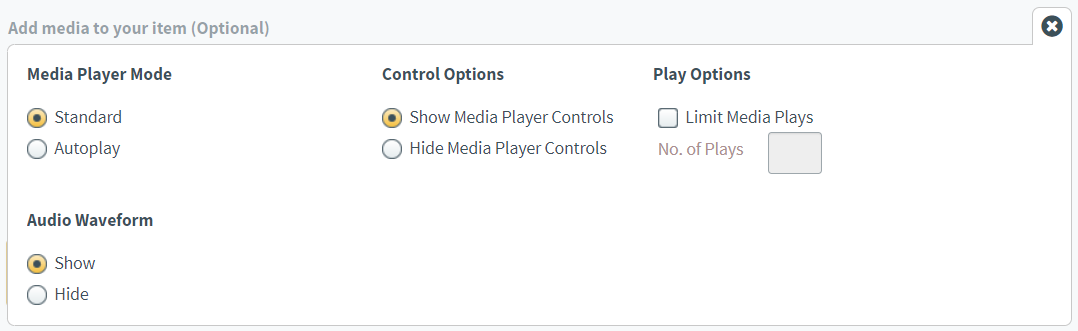
Select Additional Options to open the options menu.

Expand the following section for an explanation of the audio player’s available options.
| Setting | Description |
|---|---|
| Media Player Mode |
Determines the playback behaviour of the media player. Standard mode allows candidates to manually start audio playback. Autoplay mode forces audio playback when the candidate opens the item.
NOTE: Autoplay is only supported in HTML tests.
|
| Control Options |
Determines whether candidates have access to full or limited media player controls. Show Media Player Controls gives candidates access to all media player controls (Play, Pause, Skip to End, Skip to Start, Progress Bar, Playback Speed, Volume, and Mute). Hide Media Player Controls only gives candidates access to the Volume and Mute controls. If Standard mode is selected along with Hide Media Player Controls, candidates can use the Play button to start the audio but they cannot pause, skip, scrub, or control the playback speed. |
| Play Options |
Determines how many times candidates can play the media. Select Limit Media Plays to enable the setting and define the play limit in No. of Plays. If a candidate exceeds the No. of Plays value they cannot replay the media. To allow unlimited media replays, clear Limit Media Plays. |
| Audio Waveform |
Determines whether candidates can view the audio waveform. Select Show to display the audio waveform in the test driver. Select Hide to prevent audio waveform from being displayed.
IMPORTANT: You can only configure Audio Waveform options in HTML subjects.
NOTE: In the test driver, candidates cannot use the progress bar or view the total time elapsed when the audio waveform is hidden.
|
5. Choose a media layout
You can determine the media’s layout by selecting a Choose layout option.
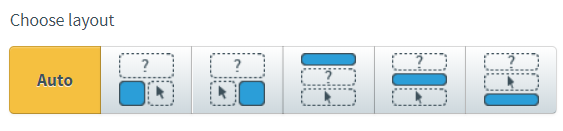
| Icon | Setting | Description |
|---|---|---|
 |
Auto | Media is automatically laid out based on its dimensions. |
 |
Left of the Answer | Media is displayed to the left of the answer block. |
 |
Right of the Answer | Media is displayed to the right of the answer block. |
 |
Above the Question Text | Media is displayed above the question stem. |
 |
Above the Answer | Media is displayed between the question stem and the answer block. |
 |
Below the Answer | Media is displayed below the answer block. |
6. Preview your item
To see your item from a candidate’s perspective, select Preview .

In Mixed subjects, you can preview your item in the HTML test driver. Use the Preview arrow to open the Preview Options menu and select Preview in HTML . Any custom CSS is applied in the Preview screen. For more information on custom CSS, read ‘About Subject settings’ in About Site Settings options.
7. Saving and closing your item
Select Save to save your item to your subject.

To see additional saving options, use the Save arrow to open the Save Options menu. Select Save & Close to save the item and return to the Subjects screen. Select Save & New to save the item and create another item.
Select Close to leave the Edit screen. If you have unsaved changes, you are prompted to either save or discard them.
Further reading
To learn more about media in Surpass, read the following articles: