Creating a subject in Item Authoring
In Surpass, a subject is where you create and manage items for use in tests. Subjects can hold folders and sub-folders of items, allowing for flexible organisation of your test content. You can also upload media to your subject’s media library for use in its items. All subjects are associated with at least one centre. Any tests created in the subject can be scheduled at the associated centre(s).
This article explains how to create a subject in Item Authoring.
In this article
1. Go to the Subjects screen in Item Authoring
The Subjects screen lists all subjects in your instance you have access to. To view the Subjects screen, go to Item Authoring > Subjects.

2. Select Create Subject
Select Create Subject to open the Create Subject dialog in the Setup screen.

3. Fill out the Create Subject dialog
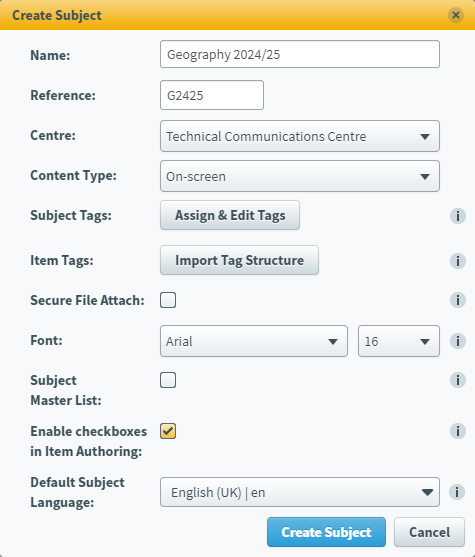
Fill out the Create Subject form. Details of fields are available in the following table.
| Setting | Description |
|---|---|
| Name | The subject’s name. |
| Reference | The subject’s alphanumeric reference code. This must be unique. |
| Centre | Choose the centre that the subject is to be associated with. |
| Subject Tags |
Allows users to assign subject tags to this subject. This is useful for filtering a large number of subjects when scheduling tests. For more information, read Setting up subject tags. |
| Content Type |
Displays the content type of this subject.
NOTE: The content type of a subject is determined when the subject is created and cannot be edited in the Edit Subject Details dialog. For more information, read Creating a subject in Setup.
|
| Item Tags | Choose whether to import another subject’s tag structure. For more information, read Importing a tag structure. |
| Secure File Attach |
Determines whether Secure File Attach is applied to all File Attach items in this subject. For more information, read Creating a File Attach question. |
| Font |
Determines the default font and font size for question text and answer options in this subject. |
| Subject Master List |
Determines whether a subject master list is created for this subject. For more information about subject master lists, read Sharing items with a subject master list from the Item Search screen. |
| Enable checkboxes in Item Authoring |
Determines whether the test driver displays checkboxes for Multiple Choice, Multiple Response, and Either/Or items, Multiple Choice survey, and Multiple Response survey items. |
| Default Subject Language |
Choose the default language for the subject from the list. The available languages are those enabled in Site Settings. The selected language becomes the default language for item types created for this subject. For more information about site settings, read ‘About Language Variants settings‘ in About Site Settings options.
IMPORTANT: Item language variants are not available by default. Language variants let you author variations of an item in different languages. Language variants can only be created for Multiple Choice, Multiple Response, Either/Or, and Essay item types, and only exist across the Item Authoring and Tasks screens. For more information, read Creating and managing language variants.
|
| Item Prefix |
Enter a prefix to be automatically added to the name of all new items in this subject.
NOTE: This setting is only visible and configurable if the Item Prefixes and Sequential Numbering site setting is enabled. For more information, read 'About Item Authoring settings' in About Site Settings options.
|
| Read-Only Item Names |
Determines whether item authors can edit item names in this subject. This setting can only be enabled if an item prefix has been provided.
NOTE: This setting is only visible and configurable if the Item Prefixes and Sequential Numbering site setting is enabled. For more information, read 'About Item Authoring settings' in About Site Settings options.
|
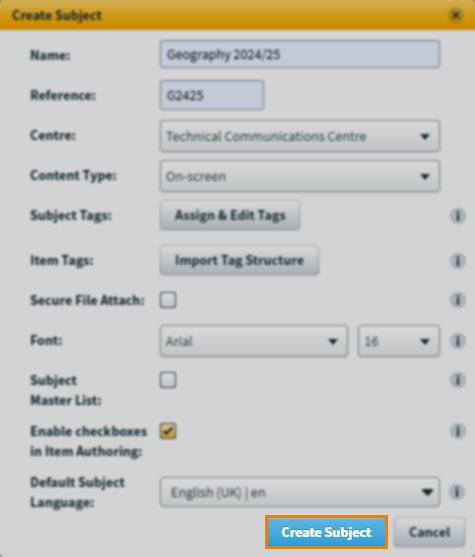
4. Save your subject
Select Create Subject to save your new subject. Select the subject on the Subjects screen to enter it.
Further reading
Now you know how to create a subject, read the following articles to learn more: