About Site Settings options
The Site Settings area of Surpass allows you to configure site-wide settings for your instance. This includes top-level Item Authoring and Test Creation settings, as well as how Surpass integrates with other apps and systems.
This article explains how to configure the options in Site Settings, including how to enable beta functionality, Single Sign On, and the CRM Adapter, as well as creating custom workflow statuses.
In this article
Navigating to Site Settings
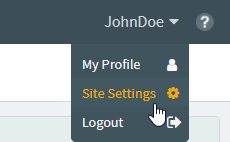
To view Site Settings, select your user name to open the User menu.

Select Site Settings in the User menu.
Select the Site Settings tab to view the Site Settings options.

About General settings
The General settings in Site Settings determine the visibility of help content, home page links, and beta functionality for all other users of your Surpass instance. These settings do not apply to users with the Site Administrator role.
For each option, select either Show or Hide as appropriate.
| Setting | Description |
|---|---|
| Deliver Tests |
Controls the visibility of the Deliver Test button on the Surpass home page. |
| Help | Controls the visibility of the Help button on the top navigation bar. |
| Surpass Learning | Controls the visibility of the Surpass Learning button on the Surpass home page. |
| Beta Functionality |
Controls the visibility of beta functionality across Surpass. |
About Authentication settings
The Authentication settings in Site Settings include configurations for Two-Factor Authentication (2FA) and Single Sign-On (SSO).
Enabling 2FA enhances the security of your Surpass instance as all users must enter a six-digit authentication code upon logging in. You can allow devices to be trusted so that users do not need to authenticate every time they log in, for a period of time.
To set up 2FA, select Enabled.
| Setting | Description |
|---|---|
| Two-factor Authentication upon user sign-in |
Enables the requirement for 2FA. Once enabled, users must configure 2FA the next time they log in. Instructions are sent to the user’s registered email address. Any recognised authenticator application can be used. After setup, users must confirm their consent to sharing their device’s essential data with Surpass Assessment. |
| Trust user device |
Allows users to set a device to be ‘trusted’. The login data for trusted devices is remembered for future logins so that 2FA does not need to be completed upon each log in. A time period must also be specified. |
| Set Trusted Device Time Period (days) |
Enter the number of days a device is trusted, between 30-999 days. After this period, users logging in with the device must authenticate again. |
Surpass offers an SAML-based SSO solution that allows you to control the authorisation and authentication of hosted user accounts that can access web-based applications. By using SSO, you can allow users to log into Surpass along with any other linked web apps with one set of credentials.
To set up SSO, select Enable.
| Setting | Description |
|---|---|
| Provider Type |
Determines the SSO provider. The default value is SAML. If you are using SURFconext to set up SSO, select SURFconext. |
| Token Signing Certificate | Select Upload to upload the token-signing certificate from your ADFS console. |
| Name/Entity ID |
Enter the Name/Entity ID of your Identity Provider. This can be found in the ADFS console by selecting Edit Federation Service Properties with the service folder highlighted. The Name/Entity ID is under Federation Service Identifier.
NOTE: Name/Entity ID is case sensitive and needs to read exactly as it does in the ADFS console. You can also find this in your Identity Providers metadata page.
|
| Single Sign On Service URL |
Enter the Single Sign On Service URL found in the ADFS console’s Endpoints folder. A typical example of this is http://[yourADFSserver]/adfs/ls.
NOTE: Single Sign On Service URL is case sensitive and needs to read exactly as it does in the ADFS console. You can also find this in your Identity Providers metadata page.
|
| Single Logout Service URL |
Enter the Single Logout Service URL found in the ADFS console’s Endpoints folder. A typical example of this is http://[yourADFSserver]/adfs/ls.
NOTE: Single Logout Service URL is case sensitive and needs to read exactly as it does in the ADFS console. This can be the same value as the Single Sign On Service URL. You can also find this in your Identity Providers metadata page.
|
About CRM Adapter settings
The CRM Adapter allows you to control the candidate selection process with other systems and use the REST API to push updates to Surpass/
To set up the CRM Adapter, select Enable.
| Setting | Description |
|---|---|
| CRM Adapter URL | Enter the URL of the API to be called. |
| User Name | Enter the username to access the API. |
| Password | Enter the password to access the API. |
About Test settings
The options available in Test Settings control high-level test behaviours such as whether tests can be scheduled over multiple days and if users require a Purchase Order Number to schedule tests.
| Setting | Description |
|---|---|
| Test Scheduling Over Multiple Days |
Determines whether tests can be scheduled over multiple days. By default, this is set to Enable. Select Disable to only allow single-day test sessions. |
| Purchase Order for Scheduling |
Determines whether users need to input a Purchase Order Number in the PO field in order to schedule a test. By default, this is set to No. Select Yes to require Purchase Order Numbers when scheduling. |
| ULN Visibility |
Determines whether users and candidates can see candidates’ Unique Learner Numbers (ULNs). By default, this is set to Hide. Select Show to display candidate ULNs in Setup > Candidates > Candidate Details and the screens in Test Administration . |
| Maximum Advance Schedule (Days) |
Determines how far in advance of the test day(s) a test session can be scheduled. Enter a numerical value in the field. The default value is 42. The maximum value is 365.
NOTE: Already scheduled tests are not affected by any changes in this setting.
|
| Learning Outcome Total Mark Threshold |
Determines the minimum number of marks that must be allocated to a Learning Outcome before it is affected by a Learning Outcome Boundary. If the threshold is met, and a Learning Outcome Boundary is set up at test form level, the candidate’s performance against a Learning Outcome will affect the final test result.
EXAMPLE: If Learning Outcome Total Mark Threshold is set to 10, Learning Outcomes must have at least ten marks attributed to them before the test result is affected.
|
| Strict Control of Test Time |
Determines whether a 24-hour buffer is applied to tests, allowing candidates to enter their test session 24 hours either side of the scheduled start time. By default, this is set to Disable to accommodate test sessions scheduled over multiple time zones. Select Enable to enforce strict test timings. |
| Show Each Candidate View in Schedule Screen |
Determines whether the Group by session setting in Test Administration > Schedule is available for users. By default, this is set to Disable meaning users have access to both Group by session and Show each candidate views. Select Enable to only displays Show each candidate. |
About ContentProducer settings
In ContentProducer Settings, you can determine whether you want to support paper-based items created in ContentProducer in Surpass.
By default, Support for ContentProducer Paper Production is set to Disable. Select Enable to allow ContentProducer content to be used in Surpass. This cannot be disabled once a paper-based test using ContentProducer items has been created.
About Integration settings
In Integration Settings, you can determine whether the Access External Application permissions is available in Site Settings > Roles. This allows users to gain access to integrated systems, providing the external system accepts this.
By default, Support for external applications is set to Disable, which hides the permission. To show the permission, select Enable. For more information, read About roles and permissions.
About Item Authoring settings
The Item Authoring settings in Site Settings allow you to configure various settings that control the creation and management of items in Surpass.
| Setting | Description |
|---|---|
| Ability to Publish Changes to Lists |
Determines whether item lists can be published to external systems. This allows users to select the Publish option when creating an item list. |
| Item Prefixes and Sequential Numbering |
Determines whether all new subjects require a prefix that is automatically added to the name of all new items. The prefix is defined when creating new or editing existing subjects, read ‘3. Fill out the Create Subject dialog’ in Creating a subject in Setup for more information. A unique six-digit suffix is also sequentially generated (across all subjects) and added to each item, starting at 100000.
EXAMPLE: The item prefix ‘G2324’ would result in the first new item being named ‘G2324_100000’ and the second ‘G234_100001’.
IMPORTANT: Once enabled, an item prefix must be specified before you can edit any aspect of existing subjects in Setup > Subjects. If you are planning to use this setting, it is best practice to add a prefix to all existing subjects.
|
| Section Enemies |
Determines whether enemy relationships can be set up on a section basis. This is used for administrative purposes in Item Authoring and can be used as a search parameter in Item Search. However, section enemies act as test form enemies in Test Wizard and Test Creation.
NOTE: All existing section enemy relationships must be removed in order to disable this setting.
|
| Tag Collections |
Determines whether users can create tag collections, which are collections of tag values across multiple tag groups. For more information, read Using tag collections in items.
NOTE: If you want to use tag collections, contact your Surpass Account Manager.
|
| Embed .mp4 Videos |
Determines whether MP4 videos are automatically embedded on items.
NOTE: If you would like to use this feature, contact your Surpass Account Manager.
|
| Hide item content representation in item set preview |
Determines whether item content representations are hidden when previewing item sets. For more information, read ‘5. Preview your item set’ in Creating an item set. |
| Custom Dictionary |
Allows you to upload a custom dictionary for users in Item Authoring. Custom dictionaries must be in an ANSI-encoded TXT file, with all the words defined in alphabetical order. Visit the CKEditor website for a sample dictionary file. |
About Media settings
The Media settings in Site Settings allow you to enable access to the third-party media repository Nuxeo. You must provide a specific URL (URL of the Nuxeo Instance) and login credentials (Secret Key) to access Nuxeo.
You can only have either the Surpass media library or Nuxeo repository active at any one time. Use the Surpass media library / Nuxeo repository toggle to switch between them.
Switching the Surpass media library off does not affect any media already attached to items from the media library. The attached media cannot be edited but it can be removed. You can no longer access the Surpass media library or use Bulk Update to update media or source material until it is switched back on. For more information about the Surpass media library, read About the Surpass media library.
If you enable Nuxeo, you must add media to an item in its Edit screen using the Nuxeo repository. This opens an iframe in which you can select media files from Nuxeo. Turning off Nuxeo does not affect any media already attached to items from the repository unless access to Nuxeo is then revoked.
About Language Variants settings
If available, the Language Variants settings in Site Settings allow you to enable language variants for your Surpass instance and choose in which languages item authors can create variants of items. You can also configure the default language of all subjects. This can be amended when creating a subject.
From the Default column, select the preferred primary language for all newly created subjects in your instance. From the All column, select the checkboxes corresponding to the languages in which you want item authors to be able to create language variants. Alternatively, select the checkboxes next to specific languages.
| Field | Description |
|---|---|
|
All |
Select this checkbox to enable all languages. |
|
Default |
Choose a primary language for the Surpass instance. |
| Language Name |
The name of the language. The languages available are:
|
| Language Name (Native) | The language name in the native language. |
| ISO Language Code | A standardised code that universally indicates a language. |
About Workflow Status settings
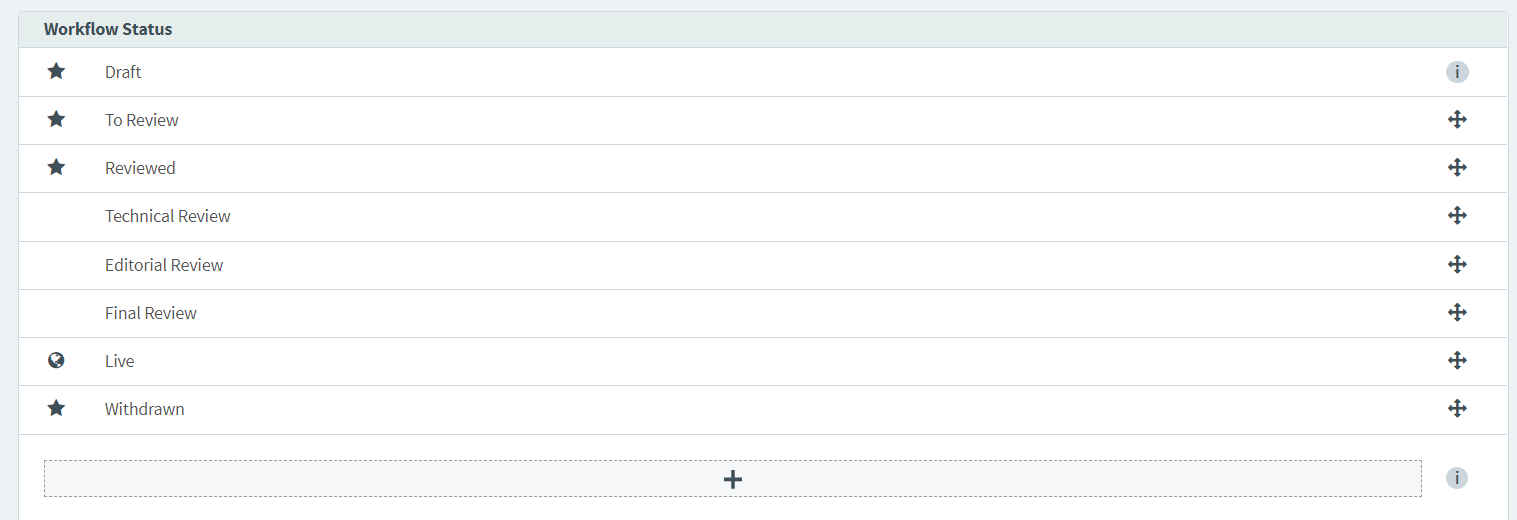
The Workflow Status area of Site Settings allows you to configure workflow statuses in Surpass, including creating and editing up to 15 custom workflow statuses.
To reorder workflow statuses, drag Move .
To create a custom workflow status, select Add Workflow Status and enter the status’ name.
To edit a custom workflow status’ name, select it to reveal a text field. Custom workflow status names are not automatically translated if you change your Surpass instance’s display language.
To delete a custom workflow status, highlight the status and select Delete . You cannot delete custom statuses already applied to items.
About Subject settings
In Subject Settings, you can upload custom CSS profiles to change the appearance of HTML tests (Upload Custom CSS File) and set up subject tags (Add Tags). Unlike other tags in Surpass, which are attached to items, subject tags are attached to subjects. These tags allow you filter large number of subjects and group similar subjects together. For more information, read Setting up subject tags.
About Reporting settings
The Reporting settings in Site Settings allow you to enable the automatic selection of the grading scale parameters Fixed Pass Grade and Pseudo-guessing Chance in the Tests Delivered screen of Reporting. For more information, read Viewing Tests Delivered reports.
The Fixed Pass Grade setting must be enabled before you can enable Pseudo-guessing Chance. Once enabled, you can also enter a default value for (z) in the grading scale formula in Enter Value for (z)
About API settings
In API Settings, you can restrict access to the Surpass API by specifying which IP addresses can access it. The IP Address List is a whitelist of IP addresses or CIDR ranges that are allowed to access the API if restriction is enabled.
Select Enabled on the Restrict API access toggle to prevent any non-specified IP addresses from accessing the API. Enter a new IP address or CIDR range under Enter New IP Address and select Add IP to add a new entry to the IP Address List. You must add these using the following format: [0-255].[0-255].[0-255].[0-255]
To remove an IP address from the IP Address List, select the IP address you want to remove and select Remove.
Select Add Client IP to add your own public IP address to the list.
Further reading
To learn more about working in Site Settings, read the following articles: