Creating a user
In Surpass, a ‘user’ is someone who interacts with the system. Users create items, set up and schedule tests, mark scripts, and view reporting analytics. Users are always associated with at least one parent centre.
This article explains how to create a user in the Users screen of Setup.
In this article
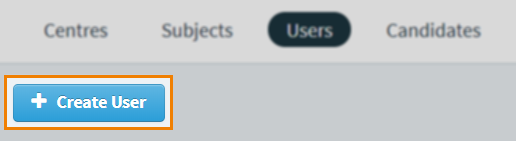
1. Go to the Users screen
To view the Users screen, go to Setup > Users.

2. Select Create User
Select Create User to create a new user.
3. Choose user type
Choose the type of user you want to create in the User Creator dialog. User types are differentiated based on the level of their available roles. For more information about roles and permissions, read About roles and permissions.
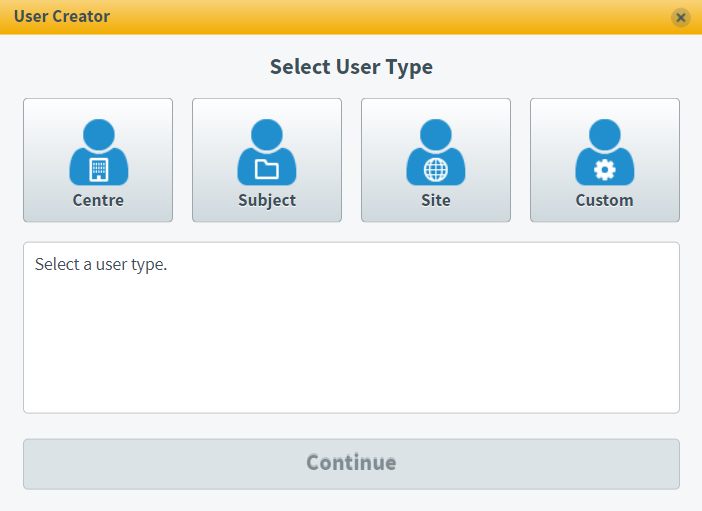
There are four available user types:
- Centre – A centre-level user has access to roles for all subjects in a particular centre. These users are typically centre administrators, markers, and invigilators that need access to all subjects within a centre.
- Subject – A subject-level user has access to roles for specific subjects in a particular centre. These users are typically subject matter experts, item writers, and test creators.
- Site – A site-level user has access to roles across all subjects in all centres. These users are typically central administrators who are responsible for the end-to-end testing process and support desk users who need access to all data.
- Custom – These users have a combination of centre, subject, and site access levels.
When you have chosen a user type, select Continue to proceed.
4. Fill out user details
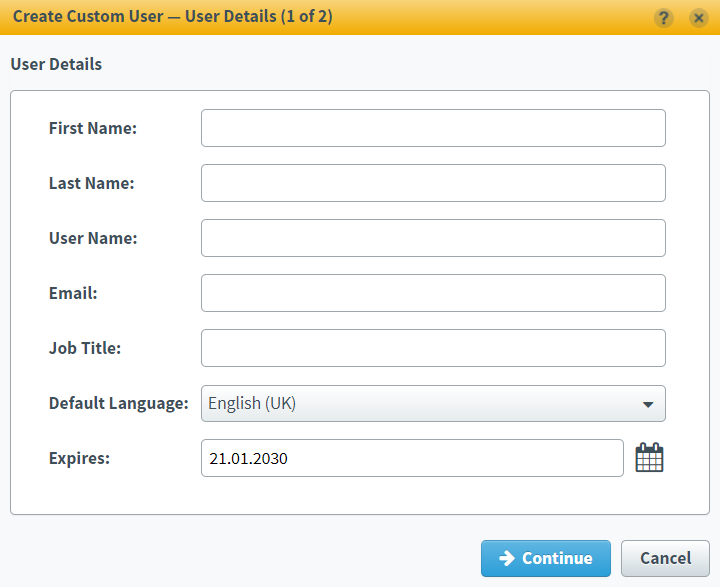
Fill out the User Details dialog with your new user’s information. Refer to the following table for information about each field.
| Field | Description |
|---|---|
| First Name* | Enter the user’s first name. |
| Last Name* | Enter the user’s last name. |
| User Name* | Enter the user’s user name. The user will use the user name to log into Surpass. The user name must be unique. |
| Email* | Enter the user’s email address. They are emailed a link to create a password before logging in for the first time. |
| Job Title | Enter the user’s job title at your organisation. |
| Default Language | Choose the user’s default navigation language for the Surpass interface. |
| Expires |
Choose a date when the user expires. After the expiry date, the user will be unable to access Surpass. The default expiry date is ten years from the creation date.
NOTE: You can extend an expired user's expiry date to reactivate their account. For more information, read Editing a user.
|
When you have filled out the user details, select Continue to proceed.
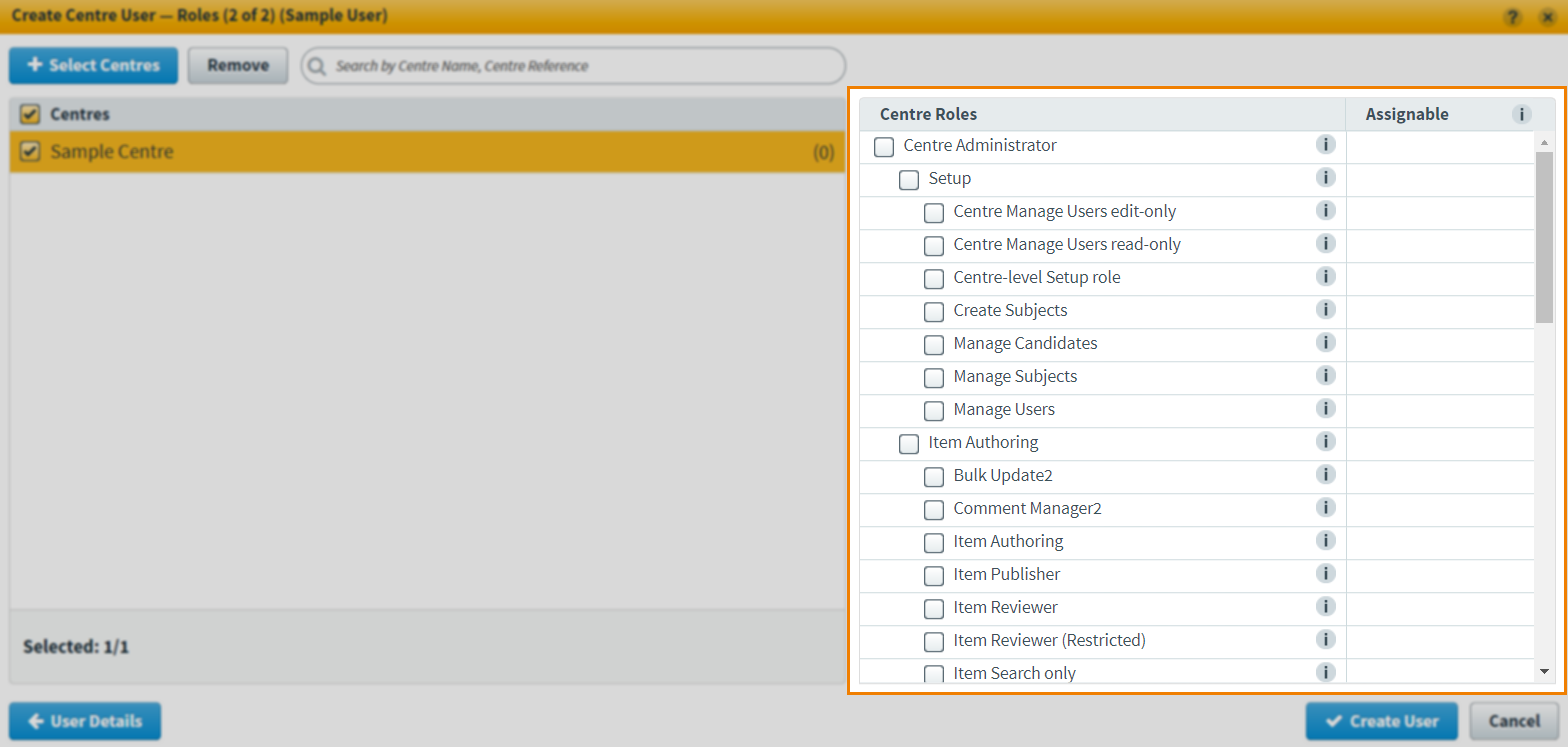
5. Choose user roles
The options available in the Roles dialog depend on whether you chose to create a centre, subject, site, or custom user. Expand the relevant section to learn more about assigning roles to your chosen user type.
Choosing roles for a centre user
Use Manage Centres to open the Select Centres dialog.

Choose a centre in the Available Centres list and use Add to move it to the Selected Centres list. Select Confirm when you have added all relevant centres.

Choose the roles you want the user to have in the Centre Roles column. If you want the user to be able to assign a role to another user, select the corresponding checkbox in the Assignable column.
Choosing roles for a subject user
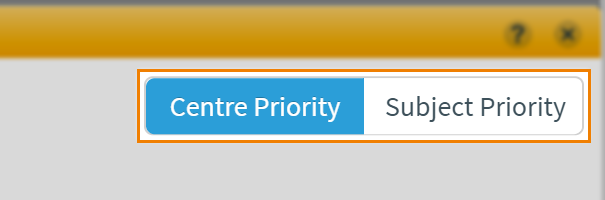
Choose between Centre Priority and Subject Priority in the Create Subject User dialog. This lets you choose the most convenient option for assigning roles to subject level users.
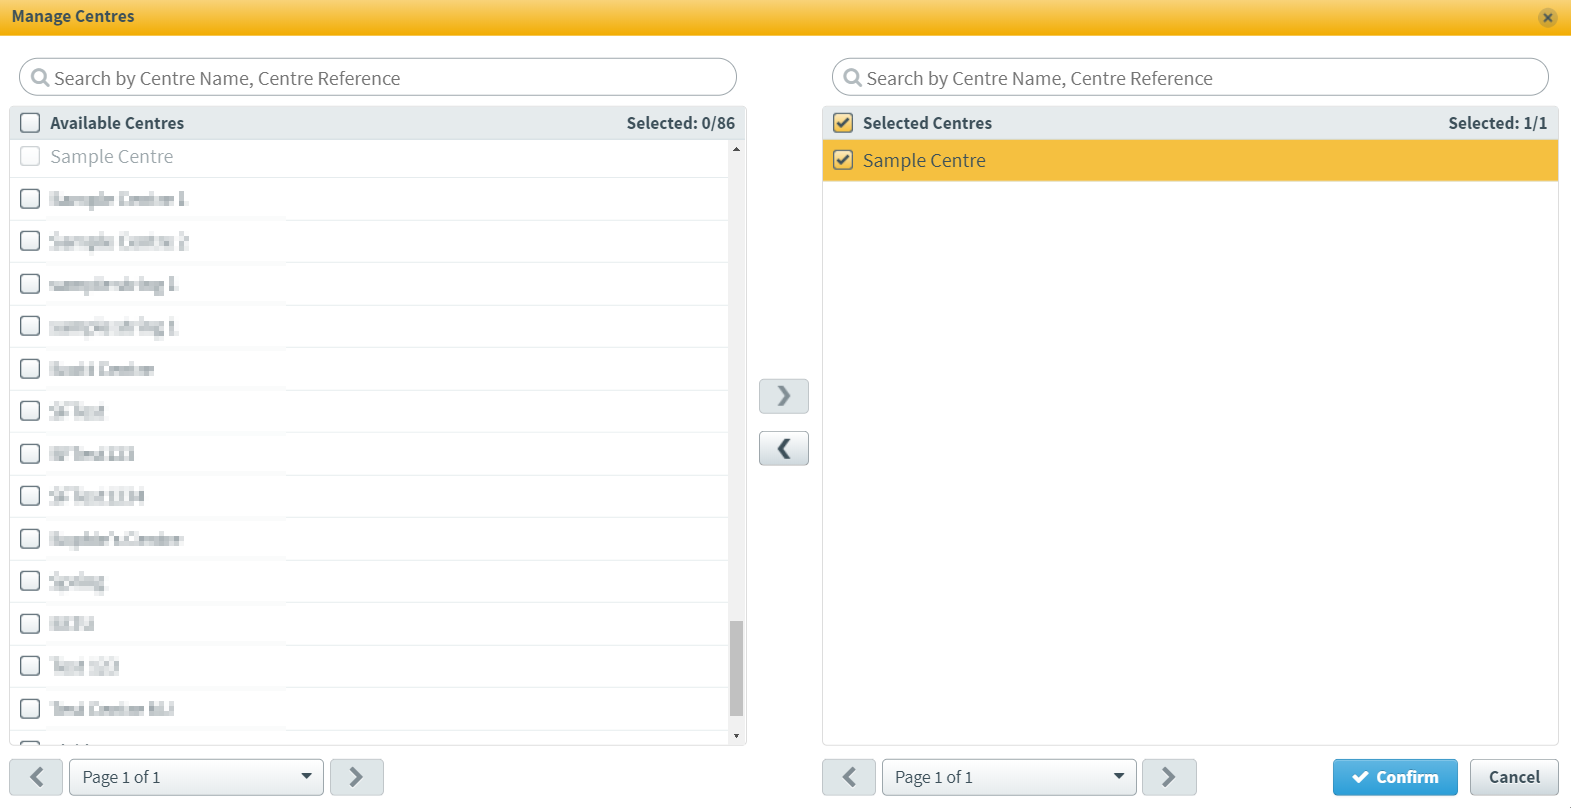
Use Manage Centres to open the Manage Centres dialog.

Choose a centre in the Available Centres list and select Add to move it to the Selected Centres list. Select Confirm when you have added all relevant centres.
Select the subjects you want the user to have access to in the Subjects list.
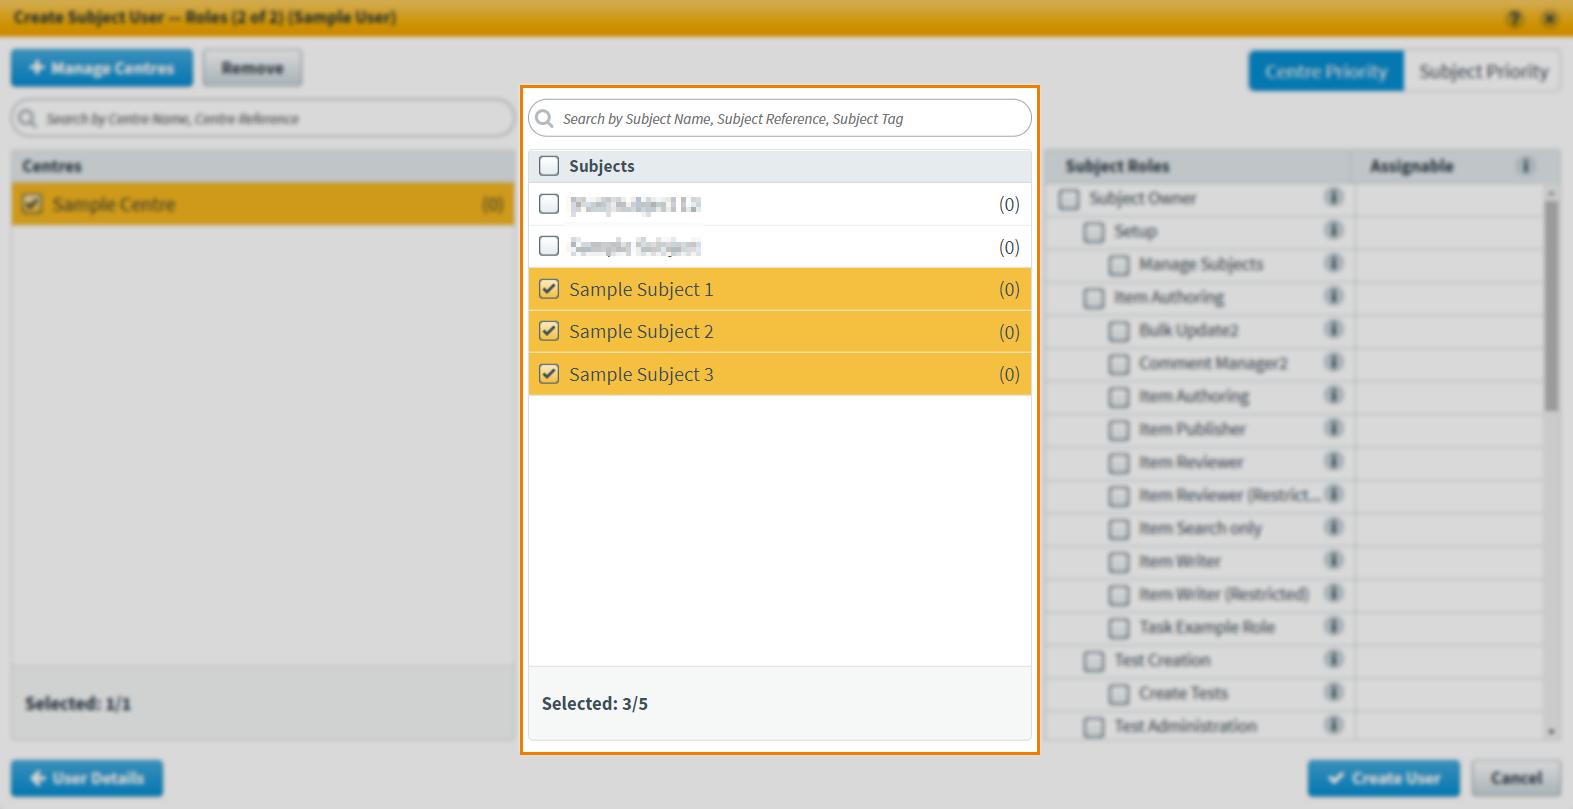
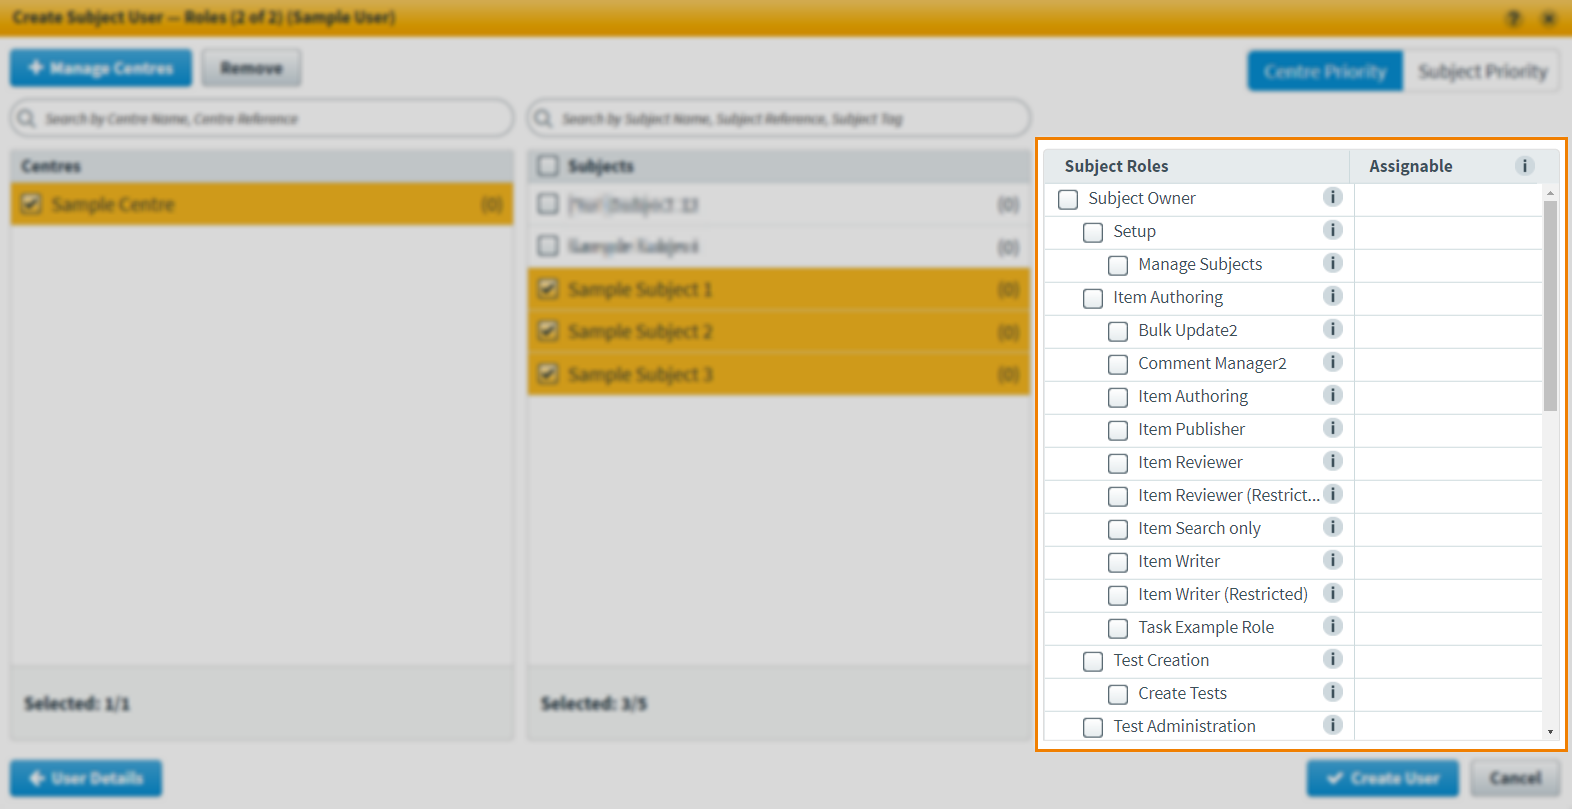
Choose the roles you want the user to have for the chosen subjects in the Subject Roles list. If you want the user to be able to assign a role to another user, select the corresponding checkbox in the Assignable column.
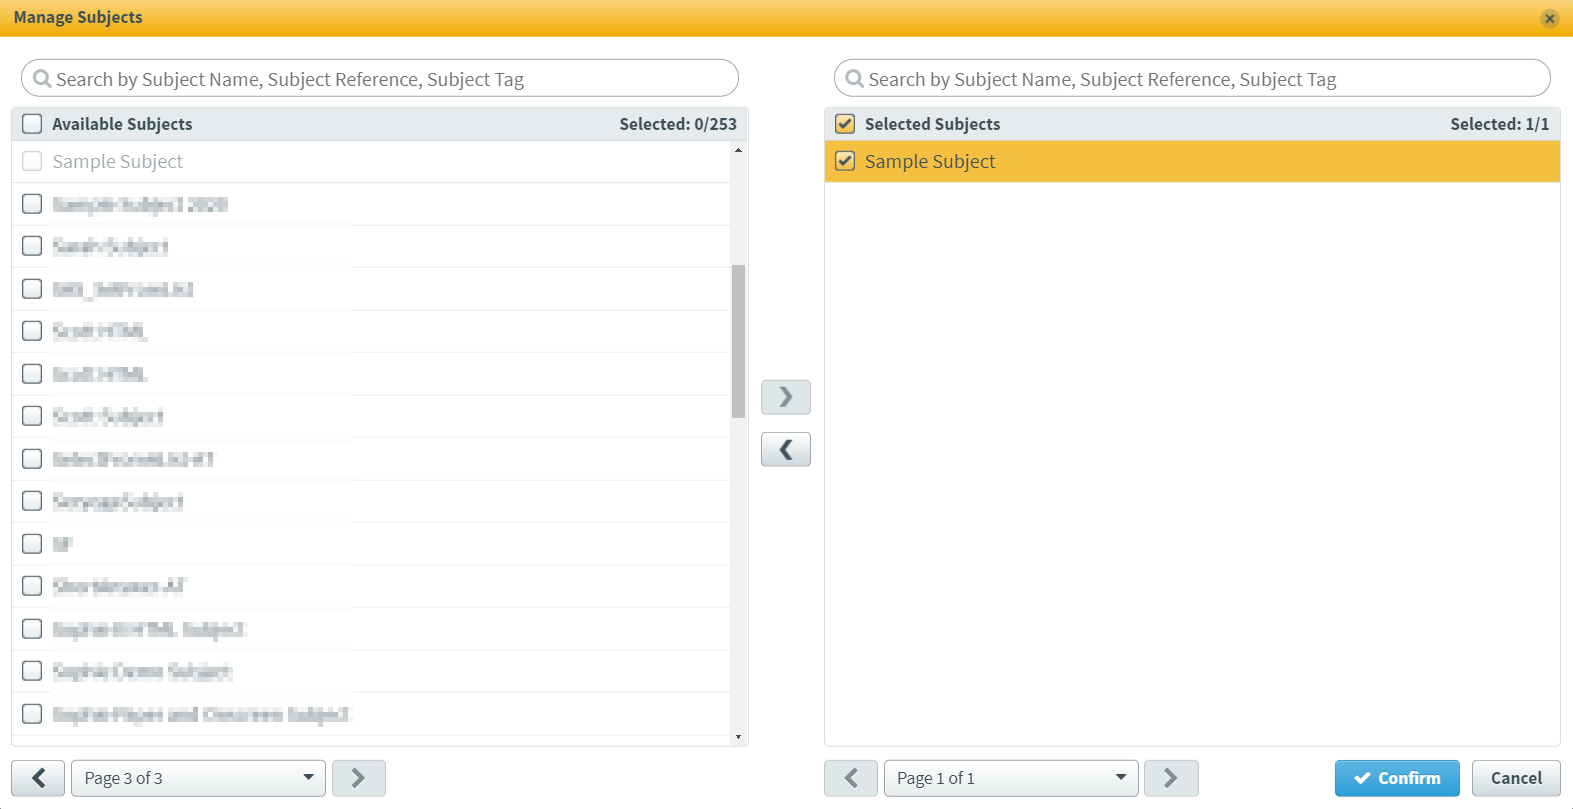
Select Manage Subjects to open the Manage Subjects dialog.

Choose a subject in the Available Subjects list and select Add to move it to the Selected Subjects list. Select Confirm when you have added all relevant subjects.
Select the centres you want the user to have access to in the Centres list. All centres that the subject is associated with appear in this list.
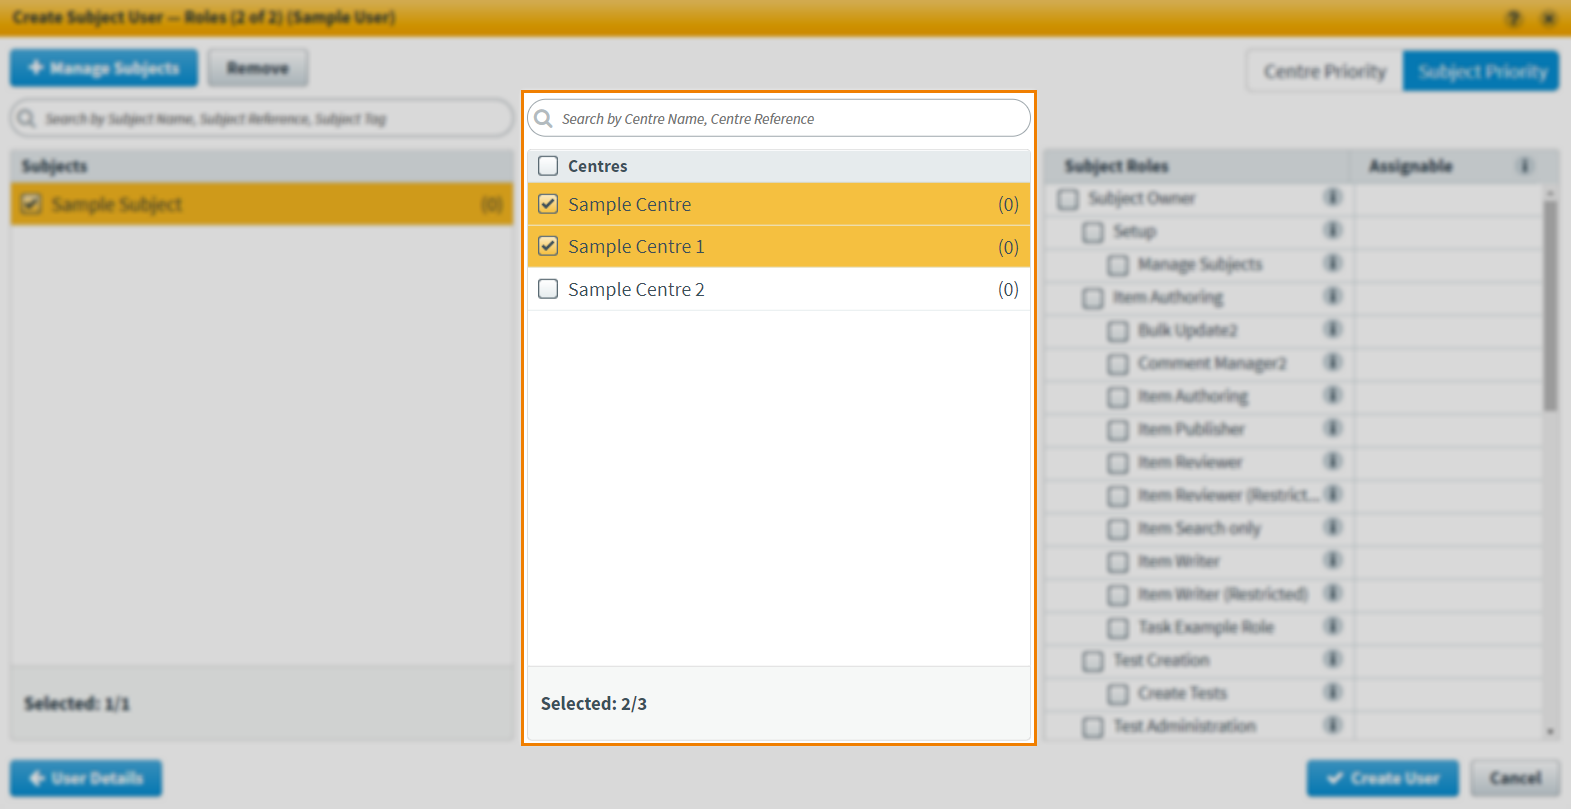
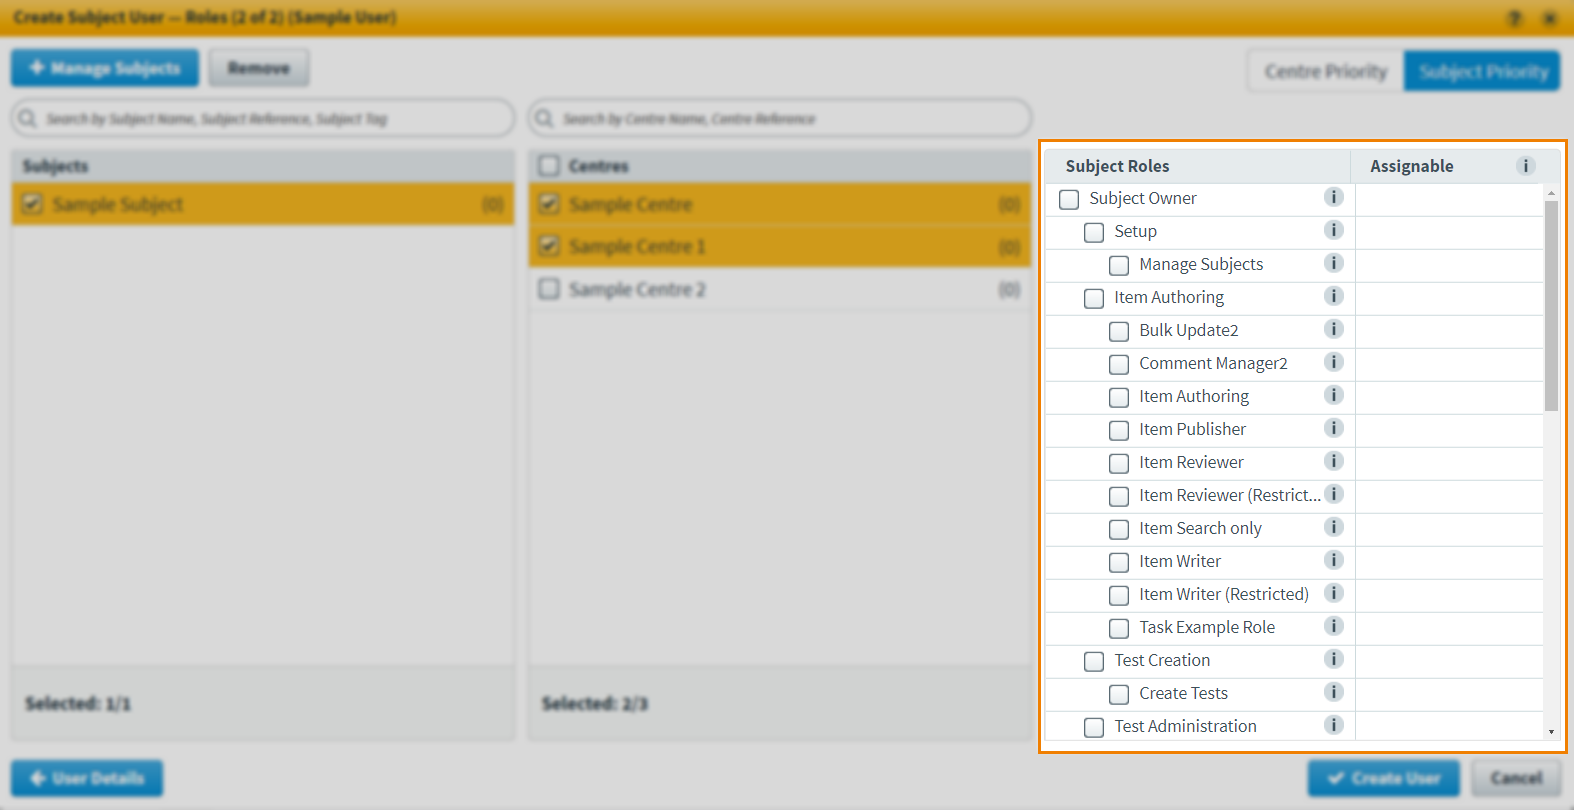
Choose the roles you want the user to have for the chosen subject in the Subject Roles list. These roles are applied at each centre you have selected. If you want the user to be able to assign a role to another user, select the corresponding checkbox in the Assignable column.
Choosing roles for a site user
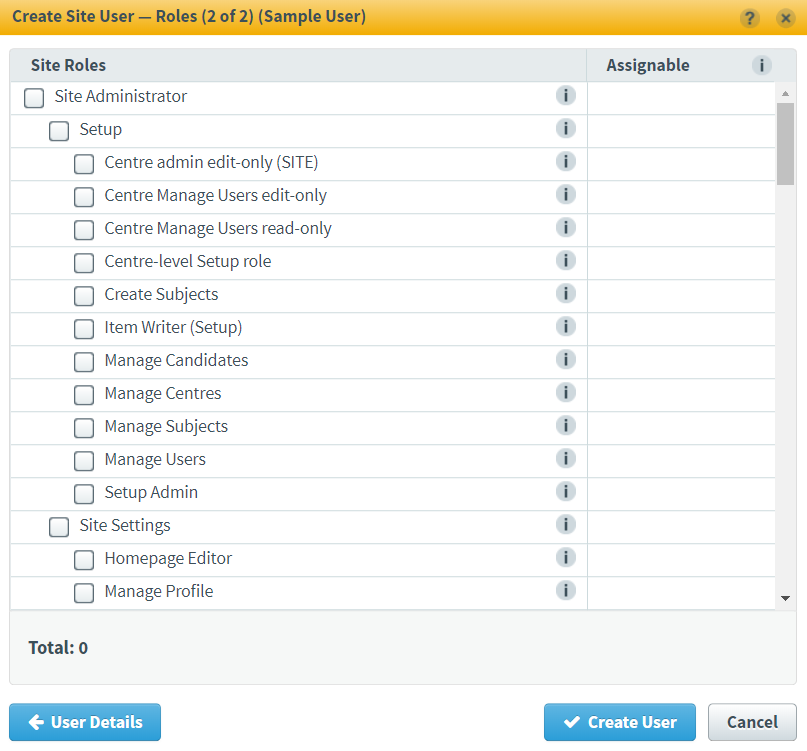
Choose the roles you want the user to have in the Site Roles list. If you want the user to be able to assign a role to another user, select the corresponding checkbox in the Assignable column.
Choosing roles for a custom user
When creating a custom user, you can combine site, centre, and subject-level roles. Use the tabs to toggle between Site Roles, Centre Roles, and Subject Roles. For more information, expand the preceding sections.
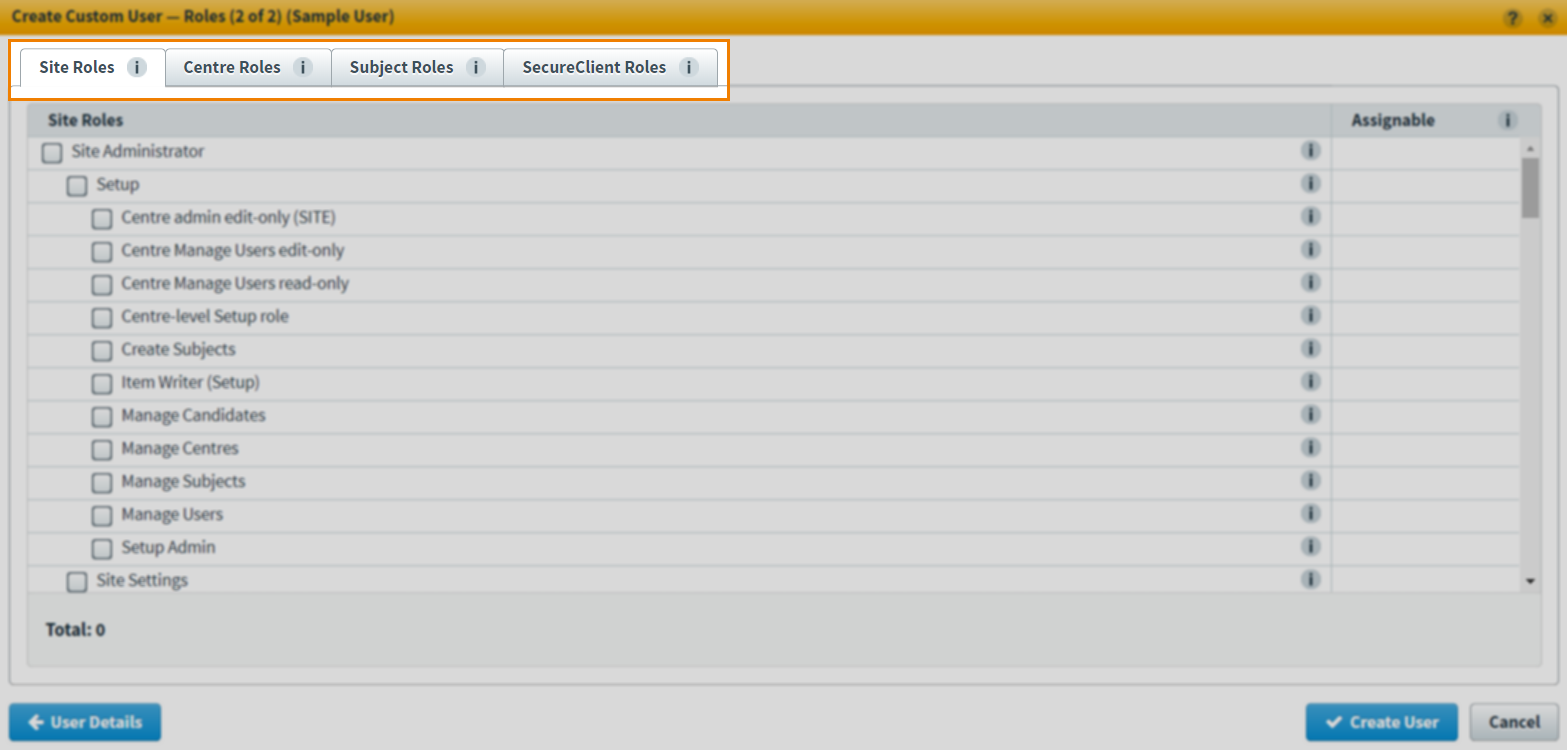
Custom users also have access to SecureClient roles that grant access to the SecureClient Admin Console. For more information, read About the SecureClient Admin Console.
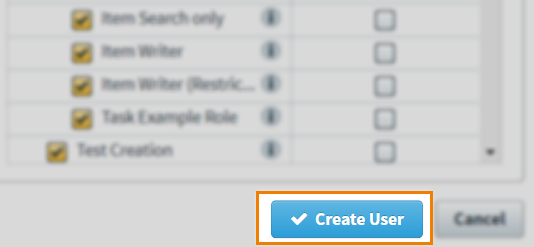
6. Confirm user details
Select Create User to create the user. An email is sent to the user’s registered email address containing a link to create a password and security question.
Further reading
To learn more about working in the Users screen, read the following articles: