About test form settings
When creating or editing a test form in Surpass, you can configure its settings in the Test Form Details tab of the Edit Test Form window.
The Test Form Details tab is divided into five areas:
- Test Details covers fundamental test form settings like name and reference, status, and grade boundaries.
- Test Feedback allows you to configure what results data is displayed to candidates after test submission.
- Test Version Availability lets you set an availability window for the test form separate from the parent test.
- Miscellaneous covers additional options including moderation and SecureMarker functions
- Test Delivery allows you to view and edit the parent test’s settings without leaving the Test Forms screen.
This article explains each option in the Test Form Details tab of the Edit Test Form window.
In this article
Finding Test Form Details
To view Test Form Details, navigate to Test Creation > Test Forms and select the relevant test form in the table.

Select Edit Test Form to open the Edit Test Form window.

In the Edit Test Form window, open the Test Form Details tab.

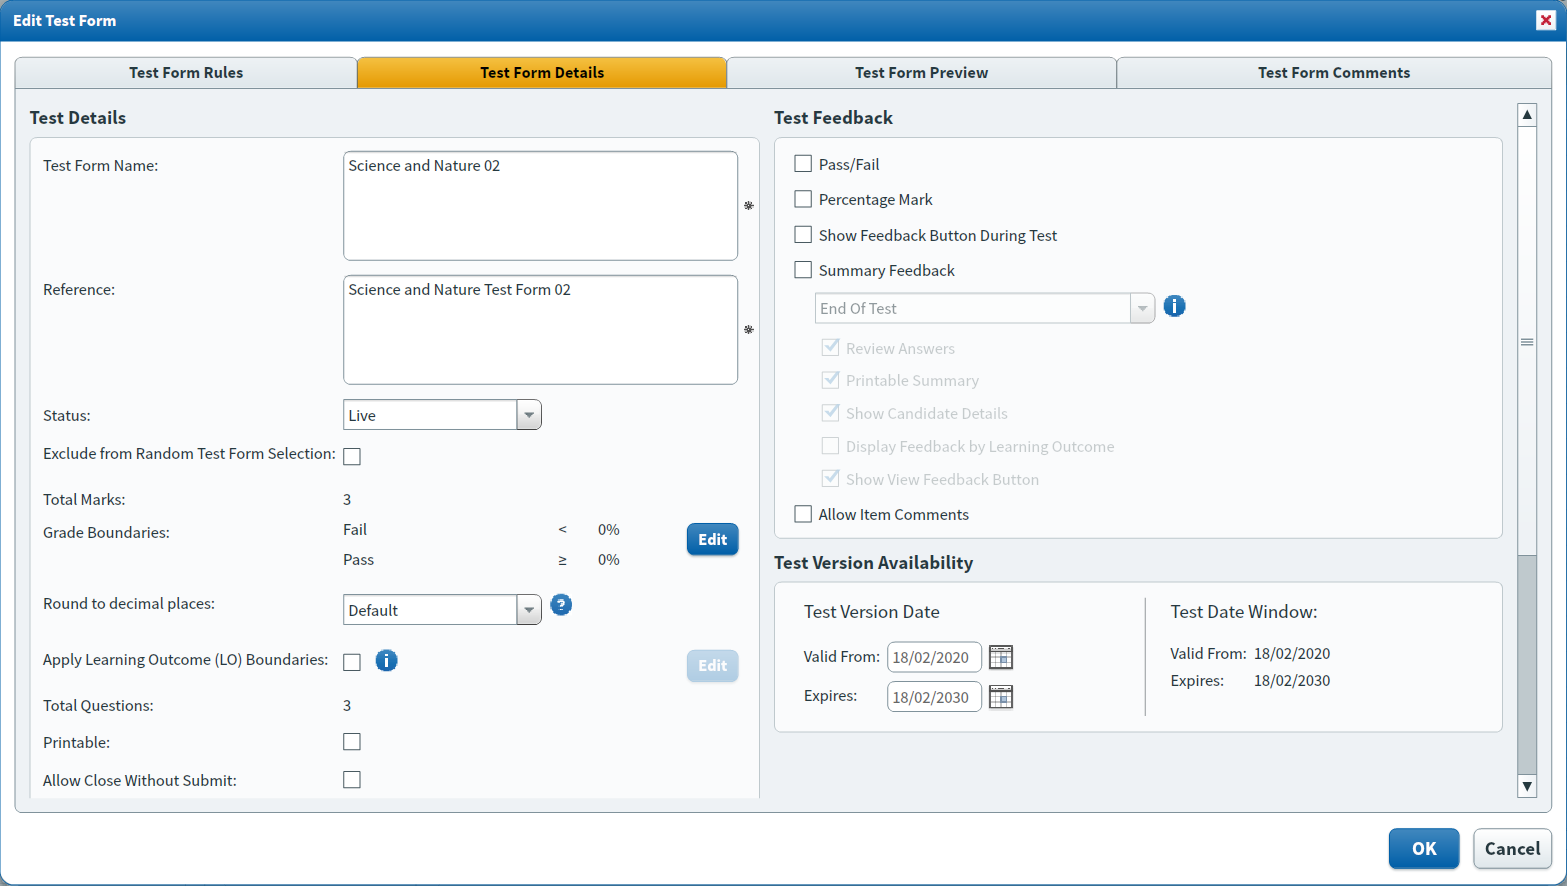
Test Details
| Setting | Description |
|---|---|
| Test Form Name* | The name of the test form. |
| Reference* | The test form’s alphanumeric reference code. The reference must be unique. This is not visible to candidates. |
| Status |
Determines whether the test form is available for scheduling. Choose from the following statuses:
IMPORTANT: Live test forms can only be scheduled if the parent test is also set to Live.
|
| Exclude from Random Test Form Selection |
Prevents the test form from being randomly selected at the point of scheduling if Randomise Test Forms is enabled in the parent test’s Advanced Test Delivery Options. |
| Total Marks |
Displays the total marks available for this test form. |
| Grade Boundaries |
Defines the test form’s grade boundaries. To learn how to set up grade boundaries, read Setting up grade boundaries. |
| Round to decimal places |
Determines how many decimal places candidates’ scores are rounded to when retrieved using the Result, Analytical, or Historical API methods. |
| Apply Learning Outcome(LO) Boundaries |
Allows you to set up pass marks for items with specific learning outcomes. If candidates do not meet the specified learning outcomes boundaries, they will fail the test despite their performance on other items. For more information, read Setting up Learning Outcome boundaries. |
| Total Questions | Displays the total number of questions in the test form. |
| Printable |
Allows you to print the test form.
NOTE: This setting is no longer in use. You can print any test form, regardless of whether Printable is selected. For more information, read Printing test forms in Test Creation.
|
| Allow Close Without Submit |
Allows candidates to exit the test without submitting their answers. Candidates can continue the test at a later stage.
NOTE: This setting is always applied to computer-based projects.
TIP: This is useful for computer-based tests that have long durations.
|
| Allow use as template | Enables test form cloning. For more information, read Cloning test forms. |
| Action Script Mode |
The action script mode of the content (AS2/ AS3/ Mixed).
NOTE: This only applies to test forms with ContentProducer content.
|
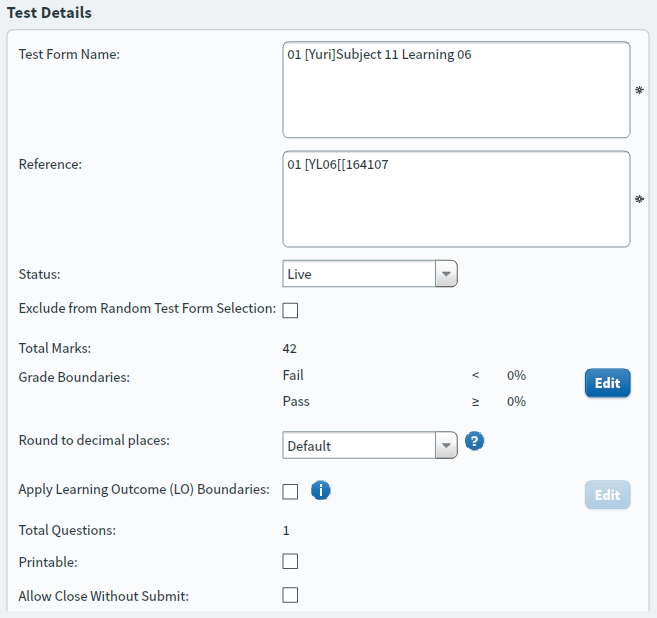
Test Feedback
| Setting | Description |
|---|---|
| Pass/Fail |
Shows candidates whether they have passed or failed the test after submission. Summary Feedback must also be enabled.
NOTE: This is only available for tests containing only computer-marked items.
|
| Percentage Mark |
Shows candidates their percentage mark after submission. Summary Feedback must also be enabled.
NOTE: This is only available for tests containing only computer-marked items.
|
| Show Feedback Button During Test |
Displays the Feedback button during the test, allowing candidates to see any general feedback (or correct/incorrect feedback in legacy tests, only) added to items in Item Authoring. This should not be used in summative tests. For more information, read Adding candidate feedback to items. |
| Summary Feedback |
Shows candidates a summary of their performance on the test, including which items were answered correctly or incorrectly. Use the menu to determine when candidates receive summary feedback:
IMPORTANT: Summary feedback is unavailable if the test form contains non-scored items.
NOTE: Pass/Fail or Percentage Mark must be enabled if you want to use End of Section or End of Section & Test in HTML tests.
|
| Summary Feedback > Review Answers |
Allows candidates to review their responses during the summary feedback. If cleared, candidates can only see if their answers were correct or incorrect. The functionality of Review Answers differs depending on which summary feedback option you select:
|
| Summary Feedback > Printable Summary | Allows candidates to print the summary feedback. |
| Summary Feedback > Show Candidate Details |
Displays candidates’ details (name, reference, and so on) during the summary feedback. |
| Summary Feedback > Display Feedback by Learning Outcome |
Displays how candidates scored on items with shared tag values. |
| Summary Feedback > Show View Feedback Button |
Allows candidates to view general feedback (or correct/incorrect feedback in legacy tests, only) left on items during the summary feedback. Review Answers must also be enabled for a candidate to access the feedback button.
NOTE: This is different from the Show Feedback Button During Test setting, which allows candidates to review feedback at any point.
|
| Allow Item Comments |
Allows candidates to leave a comment on items during the test for feedback purposes. These comments are viewable in Test Administration. You can also view comments left by candidates in Reporting. Read ‘About the Candidate Comments panel’ in Viewing Items Delivered Reports for more information. |
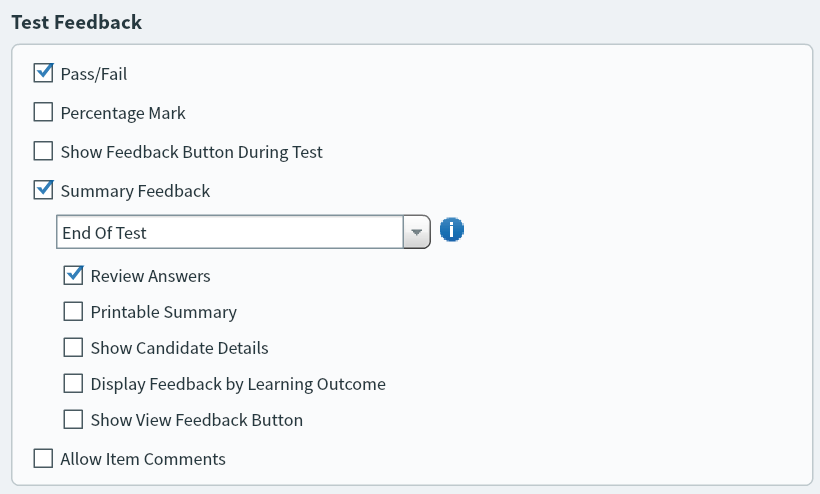
Test Version Availability
| Setting | Description |
|---|---|
| Test Version Date | Sets the date range in which the test can be scheduled for candidates. Use the Valid From and Expires date pickers to choose your start and end dates, respectively.
TIP: You can also enter your dates in DD/MM/YYYY format.
|
| Test Date Window | Displays the availability window of the parent test. This cannot be edited at the test form level. |
Miscellaneous options
| Setting | Description |
|---|---|
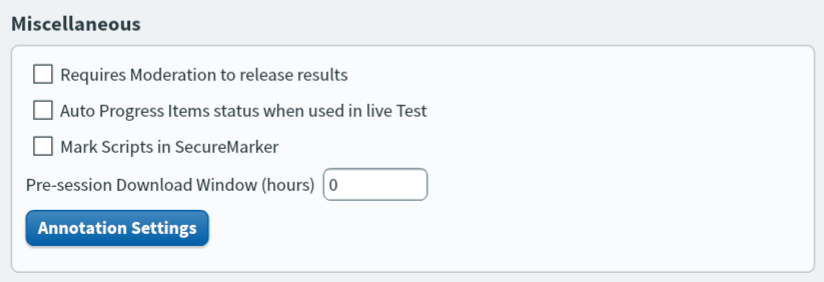
| Requires Moderation to release results |
Prevents candidate scripts from appearing in the Results screen of Test Administration until they have been reviewed by another marker in the Moderate screen.
IMPORTANT: Enabling Requires Moderation to release results suppresses end of test summary feedback.
|
| Auto Progress Items status when used in live Test |
NOTE: This setting is obsolete and will be removed in a future release of Surpass.
|
|
Mark Scripts in SecureMarker (Before and including Surpass Release 12.26: Requires SecureMarker) |
Exports candidate scripts to SecureMarker for marking and moderation. For more information, read Configuring a test form for SecureMarker. |
|
Pre-session Download Window (hours) (Before and including Surpass Release 12.26: Advance content download timespan (hours)) |
Determines how far in advance of the test’s start time candidate test forms are generated and made available for download. Test forms (including item content) are locked once generated and cannot be edited for the scheduled test session. Once scheduled, the Pre-session Download Window cannot be amended.
TIP: Tests only appear in the Invigilate screen of Test Administration after they have been generated. If your tests do not appear in Invigilate after scheduling, check the Pre-session Download Window value.
NOTE: Whether a test can be delivered in the standard or legacy test driver is defined by what the Deliver in HTML Delivery test setting is set to at the point it is scheduled, regardless of this value.
|
| Annotation Settings |
Configure what commenting and annotation tools are available to markers working in the Mark screen and SecureMarker. Read ‘Annotation Settings’ further in this article for more detail on the available settings. |
Annotation Settings
You can control what commenting and annotation tools are available to markers working in the Mark screen and SecureMarker using Annotation Settings.
General Comments
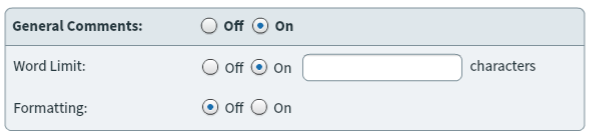
General comments allow markers to leave a comment on the item. General comments are not attached to specific part of the response.
Use the General Comments > On / Off toggle to enable and deactivate general comments, respectively.
Enable Word Limit to enforce a character limit on markers’ responses. Define the character limit in the characters field.
Enable Formatting to give markers basic formatting tools, such as bold, italic, and underline.
Open Comments

Open comments allow markers to leave comments on specific areas on the response with digital “sticky notes”. Multiple open comments can be left on an item.
Use the Open Comments > On / Off toggle to enable and deactivate open comments, respectively.
Enable Word Limit to enforce a character limit on markers’ responses. Define the character limit in the characters field.
Annotations
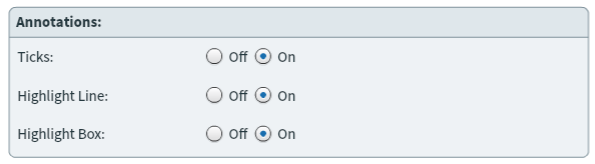
The annotation tools give markers additional markup options.
Enable Ticks to allow markers to leave checkmarks anywhere on the response.
Enable Highlight Line to allow markers to draw a translucent yellow line anywhere on the response.
Enable Highlight Box to allow markers to draw a red box anywhere on the response.
Fixed Comments
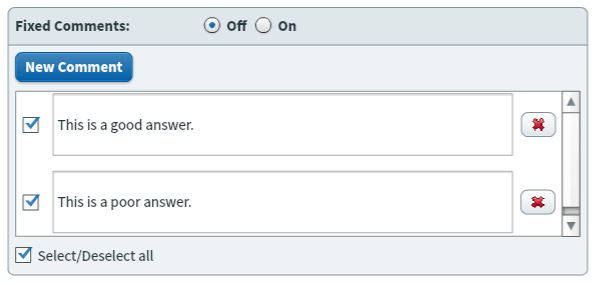
Fixed comments provide markers with pre-written remarks that can be added to the response. Use fixed comments to prevent markers from leaving inappropriate or unnecessary comments on scripts, especially those that might be shown to candidates during a candidate review session.
Use the Fixed Comments > On / Off toggle to enable and deactivate fixed comments, respectively.
Select New Comment to add a new comment.
Use the checkboxes next to fixed comments to add or remove them from the test form. To delete a fixed comment, select Delete Comment .
Symbols
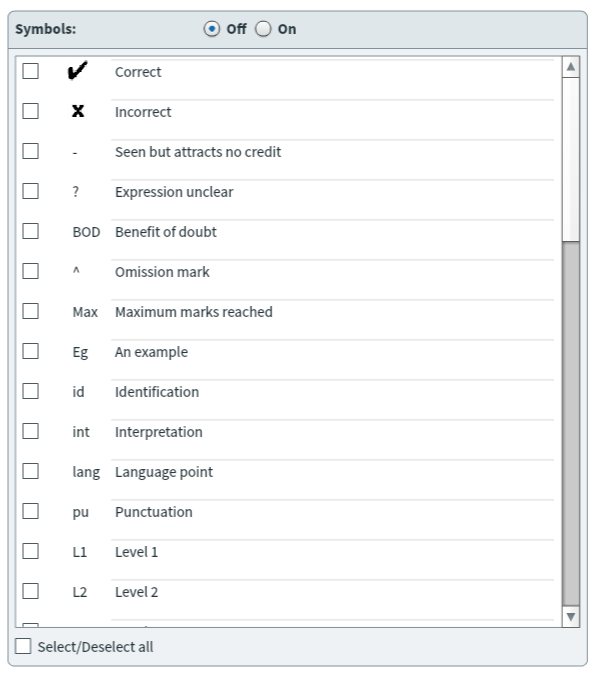
Symbols allow markers to add shorthand markup to responses. Use the checkboxes next to symbols to add or remove them from the test form. Use Select/Deselect all to add or remove all symbols.
Test Delivery Options
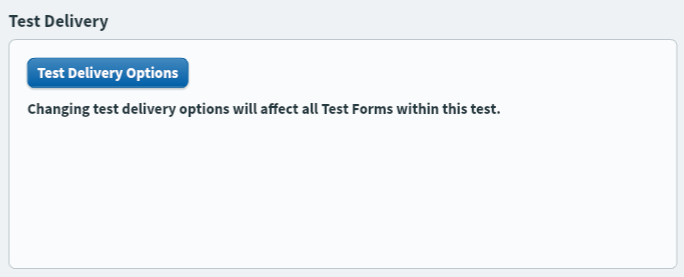
Select Test Delivery Options to edit the settings of the test form’s parent test without leaving the Test Forms screen. For more information about available options, read About test settings.
Further reading
To learn more about setting up test forms, read the following articles: