Setting up grade boundaries
You can set up to ten custom grade boundaries for your test form. Grade boundaries can be defined on either percentages or numerical scores.
Grade boundaries apply to the whole test form. You can set pass marks for individual sections, but this only determines whether the candidate passes or fails the test at certain checkpoints.
This article explains how to set up grade boundaries for your test form.
In this article
1. Go to Test Form Details
Navigate to Test Creation > Test Forms and select the relevant test form in the grid.

Select Edit Test Form to open the Edit Test Form window.

In the Edit Test Form window, open the Test Form Details tab.

2. Open the Edit Grade Boundaries dialog
Select Edit next to Grade Boundaries to open the Edit Grade Boundaries dialog.

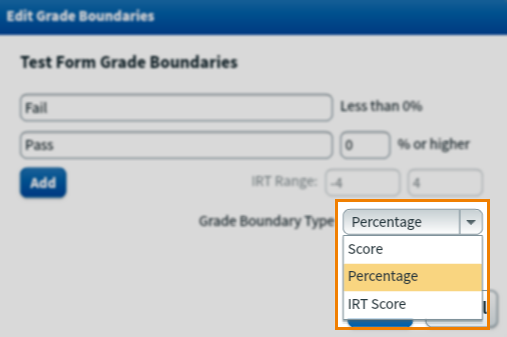
3. Set the boundary type
Before configuring your boundaries, you must choose the type of grade boundary in the Grade Boundary Type menu.
| Grade boundary type | Description |
|---|---|
| Score |
Boundaries are based on a raw score.
WARNING: If you select Score, ensure that boundary values correspond to achievable marks on the test form. Incorrectly set score-based boundaries can make a test form impossible to pass.
|
| Percentage | Boundaries are based on a percentage of the total mark. |
| IRT Score |
Boundaries are based on an IRT theta value. You can define the IRT Range, which has default values of -4 and 4. These values are used if candidates answer all items correct or incorrectly, respectively. All IRT values support negative and decimal values up to four decimal places.
NOTE: For IRT Scoring to be supported in your test, you must assign IRT tag values to the relevant items in your test. For more information, please read About IRT tags.
|
4. Define the pass mark
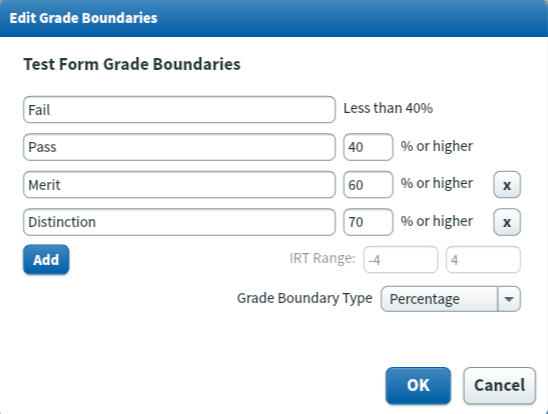
The default grade boundaries are “Fail” and “Pass”. You must define a “Pass” boundary for the test form to be validated. Enter the minimum accepted pass value next to “Pass”. The “Fail” boundary is automatically calculated based on this.
5. Add custom boundaries
Select Add to add a custom boundary above the default “Pass” boundary.
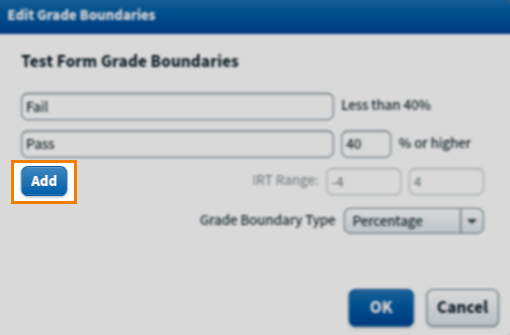
The “Pass” boundary now becomes the middle boundary. Give the new boundary a name in the text field and enter its minimum accepted value.
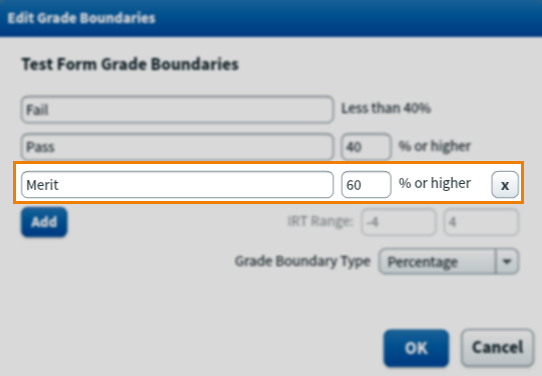
In this example, the “Pass” boundary is 40% and the “Merit” boundary is 60%. A score of 39% or lower would be a “Fail”, a score between 40% and 59% would be a “Pass”, and any score over 60% would be a “Merit”.
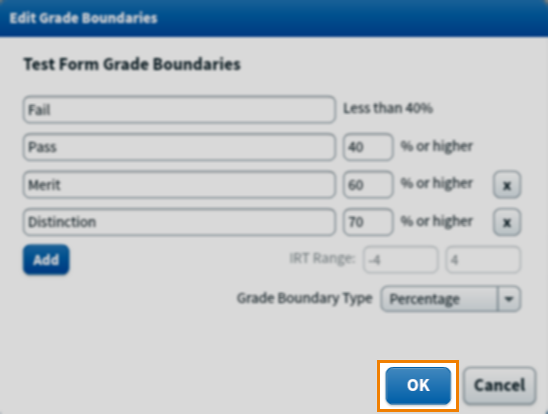
Select Add to set up an additional grade boundary. New grade boundaries are always added above the current highest boundary. You can set up a maximum of ten grade boundaries per test form.
6. Save the grade boundaries
Select OK to save the grade boundaries to the test form.
Further reading
To learn more about test form settings, read the following articles: