Marking a script in the Mark (Legacy) screen
In the Mark screen, you can assign marks to and interact with candidate responses. This includes adding annotations and comments, viewing mark schemes, and escalating scripts for further attention.

This article explains how to mark a script in the Mark (Legacy) screen, including how to assign marks to items.
In This Article
1. Go to the Mark screen
To mark a script, go to the Mark screen in Test Administration.

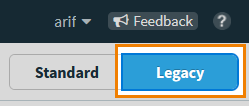
Select Legacy on the Standard / Legacy toggle to view the Mark (Legacy) screen.
2. Choose a script
Select the relevant script in the Mark grid.
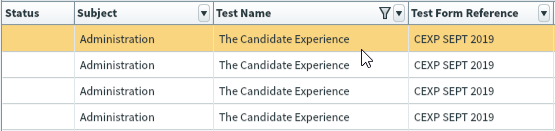
Select Mark Script to open the Mark Script dialog.

3. Find an item to mark
In the Mark Script dialog, you can view candidate responses, assign marks to items, and view mark schemes.
If the test has multiple sections, use the Section menu to change the currently selected section. The number of items requiring attention in each section is indicated in brackets. Use the Question menu to change the currently displayed item. If an item requires attention, (to mark) is displayed next to the item name.

Select Previous to view the previous item in the script. Select Next to view the next item in the script. Select Next to Mark to immediately jump to the next item requiring attention.

4. Mark the item
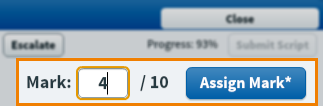
To assign a mark to an item, enter a value in the Mark field and select Assign Mark. The Progress percentage updates to reflect how much of the script has been marked.
If the item has a mark scheme attached, select View Mark Scheme. Select View Marking History to view a log of previous markers’ interactions with the item. Select Marker Comments to view any comments that markers have left on the item. If the script contains items created in ContentProducer, you can replay them by selecting Replay.

Marking items with Marked Learning Outcomes
If an item has Marked Learning Outcomes, you must add a score for each Learning Outcome. Each Learning Outcome’s maximum mark is displayed next to the entry field. The item’s mark is automatically calculated from the sum of all Learning Outcome scoring values.

For more information about Marked Learning Outcomes, read ‘Setting up Marked Learning Outcomes‘ in Using tags in items.
About annotation tools

If annotation tools are set up on the parent test form, you can mark up candidates’ scripts. For more information, read ‘Annotation Settings‘ in About test form settings.
5. Submit the script
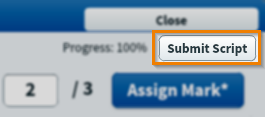
Select Submit Script to transfer the script to the Results screen.
Select Close to exit the Mark Script dialog and return to the Mark screen.
Further reading
Now you know how to mark a script in the Mark (Legacy) screen, read the following articles to learn more: