Using bulk update
The bulk update functionality in Item Authoring allows you to update information on multiple items or item sets in your subject simultaneously.
When using bulk update in a subject, you can only update items and item sets in that subject.
You can also perform a bulk update in the Item Search and Item Lists screens after selecting some items. You have limited update options if you are updating items across multiple subjects.
This article explains how to use bulk update to update multiple items at the same time.
In this article
1. Open bulk update
You can open bulk update in your subject and the Item Search / Item Lists screens.
Opening bulk update in a subject
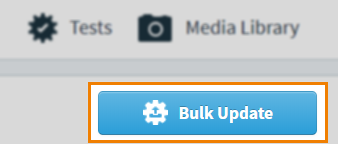
In your subject, select Bulk Update to open the Select update type dialog.
To learn more about working inside a subject, read Managing items in a subject.
Opening bulk update in Item Search and Item Lists
Either go to Item Authoring > Item Search and perform a search or go to Item Authoring > Item Lists and open a list to see the item grid. Choose the items you want to update and select Bulk Update .

For more information, read About the Item Search results table and Managing an item list.
2. Choose update type
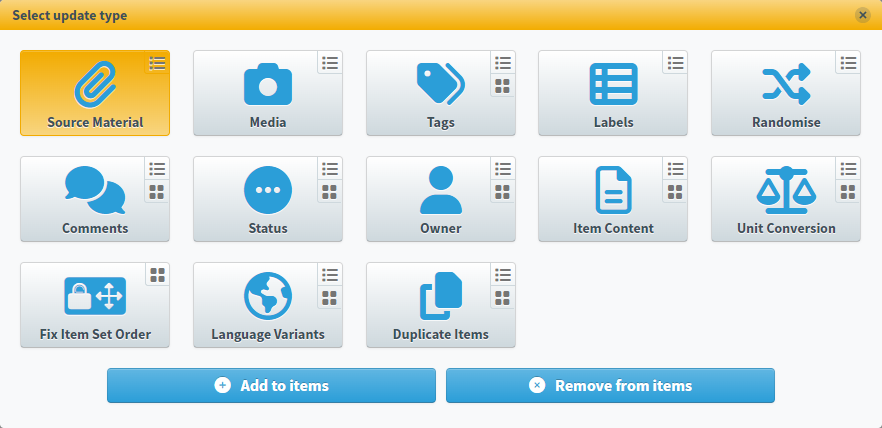
Choose your update date in the Select update type dialog, refer to the following table for information about each update type.
| Icon | Update Type | Description | Item Set Support |
|---|---|---|---|
| Source Material |
Adds or removes source material on multiple items. Choose Add to items or Remove from items . |
||
| Media |
Adds or removes media on multiple items. Choose Add to items or Remove from items . |
||
| Tags |
Adds or removes tags on multiple items. You can add and remove tags on up to 5,000 items at once using a spreadsheet import. Choose Add to items , Remove from items , or Upload CSV . |
|
|
| Labels |
Adds or removes labels to Multiple Choice and Multiple Response answer options. Choose Add to items or Remove from items . |
||
| Randomise |
Enables or disables randomisation of answer options for Multiple Choice, Multiple Response, and Either/Or answer options. Choose Add to items or Remove from items . |
||
| Comments |
Adds or removes comments on multiple items. Choose Add to items , Remove from items , or Upload CSV . |
||
| Status |
Changes the workflow status for multiple items. Choose Continue . |
||
| Owner |
Changes the item owners of up to 5,000 items using a spreadsheet. Choose Continue or Upload CSV . |
||
| Item Content |
Exports or imports (to replace) item content using a spreadsheet. Choose Export Item Content or Import Item Content . |
||
| Unit Conversion |
Updates units across multiple items. Choose Continue or Upload CSV . |
||
| Fix Item Set Order |
Fixes or unfixes the order of item sets. Choose Fix Item Order or Unfix Item Order . |
||
| Language Variants |
Adds language variants to multiple items. Choose Continue or Upload CSV .
NOTE: Item language variants functionality is not available by default. Read Creating and managing language variants for more information.
|
||
| Duplicate Items |
Duplicate multiple items. Choose Continue . |
3. Select items (updating from Subjects only)
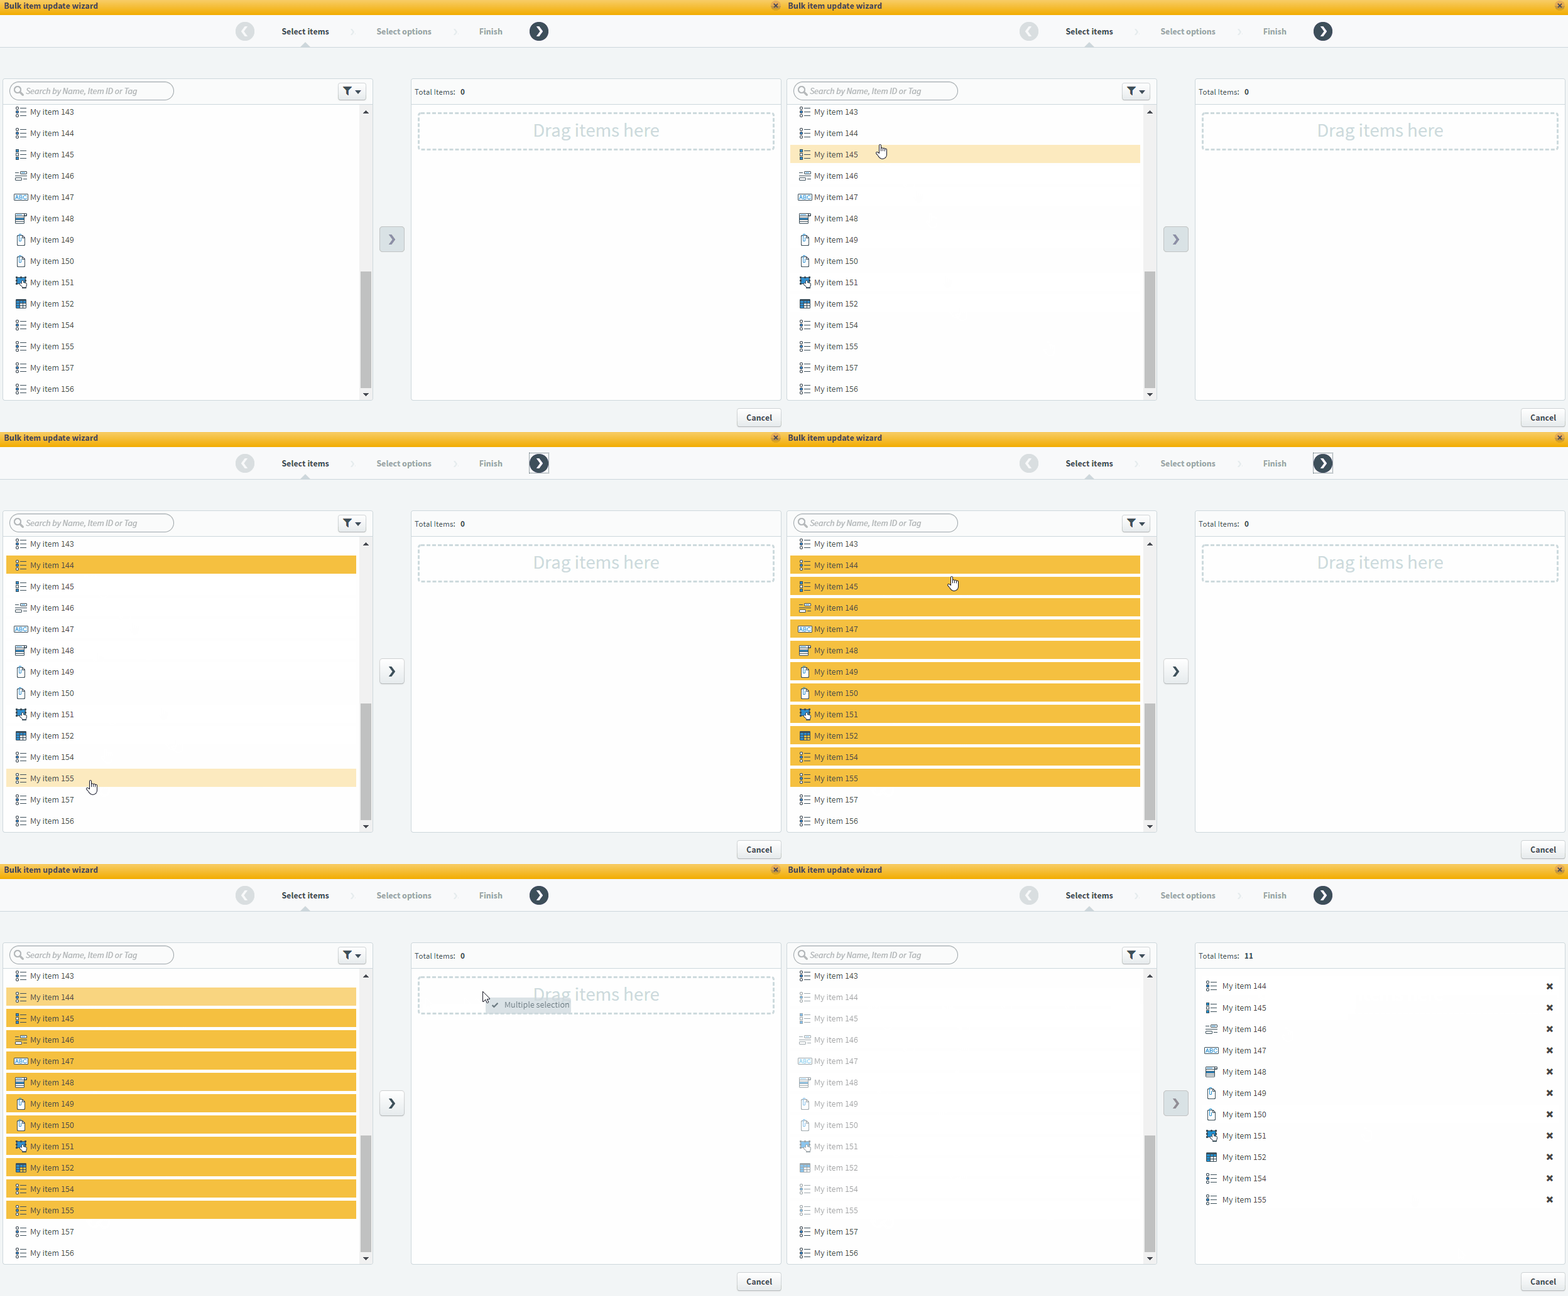
After selecting your update type in a subject-based bulk update, you must choose the items you want to update in the Select items tab of the Bulk item update wizard. Select items in the left list and drag them to the right list. Use Shift to select multiple items.
You can find specific items using the search bar and the Filter menu.
When you have chosen all the items you want to update, select Next .
Configuring item set settings
Depending on the update type, item sets may not be available. Refer to the table in step ‘2. Choose update type’ for information on which update types support item sets.
If item sets are supported for your selected update type, you can configure how they are included in the update.
Item Set Settings in a subject
Select Item Set Settings from the Bulk item update wizard.

Choose whether to include item sets and their child items, item sets only, or their child items only from the Item Set Settings options.
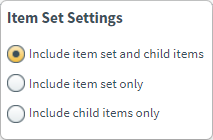
Your chosen configuration determines how item sets and their child items behave when you select them to be updated. Already selected items are not affected.
Item Set Settings in Item Search or Item Lists
If bulk updating Tags, Owner or Item Content, your item selection includes item sets, and the Show entire item set in results setting is enabled, Item Set Settings is the first step of the wizard.
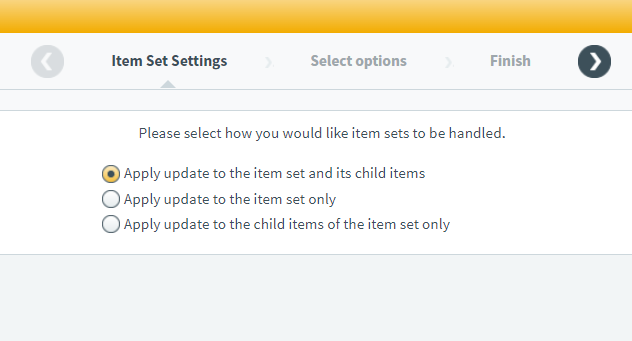
Choose whether to include item sets and their child items, item sets only, or their child items only. Select Next .
4. Select options
The Select options tab of the Bulk item update wizard has different options for each update type. Read the relevant section to learn more.
Updating source material
Adding source material

In the Select options tab, select Add Source Material to open the media library. Choose the source material you want to add to the items and select Add media to item.
To add the new source material to the item without affecting any source material currently on the items, select Keep All Existing Source Materials.
To replace all items’ current source material with the new source material, select Replace All Existing Source Materials.
Select Next to proceed.
Removing source material

The Select options tab lists all chosen items with their current source material. By default, all items are selected to have their source material removed. Clear the Remove checkbox next to any items you do not want to update.
Select Next to proceed.
Updating media
Adding media

In the Select options tab, use Select Media to open the media library. Choose the media you want to add to the items and select Add media to item.
Select a Choose layout option to determine the media’s layout.
| Icon | Setting | Description |
|---|---|---|
 |
Auto | Media is automatically laid out based on its dimensions. |
 |
Left of the Answer | Media is displayed to the left of the answer block. |
 |
Right of the Answer | Media is displayed to the right of the answer block. |
 |
Above the Question Text | Media is displayed above the question stem. |
 |
Above the Answer | Media is displayed between the question stem and the answer block. |
 |
Below the Answer | Media is displayed below the answer block. |
Select Next to proceed.
Removing media

The Select options tab lists all chosen items with their current media. By default, all items are selected to have their media removed. Clear the Remove checkbox next to any items you do not want to update.
Select Next to proceed.
Updating tags
Adding tags

The Select options tab displays the subject’s default and custom tag groups. Select a tag group and either enter the required tag value name in the Add New Tag Value field. Press Enter or select Add Tag Value to add the tag value to the bulk update.

Select Next to proceed.
Removing tags

The Select options tab displays the default and custom tag values currently used on all and/or some of the items.
Select a tag group to view its tag values. The number of items containing each tag value is displayed under Associated items. Select Toggle to either add or remove the relevant tag value from the bulk update.
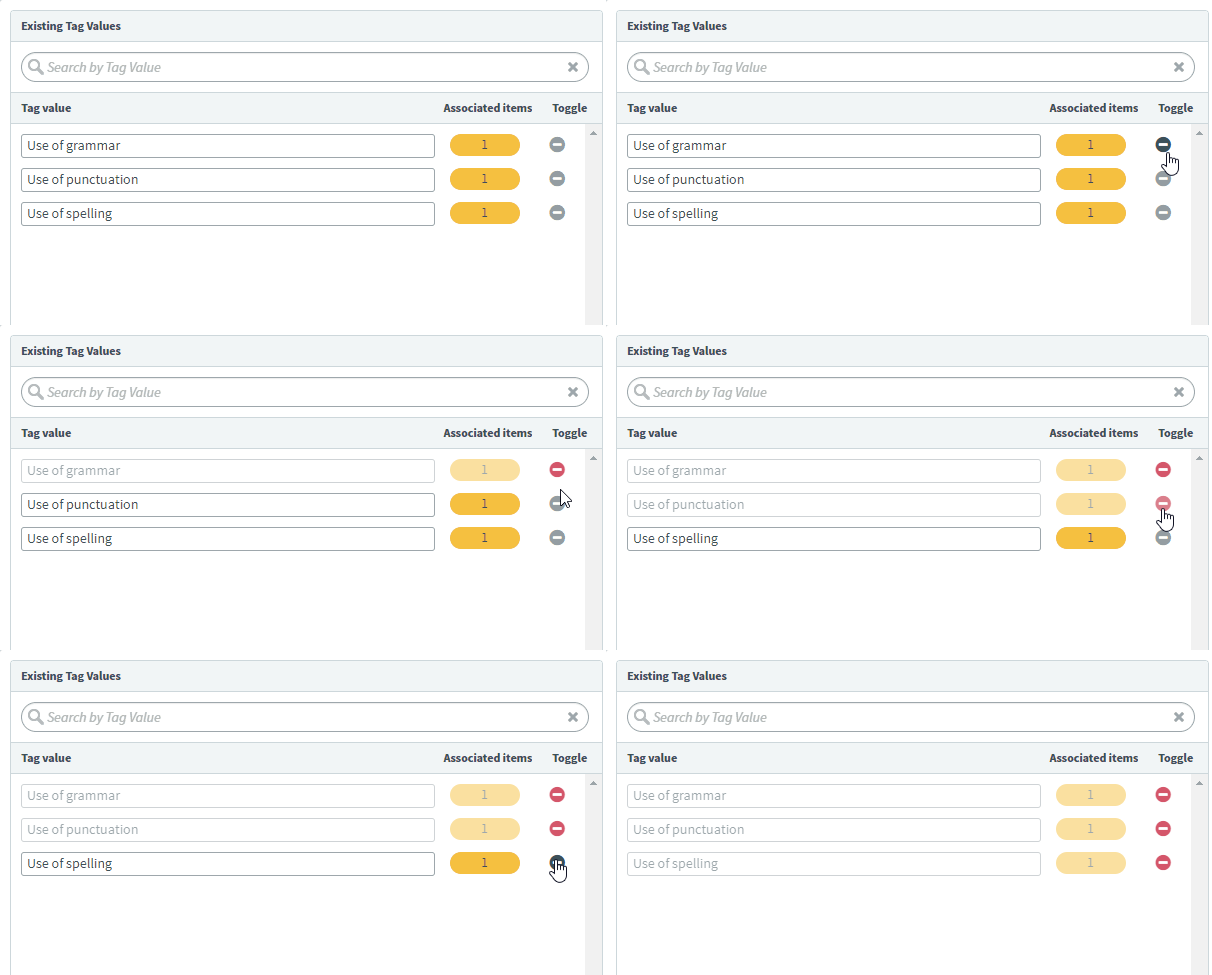
Select Next to proceed.
Uploading a CSV
To upload a spreadsheet of new tag values, select Upload CSV in the Select update type dialog.

In the Upload CSV dialog, select Download Sample CSV to download a template spreadsheet.
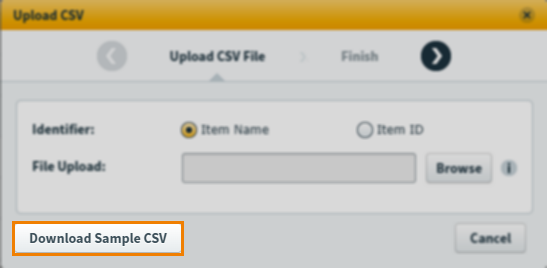
Determine the items to be updated in the Item Name column using either the items’ names or IDs. Spreadsheets can contain a maximum of 5,000 items, including item sets.
The spreadsheet is pre-populated with columns for the default tag groups (Learning Outcome, Unit, and Keyword) and IRT tags. You can add a new column for any custom tag groups in your subject.
Enter the tag values you want to add to the relevant columns. Multiple tag values must be separated by the pipe symbol (|). Tag values must exist in the subject.
Save the CSV file and return to Surpass. In the Upload CSV dialog, select the Identifier (Item Name or Item ID) you used in your spreadsheet.
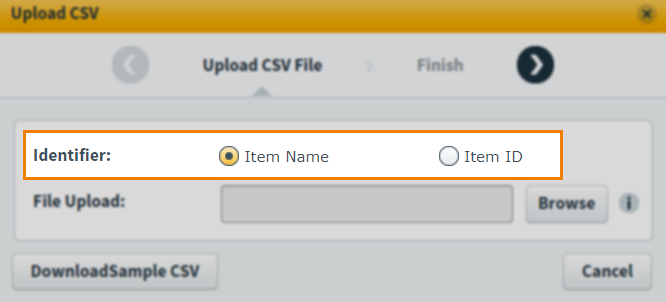
Use Browse to open your device’s file explorer and select your spreadsheet to upload it to Surpass.
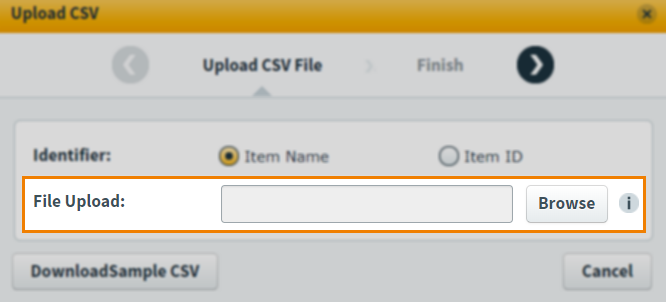
Select Next to proceed.
Updating labels
Adding labels

Use the Add Labels to your items menu in the Select options tab to choose between Alphabetic, Numeric, and Custom labels. You can edit any answer option label.
Select Next to proceed.
Removing labels
Go to ‘5. Finish the update’.
Updating comments
Updating status
Use the New Item Status menu in the Select options tab to choose a new workflow status for the selected items.
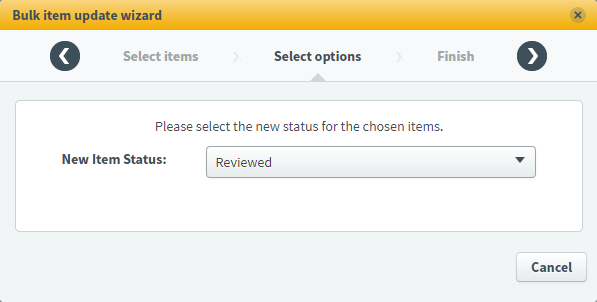
Select Next to proceed.
Updating item owners
Selecting a new owner
In the Select options tab, choose a new item owner for your chosen items from the New Item Owner drop-down menu.
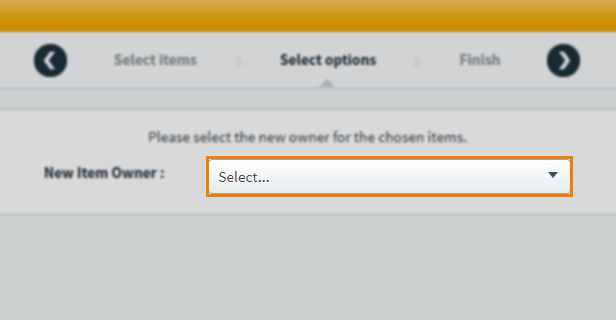
Uploading a CSV
To upload a spreadsheet of new item owners, select Upload CSV in the Select update type dialog.

In the Upload CSV dialog, select Download Sample CSV to download a template spreadsheet.
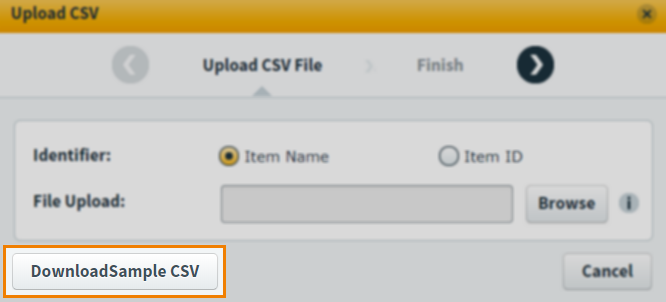
Determine the items to be updated in the Item Name column using either the items’ names or IDs. Spreadsheets can contain a maximum of 5,000 items.
Enter the user names of the items’ new item owners in the Owner column. Items can only have one owner.
Save the CSV file and return to Surpass. In the Upload CSV dialog, select the Identifier (Item Name or Item ID) you used in your spreadsheet.

Use Browse to open your device’s file explorer and select your spreadsheet to upload it to Surpass.

Select Next to proceed.
Updating item content
If exporting item content, select Export Item Content and then choose your items.
Choose which language variants of your items’ question stems and answer blocks you want to export. This can be the Default Item Language or any languages that are enabled in the Language Variants site settings. For more information, read ‘About Language Variants settings‘ in About Site Settings options.

If importing item content, select Import Item Content .
In the Upload CSV dialog, use Browse to open your device’s file explorer and select your spreadsheet to upload it to Surpass.
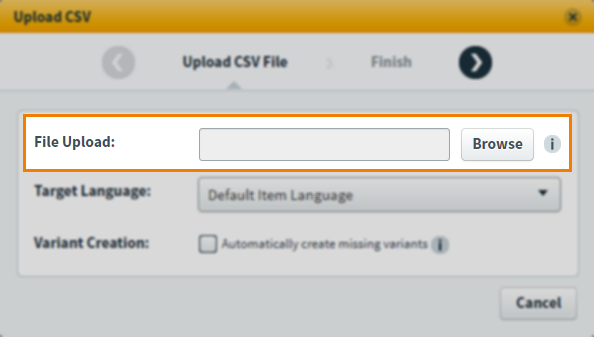
Choose which language variants of your items’ question stems and answer blocks you want to import (and replace). This can be the Default Item Language or any languages that are enabled in the Language Variants site settings. For more information, read ‘About Language Variants settings‘ in About Site Settings options.
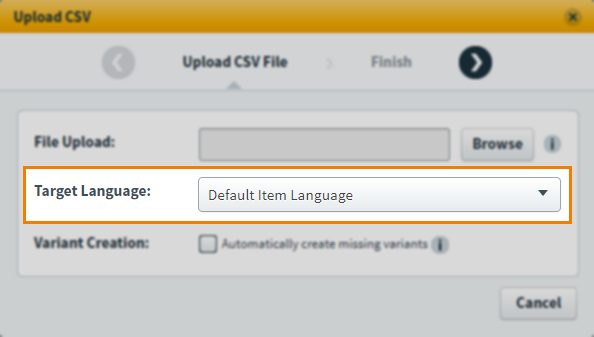
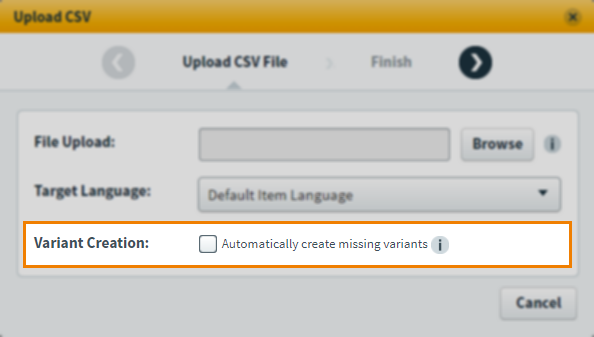
If there are any language variants missing in the target language, you can choose to automatically create those missing language variants by selecting the Automatically create missing variants setting. The imported content must match the default item structure.
Exported and imported CSVs contain the following information:
| Column | Description |
|---|---|
| System Identifier | Identifies the part of the item using a unique system identifier. |
| Friendly Identifier | Identifies the part of the item in a friendlier format; for example, ‘Item Stem 1’ or ‘Answer Option 1’. Other item assets can be exported for reference, but their contents cannot be edited. |
| Contents |
Contains any text in HTML format. |
Updating unit conversions
In the Select options tab, choose the conversion profile you want to use to update your items in Select Unit Conversion Profile. For more information, read Uploading a conversion profile.
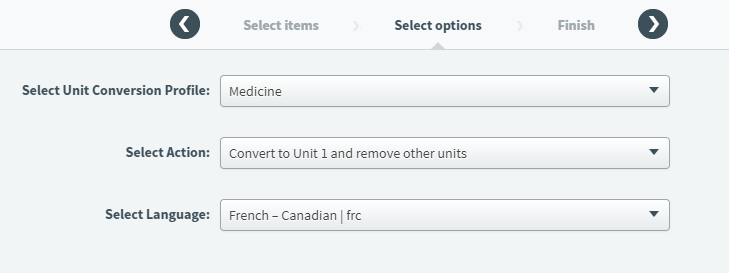
The following table displays the different actions you can take to bulk update units on items:
| Action | Description |
|---|---|
| Convert to Unit 1 and remove other units | Converts units to what is specified in the Unit 1 column in your conversion profile. |
| Convert to Unit 2 and remove other units | Converts units to what is specified in the Unit 2 column in your conversion profile. |
| Add Unit 1 and keep other units | Adds unit specified in Unit 1 column and keep any other units already in the items. |
| Add Unit 2 and keep other units | Adds unit specified in Unit 2 column and keep any other units already in the items. |
| Add both units | Adds both units specified in Unit 1 and Unit 2 columns. |
Choose which language variants of your items you want to update. This can be the Default Item Language, All Language Variants, or any languages that are enabled in the Language Variants site settings. For more information, read ‘About Language Variants settings‘ in About Site Settings options.
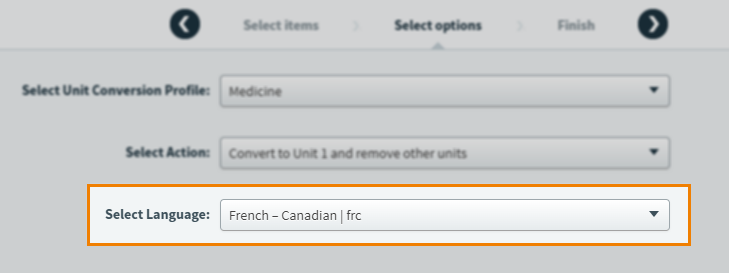
Select Next to proceed.
Uploading a CSV
To upload a spreadsheet of items with units to be converted, select Upload CSV in the Select update type dialog.

In the Upload CSV dialog, select Download Sample CSV to download a template spreadsheet.
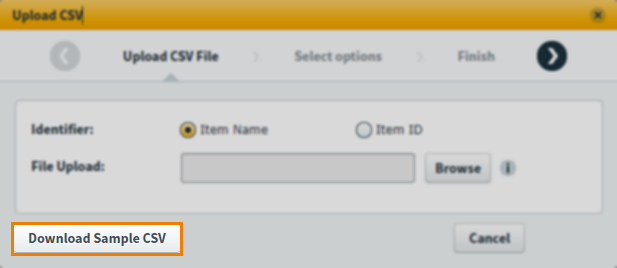
Determine the items to be updated in the Item Name column using either the items’ names or IDs. Spreadsheets can contain a maximum of 5,000 items, including item sets.
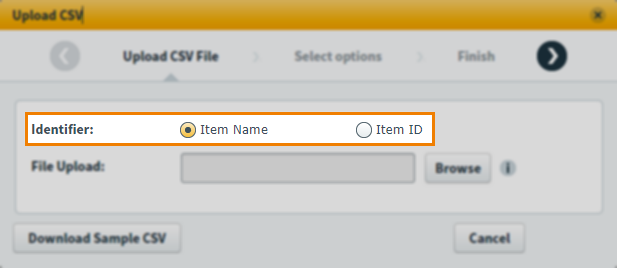
Save the CSV file and return to Surpass. In the Upload CSV dialog, select the Identifier (Item Name or Item ID) you used in your spreadsheet.
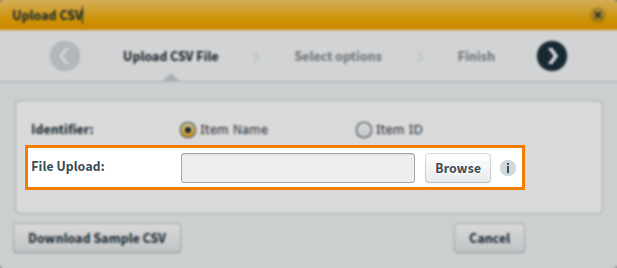
Use Browse to open your device’s file explorer and select your spreadsheet to upload it to Surpass.
Select Next to proceed to the Select options section. Refer back to the beginning of this section for information on how to proceed with your update.
Updating language variants
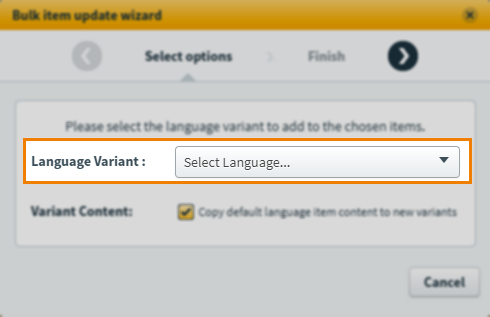
Choose a language variant to add to your items. This can be any languages that are enabled in the Language Variants site settings. For more information, read ‘About Language Variants settings‘ in About Site Settings options.
Choose whether to copy item content from each item’s default language variant to the newly created variants.
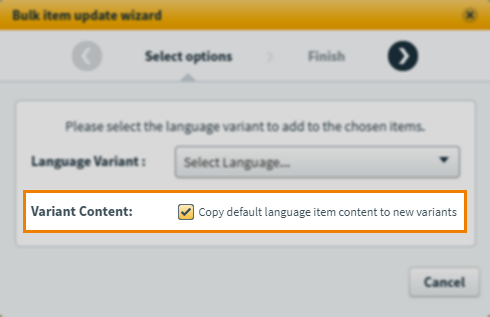
If Copy default language item content to new variants is not selected, newly created language variants are blank.
Select Next to proceed.
Uploading a CSV
To upload a spreadsheet of items to add language variants to, select Upload CSV in the Select update type dialog.

In the Upload CSV dialog, select Download Sample CSV to download a template spreadsheet.

Determine the items to be updated in the Item Name column using either the items’ names or IDs. Spreadsheets can contain a maximum of 5,000 items, including item sets.
Save the CSV file and return to Surpass. In the Upload CSV dialog, select the Identifier (Item Name or Item ID) you used in your spreadsheet.

Use Browse to open your device’s file explorer and select your spreadsheet to upload it to Surpass.

Select Next to proceed to the Select options section. Refer back to the beginning of this section for information on how to proceed with your update.
Duplicating items
The Select options tab gives you the same duplication options as when duplicating items from within a subject, including the option to create a new item list containing the newly created items.
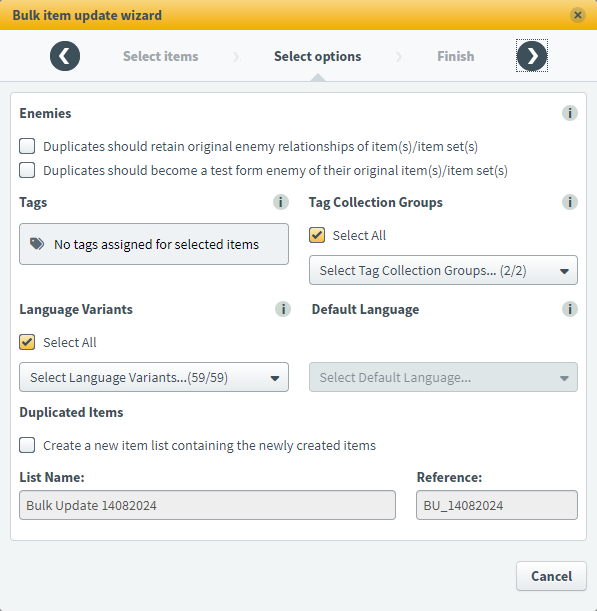
Duplication options include:
- Duplicating enemy items (including acquired enemy items)
- Making duplicated items enemies of the original items
- Duplicating tag categories
- Duplicating tag groups and/or read-only tag groups
- Duplicating tag collections (if enabled in Site Settings)
- Duplicating language variants (if item language variants are enabled)
- Creating a new item list containing the newly created items
Duplicates take the original items’ names and prefaces them with Copy of. The duplicate items contain all the original items’ settings, media, enemies, tags, and tools. However, all duplicate items’ workflow statuses are set to Draft.
Item sets are always duplicated along with all their child items.
The user that ran the bulk update process becomes the duplicate items’ owner. For more information, read About item owners.
If an item's default language is deselected and it does not have the newly selected default language as an existing language variant, it will not be duplicated. For more information on item language variants, read Creating and managing language variants.
5. Finish the update
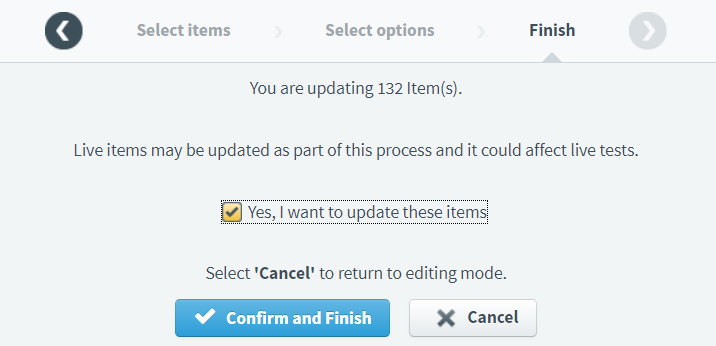
The Finish tab of the Bulk item update wizard displays a summary of the chosen update and asks you to confirm that you want to update the items. Select Yes, I want to update these items to enable the Confirm and Finish button.
Select Confirm and Finish to start the update.
Surpass performs the update process in the background, allowing to continue working in the system. You are emailed when the update is complete with a report on what items were updated and details on any issues if the update could not be performed.
Further reading
To learn more about items in Surpass, read the following articles:

Adding comments
Use the Add a Comment to your items field in the Select options tab to enter a comment that will be added to all the selected items. Comments have a limit of 500 characters.
Select Next to proceed.
Removing comments
Go to ‘5. Finish the update’.
Uploading a CSV
To upload a spreadsheet of new comments, select Upload CSV in the Select update type dialog.
In the Upload CSV dialog, select Download Sample CSV to download a template spreadsheet.
Determine the items to be updated in the Item Name column using either the items’ names or IDs. Spreadsheets can contain a maximum of 5,000 items, including item sets.
Enter the comment you want to add to each item in the Comment column, up to 4000 characters per comment. No comments are added to items with a blank cell.
Save the CSV file and return to Surpass. In the Upload CSV dialog, select the Identifier (Item Name or Item ID) you used in your spreadsheet.
Use Browse to open your device’s file explorer and select your spreadsheet to upload it to Surpass.
Select Next to proceed.