Managing an item list
When you have created an item list, you can edit and manage your item list in the Item Lists screen.
This article explains how to manage your item list, including how to customise the grid columns and sort your item list.
In this article
Viewing items in the Item Lists grid
To view the Item Lists screen, go to Item Authoring > Item Lists.

Select an item list in the Item Lists screen to view and edit the items in that list.

When you have selected an item list, you can view a summary of the item list’s details.

| Field | Description |
|---|---|
| Item List Name | Displays the name of the item list. |
| Parent Subject | Displays the item list’s associated parent subject. |
| Reference | Displays the item list’s unique alphanumeric reference code. |
| Owner | Displays the username of the person who created the item list. |
| Date Created | Displays the date on which the item list was created. |
| Last Updated | Displays the date and time the item list was last updated. |
| Item position defined by |
Displays how the items are ordered in the item list. Items can be ordered in multiple ways:
|
The following table displays the default columns shown in the Item Lists grid.

| Column | Description |
|---|---|
| Position | Displays the position of the item in the item list. |
| Question Type | Indicates the item’s type. This includes questions, basic pages, survey items, and item sets. |
| Name | Displays the item’s name. |
| Item Set – Name |
Displays the name of the item set the item belongs to. |
| Item Set – Child Item Count |
Displays the number of child items within the item set. |
| Subject | Displays the subject that the item is associated with. |
| Item Lists | Indicates whether the item has been added to an item list. |
| Subject Master List | Indicates whether the item has been shared with a subject master list. |
| Status | Displays the workflow status of the item. The default workflow statuses are: Draft, To Review, Reviewed, Live, and Withdrawn. |
| Last Edited By | Displays the username of the person who last edited the item. |
| Last Edited At | Displays the date and time the item was last edited. |
Filtering your item list
You can customise and filter the columns shown in the grid to further refine your item list.
Customising the grid columns
You can configure the columns in the grid to refine your item list. Expand the following section for information on how to customise grid columns.
Select Customise to customise the visible columns in the grid.
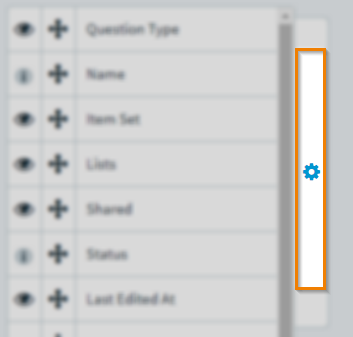
Select to remove existing columns in the grid. Select to add that column to the grid. Select Move to change the position of a column within the grid.
Select Apply to save your changes to the grid. Select Reset to revert the grid back to its default columns.
The following table displays the additional columns that can be added to the Item Lists grid.
| column | Description |
|---|---|
| Item ID | The item’s ID. |
| Item Purpose | The purpose of the item as defined in Item Authoring. |
| Created At | The date the item was created. |
| Created By | The user who created the item. |
| Marking Type | The marking type of the item. This can be set to computer-marked or human-marked. |
| Centre | The centre that the item belongs to. |
| Item Owner | The owner of the item. |
| Tags |
Any tags associated with the item.
NOTE: Tags are hidden by default.
|
Filtering your item list
You can filter the results grid column data after a search has been made. Expand the following section for information on how to filter results.
To filter the visible data in a Question Type, Item Set, Subject, Lists, Shared, Status, Last Edited By, Centre, Item Purpose, Created By, Item Owner, or Marking Type column, select Filter .

Select the relevant filter options in the menu and select OK to set the filter. Select Cancel to reset the filter.

There are different options available for columns with numerical data, such as Last Edited At, Created At, and Mark. Select the magnifying glass to reveal the available filter options.

The following table displays the available filter options for numerical columns.
| Filter option | Description |
|---|---|
| is equal to | Only displays data that is an exact match with the chosen date (Created At and Last Edited At) or number (Mark). |
| to (inclusive) |
Displays all data with dates earlier than, and including, the chosen date for Created At and Last Edited At columns.
NOTE: to (inclusive) is not available for the Mark column.
|
| from (inclusive) |
Displays all data with dates later than, and including, the chosen date for Created At and Last Edited At columns.
NOTE: from (inclusive) is not available for the Mark column.
|
| is between | Displays all data that falls between the chosen dates (Created At and Last Edited At) or numbers (Mark). |
| reset | Resets any currently applied filters. |
The following table displays the available filter options in the Item Search screen:
| Filter Option | Description |
|---|---|
| Question Type | Filter by question type. |
| Item Purpose | Filter by the item’s purpose as defined in Item Authoring. |
| Centre | Filter by a centre. |
| Subject | Filter by a subject. |
| Marking Type | Filter by the item’s marking type. This can either be computer-marked or human-marked. |
| Item Set – Name | Filter by an item set. |
| Created By | Filter by the user who created the item. |
| Item Owner | Filter by the item’s owner. |
| Last Edited By | Filter by the last user who edited the item. |
| Status | Filter by the workflow status of the item. The default workflow statuses are: Draft, To Review, Reviewed, Live, and Withdrawn. |
| Last Edited At | Filter by when the item was last edited. |
| Created At | Filter by the date on which the item was created. |
| Mark | Filter by the item’s mark. |
| Shared |
Filter by if the item has been shared with a subject master list.
NOTE: For more information about subject master lists, read Sharing items with a subject master list from the Item Search screen.
|
| Lists | Filter by items that are and are not in a standard item list. |
| Tags | Filter by any tags associated with the item. |
| Tag Collections | Filter by any tag collections associated with the item. |
Select Reset Options to remove any filters you have applied to the results grid.
Sorting the grid columns
You can sort the columns in the grid to reorder your items. Expand the following section for information on how to sort columns.
Select a column header to sort the cell data alphabetically or numerically.

The arrow icon on the column header represents whether the information in the column is sorted in ascending () or descending () order. You can toggle between ascending or descending order by selecting the column header.
Select Reset Options to remove any sorting you have applied to the results grid.

Showing entire item sets
Items in item sets can be displayed either individually or collectively. Expand the following section for information on how to show entire item sets.
Select Show entire item set in results.

All items in an item set can be displayed by selecting the item set’s expand icon. Items are displayed in the order they appear in the item set, defined in Item Authoring, in a separate sub-table.

To collapse the item set, select the item set’s collapse icon.
Working in the Edit List screen
Select Edit List to edit the details of your item list, import additional items to your item list, and perform multi-column searches.

Editing your item list
In the Edit List screen, you can import additional items to your item list, replace items in your item list, or update the order of the items in your item list.
In the Edit List screen, select Import items into list to edit your item list.

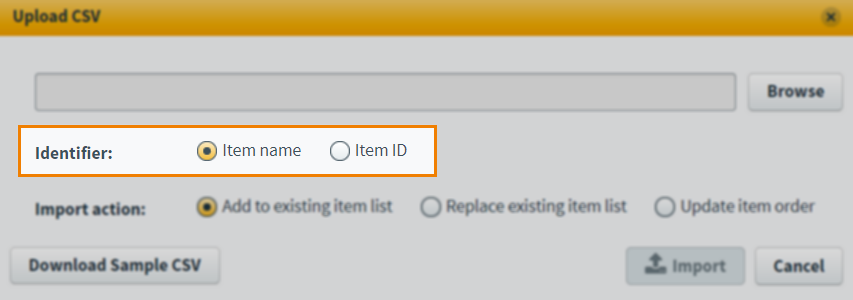
In the Upload CSV dialog, choose how Surpass identifies your items in Item Authoring. Select Item Name to search for your items by name. Select Item ID to search for your items by their unique ID number.
You can choose to import additional items to your item list, replace items in your item list, or update the order of the items in your item list.
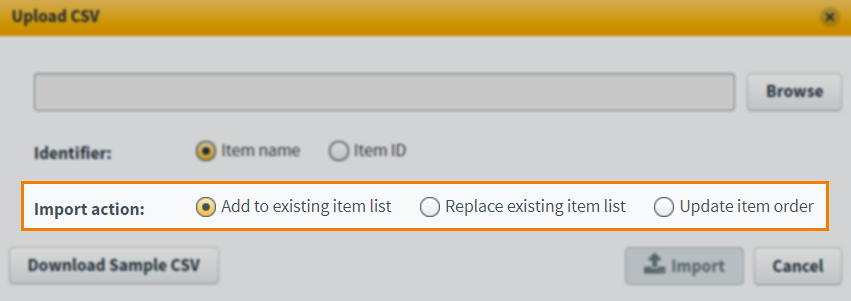
Choose from three import actions:
- Add to existing item list – Adds the items specified in your CSV to your item list. The additional items appear at the bottom of your item list.
- Replace existing item list – Replaces your item list with the items specified in your CSV.
- Update item order – Updates the order of the items in your item list. The items are updated in the order specified in your CSV.
Select Download Sample CSV to download a template spreadsheet.

The following table lists the columns you can add to the template spreadsheet. Use one row for each item.
| Column | Description |
|---|---|
| Item ID | Enter the item’s unique ID number. |
| Item Name | Enter the item’s name. |
Select Browse in the Upload CSV dialog to open your device’s file explorer. Choose the spreadsheet to upload to Surpass.

Select Import to start the import.
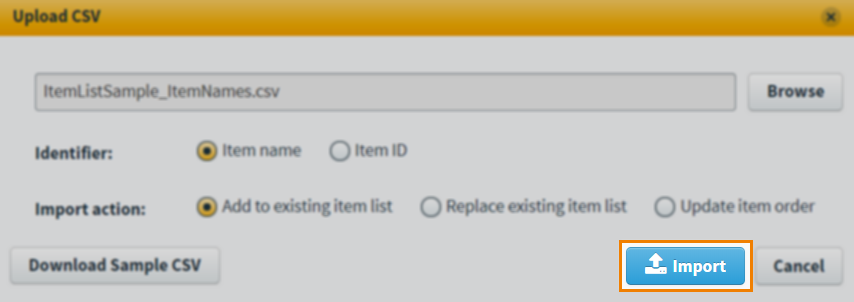
When the import is complete, select View Report to view a report on what items were imported and details on any issues if the import could not be performed.
Sorting multiple columns
Sort multiple columns in the grid to further refine the order of items in your list.
You can sort multiple columns in the grid by ascending or descending order. You can sort any column in the grid. Select Remove to remove a sort.
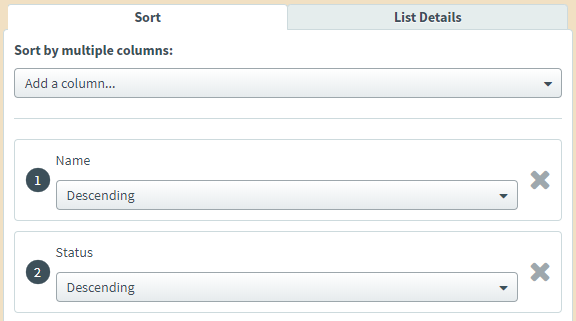
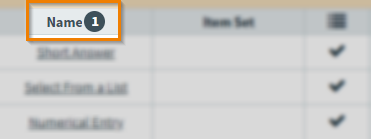
You can see a number on the column header after sorting on that column. Up to five columns can be sorted at one time.
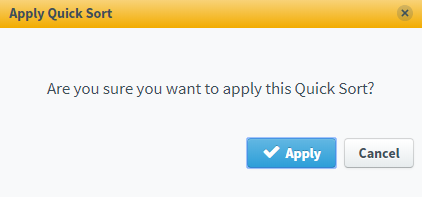
Select Apply Quick Sort to save your changes.

Select Apply to confirm your changes.
Viewing item list details
You can view and edit details about your item list in List Details.
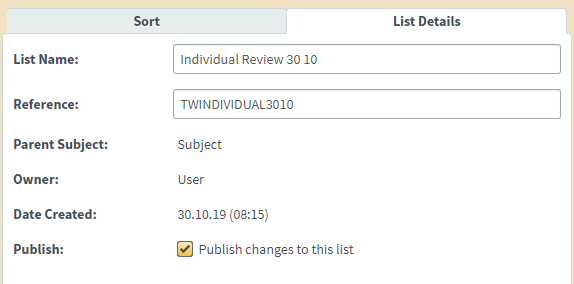
The following table displays the details in the List Details tab.
| Setting | Description |
|---|---|
| List Name | The name of the item list. |
| Reference | An alphanumeric reference code used to identify your item list. |
| Parent Subject | The parent subject associated with the item list. |
| Owner | The owner of the item list. |
| Date Created | The date on which the item list was created. |
| Publish |
Select the checkbox to publish your item list.
NOTE: The Publish checkbox is only available if it has been enabled in Site Settings. For more information, read About Site Settings options.
|
Select Save Changes to save your item list details.

Deleting items from your item list
You can delete items from your item list in the Edit List screen.
Select the items you want to delete from your item list.
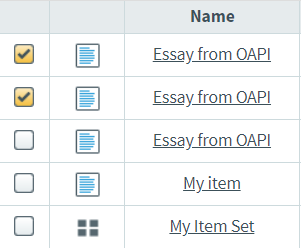
Select Delete items from list to delete the selected items.

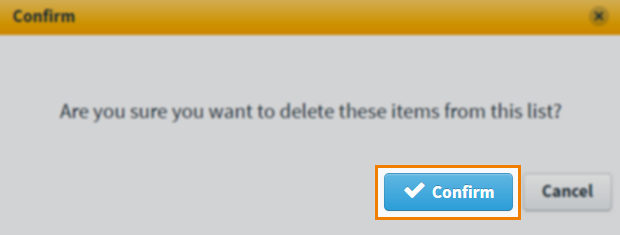
Select Confirm to save your changes.
Viewing the tags, details, relationships, and statistics panel in the Edit List screen
The Item Lists grid displays additional information about your items.
Tags
The Tags tab displays any tag categories, tag groups, or tag values associated with the item. For more information about tags, read Using tags in items.

Select Open Tag Collections to view any tag collections associated with the item. For more information about tag collections, read Setting up subject tag collection groups.
Details
The Details tab displays information about the item, including the item ID and the total mark.

You can see the following information in the Details tab.
| Details | Description |
|---|---|
| ID | The item’s ID. |
| Question Type | The item’s question type. |
| Mark | The total mark for the item. |
| Container | The folder or item set associated with the item. |
| Version | The version of the item. |
| Marking Type | The item’s marking type. This can be computer-marked or human-marked. |
| Created By | The user who created the item. |
| Created At | The date the item was created. |
Relationships
The Relationships tab displays any test form or section enemies associated with the item, if the item is part of an item set, or if the item has been shared with any subjects.

Statistics
The Statistics tab displays statistics related to the item list’s reliability based on items you select.

If your instance of Surpass is configured to use this functionality, you must create numeric tag groups depending on the statistics required, and input statistics for the individual items in your item list as tag values. For more information on setting up tag groups, read Setting up tag groups.
The P Value, and R Value statistics for individual items can be found in the Items Delivered report, in the Reporting screen. For more information on viewing Items Delivered reports, read Viewing Items Delivered reports.
Select your items and select Update to generate statistics.

The following statistics can be generated in the Statistics tab.
| Statistic | Description |
|---|---|
| Cronbach’s Alpha |
Expresses the estimated reliability of the test form by calculating the internal consistency of the item list. The Cronbach’s Alpha can be any value less than or equal to 1, including negative values. The closer the value is to 1, the more reliable the test form is estimated to be. |
| Standard Deviation |
Expresses by how much individual scores deviate from the mean. |
| Mean Score |
Expresses the average score achieved by all candidates as a percentage. |
| KR20 |
Expresses the estimated reliability of the test form. The value can be anything less than or equal to 1, including negative values. The closer the value is to 1, the more reliable the test form. This can be applied to dichotomously scored item types such as Multiple Choice items. |
| P Value |
Expresses item difficulty calculated by dividing the number of times an item has been answered correctly by the number of times the item has been attempted. P values are represented as a decimal number between 0 and 1. The closer the P value is to 1, the easier the item is considered to be. |
| R Value |
Expresses the correlation between candidate performance at item and test level. R values range between -1 and +1, with 1 indicating a positive correlation, 0 indicating no correlation, and -1 indicating a negative correlation. |
Select Close to return to the Item Lists screen.
Further reading
Now you know how to manage your item list, read the following articles to learn more:
