Working in an Item Analysis Review task as a lead assignee
Review tasks allow you to inspect an item list on an item-by-item basis. Item Analysis Review tasks allow lead assignees to see assignees’ comments and use these to help influence their decision to Approve, Change Answer, or Delete the items.
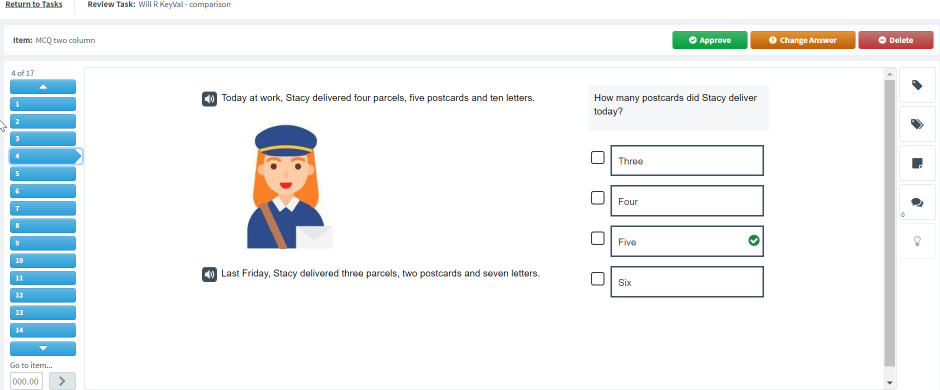
This article explains how to work in an Item Analysis Review task as a lead assignee.
In this article
1. Open the task
On the Tasks list, select the Review task you want to work on. The task details panel displays the task’s description and doughnut charts representing the number of submitted items and days until the deadline. You can also download attachments if the task has any. For more information, read About the Tasks screen.

Select Open Task to open the Item Review screen and start working on the Review task. This changes the task’s status to In progress.

2. Preview an item
The Item Review screen contains all items in the associated item list. Items are displayed in the test driver, allowing you to see the items from a candidate’s perspective.
Use the item information panel to view the item’s settings.
| Icon | Setting | Description |
|---|---|---|
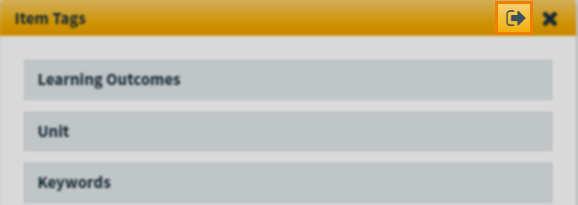
| Item Tags |
View the item’s assigned tag groups and tag values. For more information, see Using tags in items. |
|
| Item Tag Collections | View the item’s assigned tag collections. For more information, read Using tag collections in items. | |
| Citations | View the item’s citations. For more information, see Adding citations to an item. | |
| Comments | View the item’s comments left by all users assigned to the task. | |
| Candidate Feedback | View any candidate feedback that has been added to the item. For more information, see Adding candidate feedback to items. |
Select Undock to pop out the item settings and source material. Select and drag the dialog window to move it around the screen.

Select Dock to return the dialog window to the right-hand side panel.
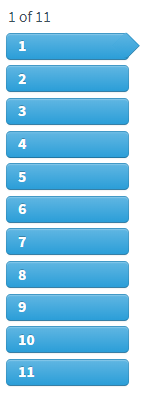
Select an item breadcrumb on the item navigation panel to go to another item.
Alternatively, you can enter a specific item number into the Go to item field to navigate directly to that item.
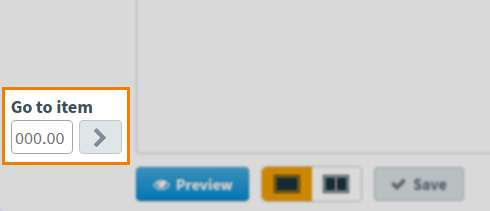
If an item is in an item set, you can enter a decimal (such as 1.3) in the Go to item field to navigate directly to that item.

You can also select Previous and Next to move through the item list.

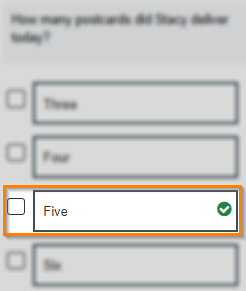
Item’s correct answers are always denoted by a green tick.
Flagging items
You can flag items to mark them for an action at a later time. As lead assignee, you can see all assignees’ flagged items.
Exporting task items
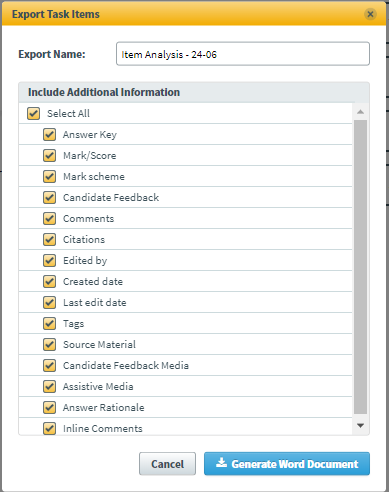
As lead assignee, you can export the task items to analyse them in further detail. For further information, read Downloading Review task reports and Exporting Review task items.
3. Make a final decision
After a final decision has been made on an item, it is no longer available for assignees to work on in this task. If an assignee is currently editing the item you are making a final decision on, you have the option to remove them and discard their changes or wait until they have saved their corrections.[/important]
In Item Analysis Review tasks, assignees comment on the quality of items. Lead assignees have the final vote on the items. There are three vote types:
- Delete is for poor items that do not meet the standards for testing.
- Change Answer is for items that will be suitable for testing after minor amendments, but are not satisfactory in their current state.
- Approve is for items that need no corrections.
As lead assignee, you have the final decision on items. After reviewing assignees’ comments, select Approve, Change Answer, or Delete as your final decision on the item and return the results to the task manager.

You can provide further explanation (maximum 4000 characters) to your decision in the Provide a comment section. Comments are optional. This text is saved as a comment against the item and is visible in Item Authoring. For more information, read Leaving comments on items.

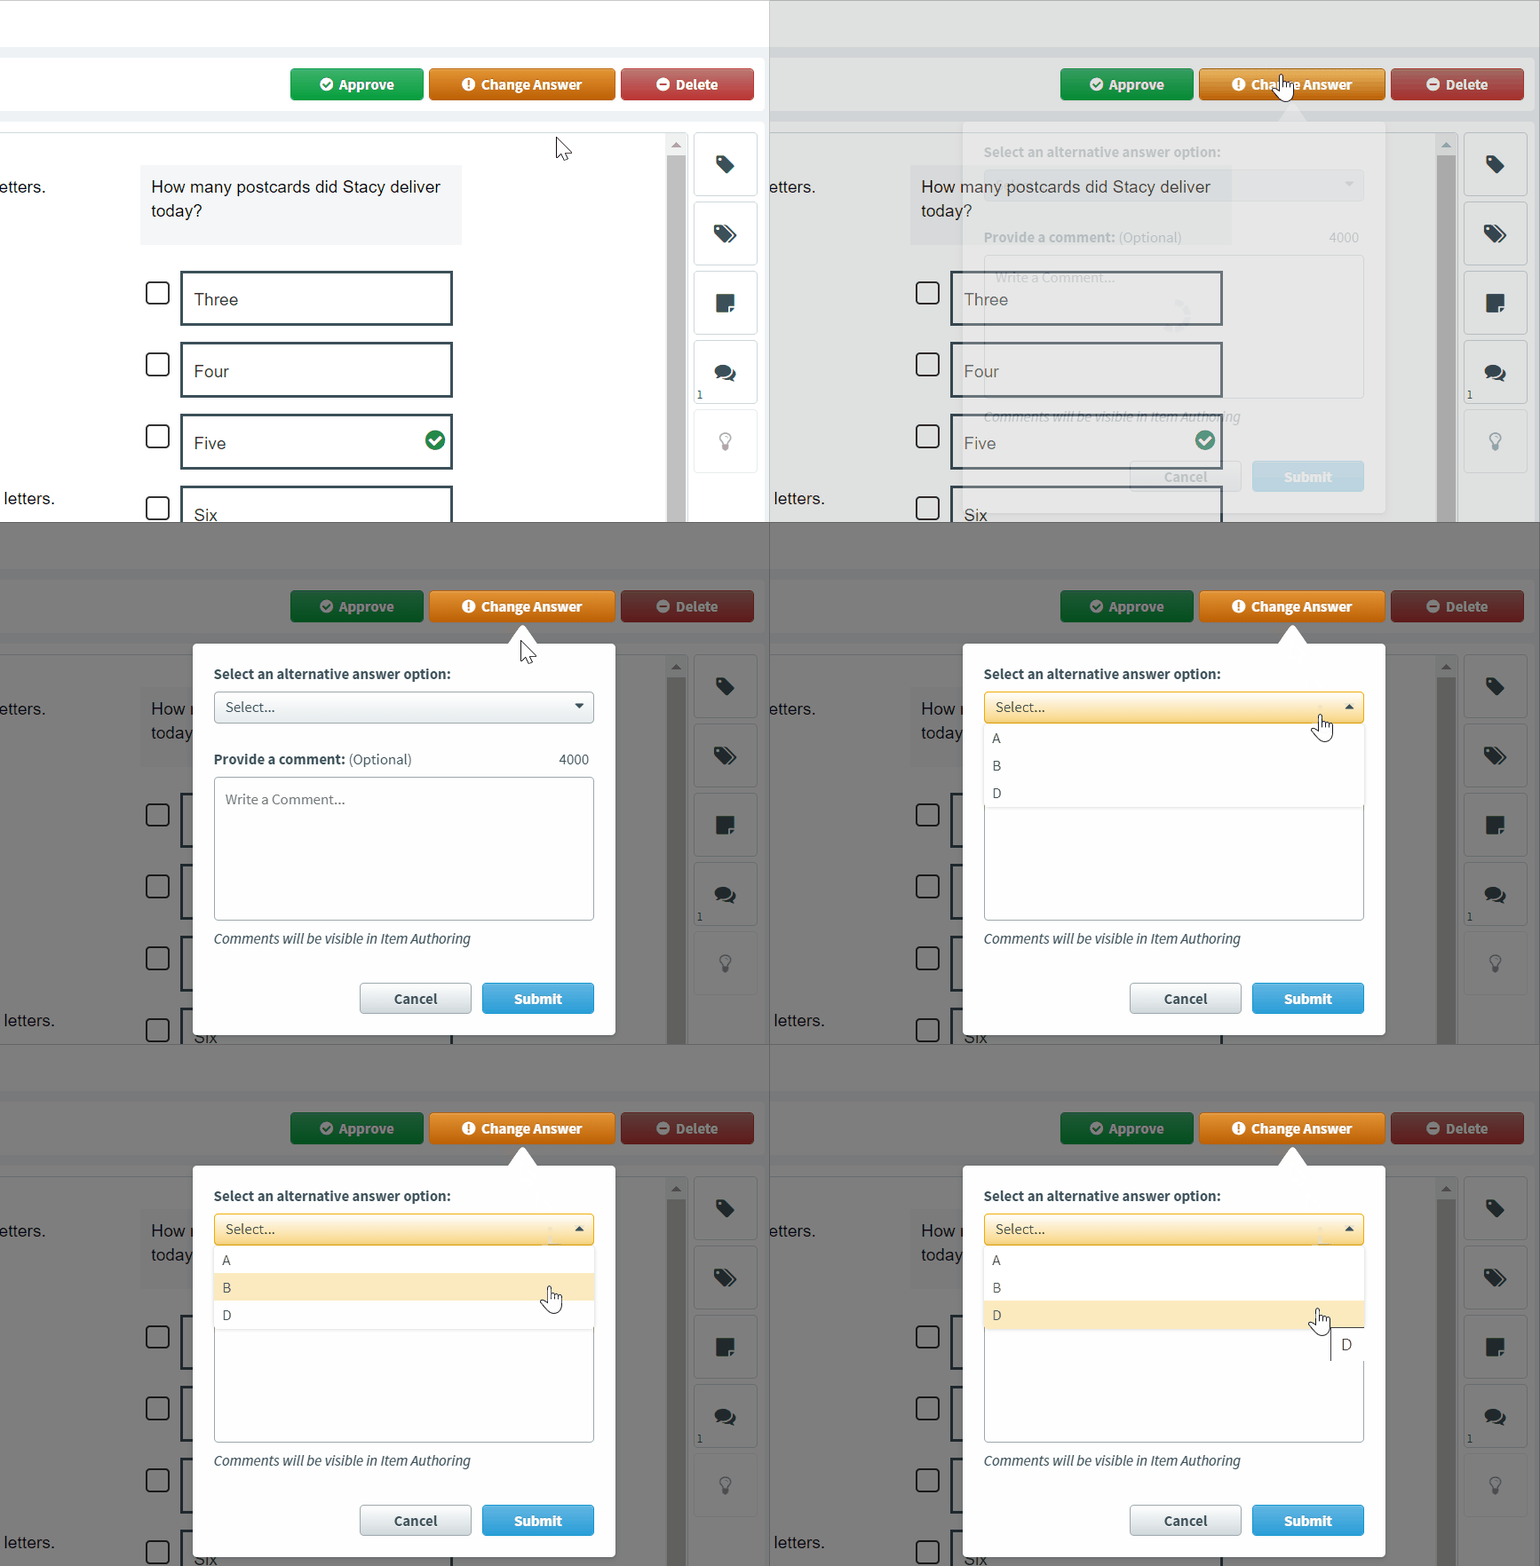
If you select Change Answer, you can select alternative answer options if available.
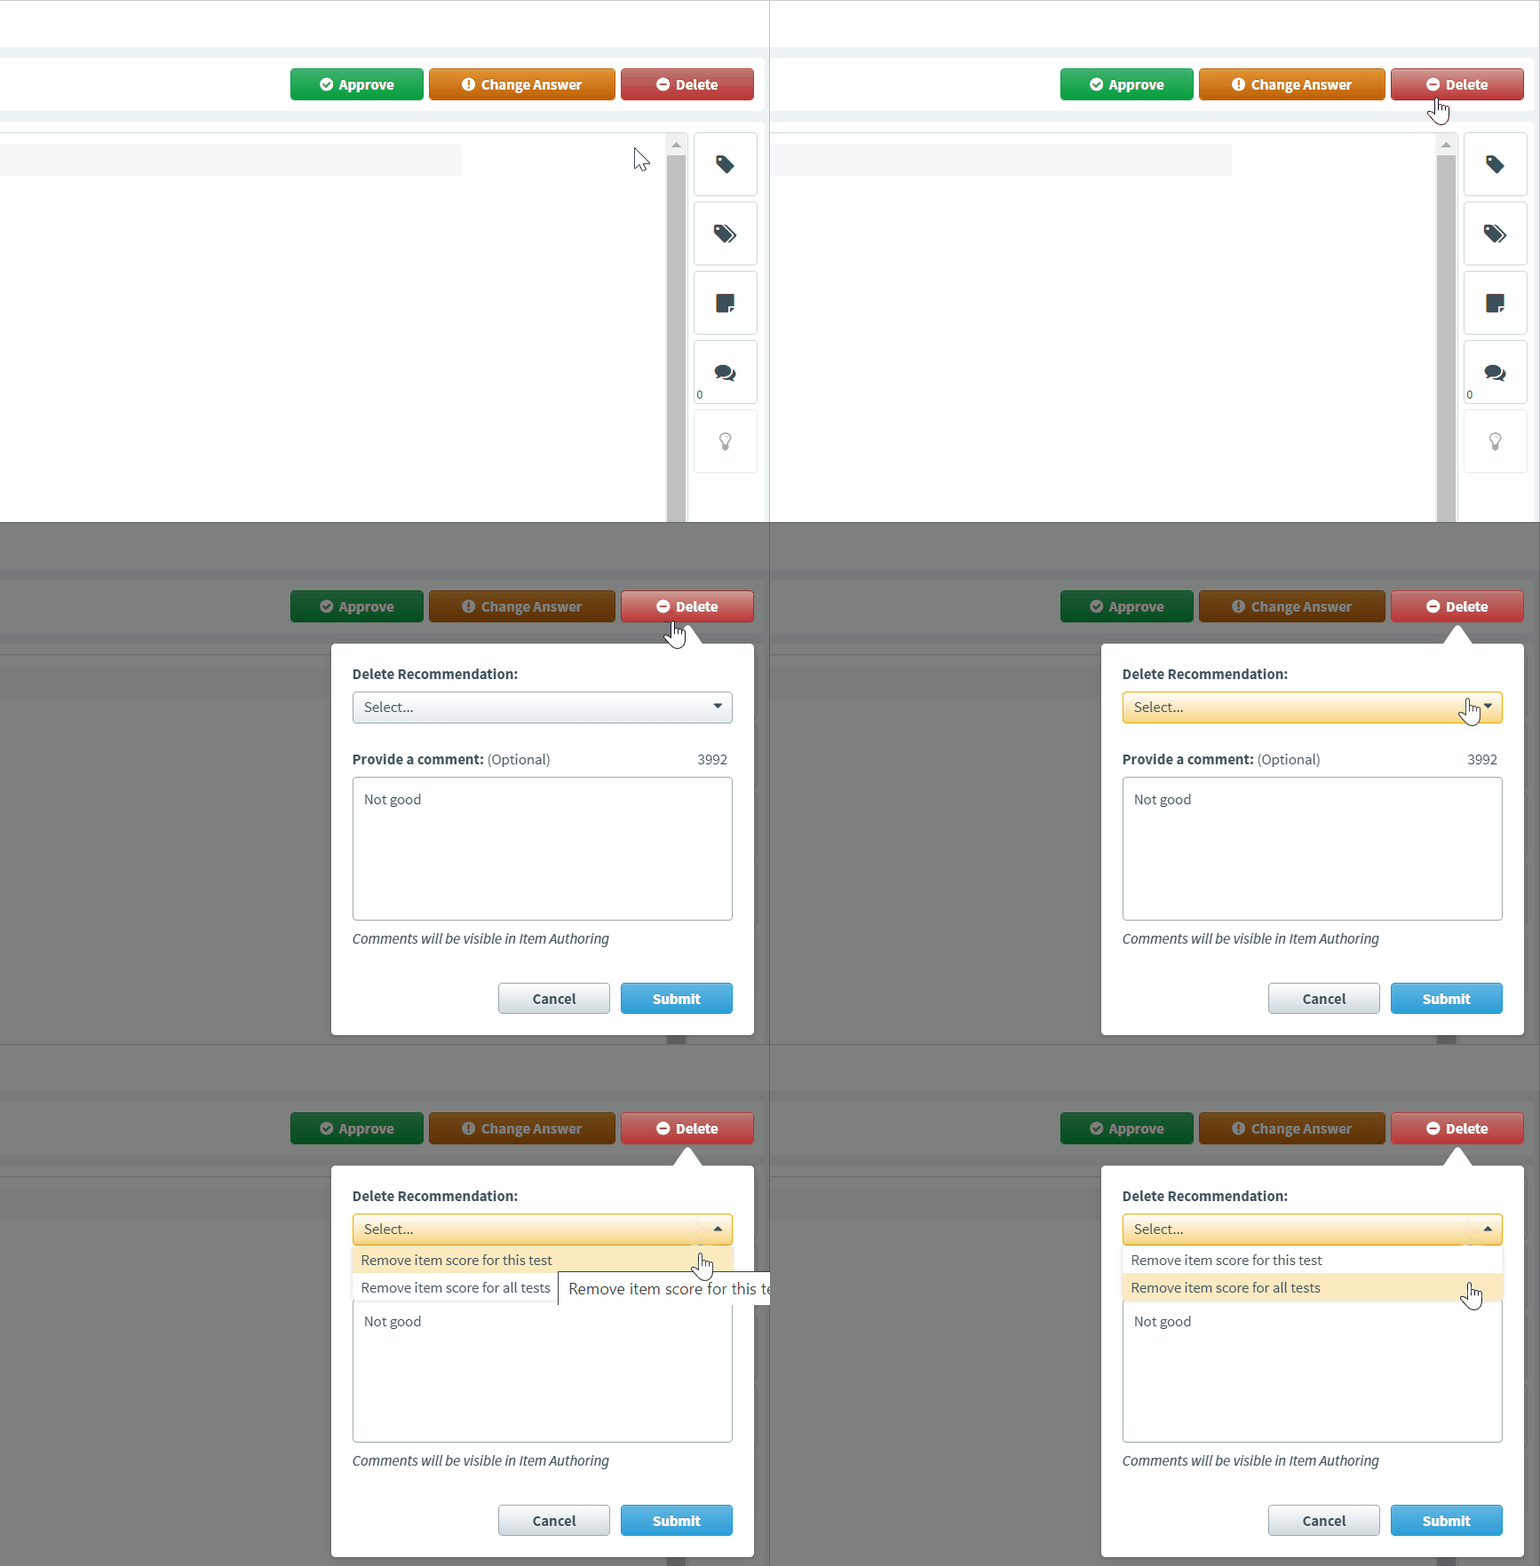
If you select Delete, you can provide further recommendations on top of your comment using the drop down menu. You have two options:
- Remove item score for this test – Remove the item score for the test (item list) this task is associated with.
- Remove item score for all tests – Remove the item score for all tests (item lists) this item is associated with.
Select Submit to confirm your final decision.

Your decisions are visible on the item list breadcrumbs.

Reading comments
Assignees can only comment on the items provided in the task. These comments are shown in the Comments in the right-hand side panel.
4. Close the task
After making a final decision on all items, you can close the Item Analysis Review task.
Select Return to Tasks to close the task and return to the Tasks screen.

5. Finalise the task
Select Finalise Task in the task details panel when you are satisfied that the task is complete.

This changes the task’s status to Complete.
Marking a task as incomplete
You can mark a task as incomplete if you incorrectly select Finalise Task or the task needs to be reopened for further work.
Further reading
For more information on Review tasks, or working in other task types as a lead assignee, read the following articles:
- About task types
- About the Tasks screen
- About task managers, assignees, and lead assignees
- Working in an Authoring (Edit Existing Items) task as a lead assignee
- Working in an Authoring (Create New Items) task as a lead assignee
- Working in an Individual Review task as a lead assignee
- Working in a Shared Review task as a lead assignee
- Working in a Standard Setting task as a lead assignee




Select Comments to open the Comments dialog and see the comments assignees have left on the item.