Setting item duration
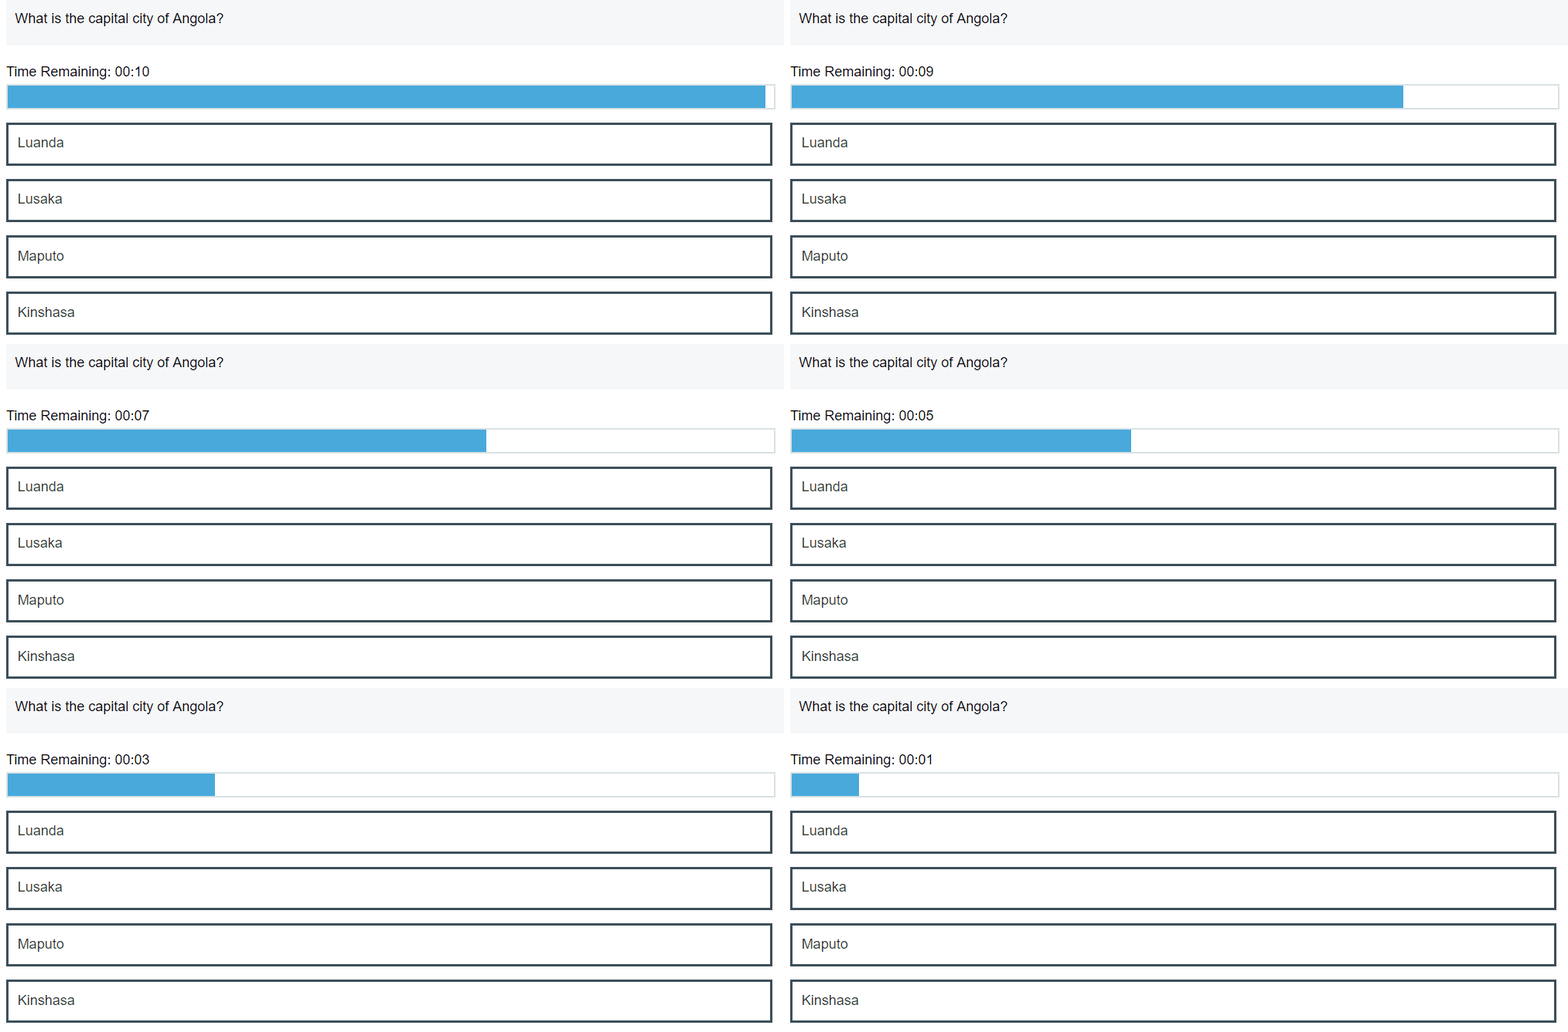
When creating items for delivery in HTML tests, you can set an item-level timer. This determines how much time candidates have to respond to the item. Item timers are separate from test timers.
In delivery, a progress bar and timer show candidates how long they have until the next item is presented. The countdown begins when the item has fully loaded. When the time expires, candidates are automatically moved to the next item.
This article explains how to set up item duration for HTML subject items.
In This Article
1. Open the item duration settings
To set up the duration of your item, select the Settings icon to open the Item Settings panel.

Next, select the Item Duration tab.

2. Set up item duration
By default, Item Duration is set to Untimed. This means candidates can spend as long as they want on the item, excepting any test or section timers that might also be in effect on the test form.
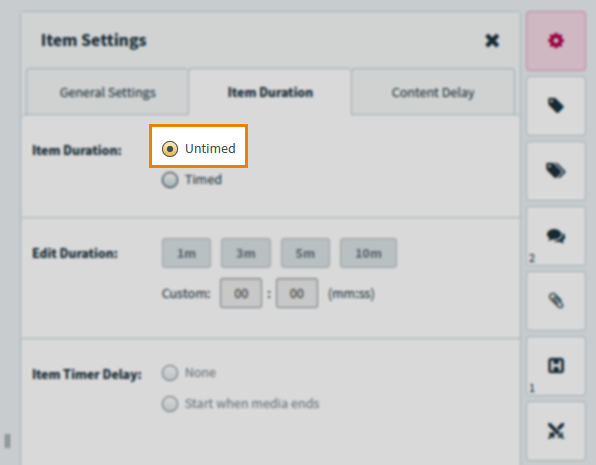
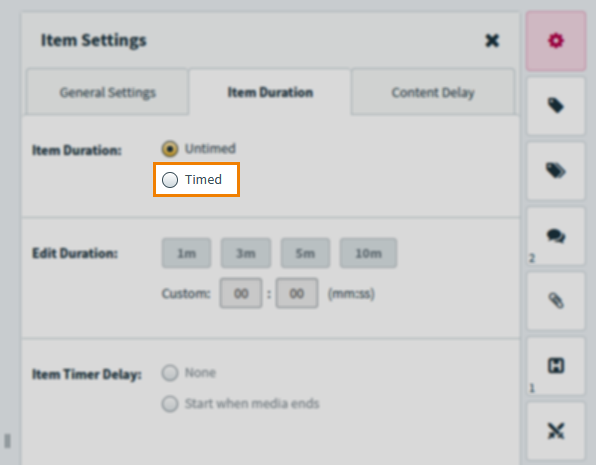
Select Timed to enable the item timer.
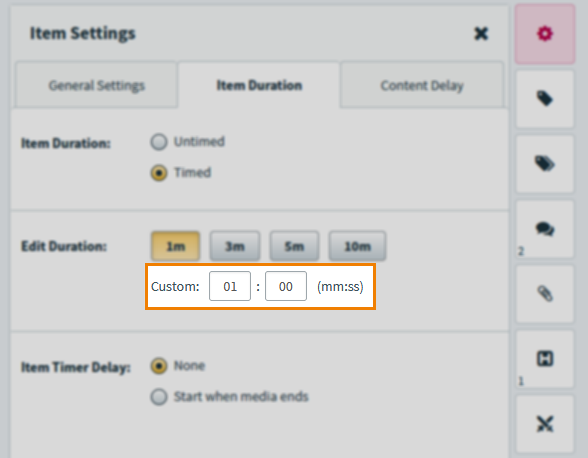
Edit Duration offers four timer presets of one minute (1m), three minutes (3m), five minutes (5m), and ten minutes (10m).
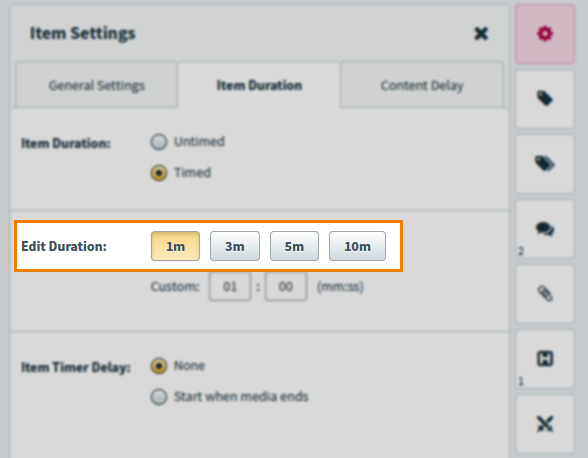
You can enter your own timer value in mm:ss format in the Custom field. The Custom value must be between 00:01 and 99:59.
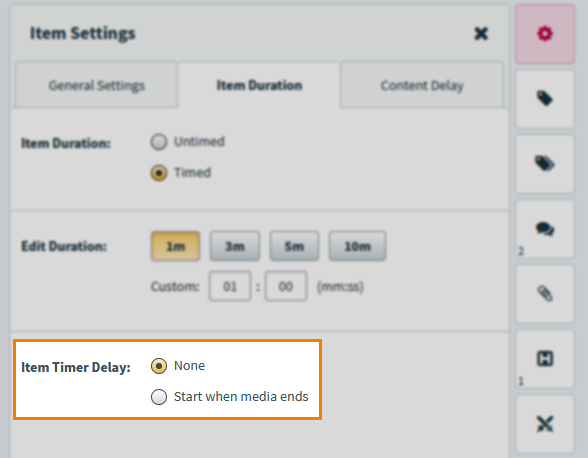
Item Timer Delay determines whether the item duration timer starts as soon as the item is fully loaded (None) or if the timer only starts when the item’s attached video or audio media finishes playing (Start when media ends).
When you have configured your item duration settings, select Save to apply the timer to your item. Select Discard Changes to cancel any changes made to the duration settings.
Further reading
Now you know how to set up item duration timers, read the following articles for more information on setting up items:
