Exporting items to Microsoft Word
You can export items in a test to a Microsoft Word document, choosing which item elements you want to include like comments, candidate feedback, and tags. The file format of exported item documents is DOCX. Other files, such as source material and assistive media, are contained in a ZIP file.
This article explains how to export items to Microsoft Word.
In this article
1. Go to your subject
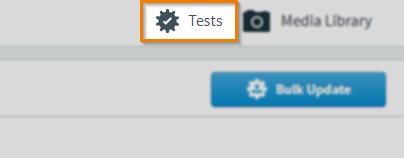
You can download printable tests with the Test Wizard in Item Authoring. In your subject, select Tests to open the Test Wizard menu.
2. Export items to Word
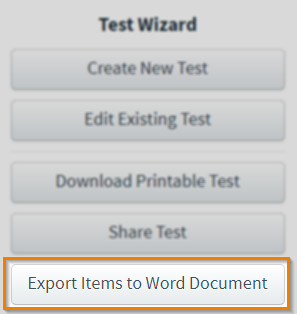
Select Export Items to Word Document in the Test Wizard menu.
3. Choose your test
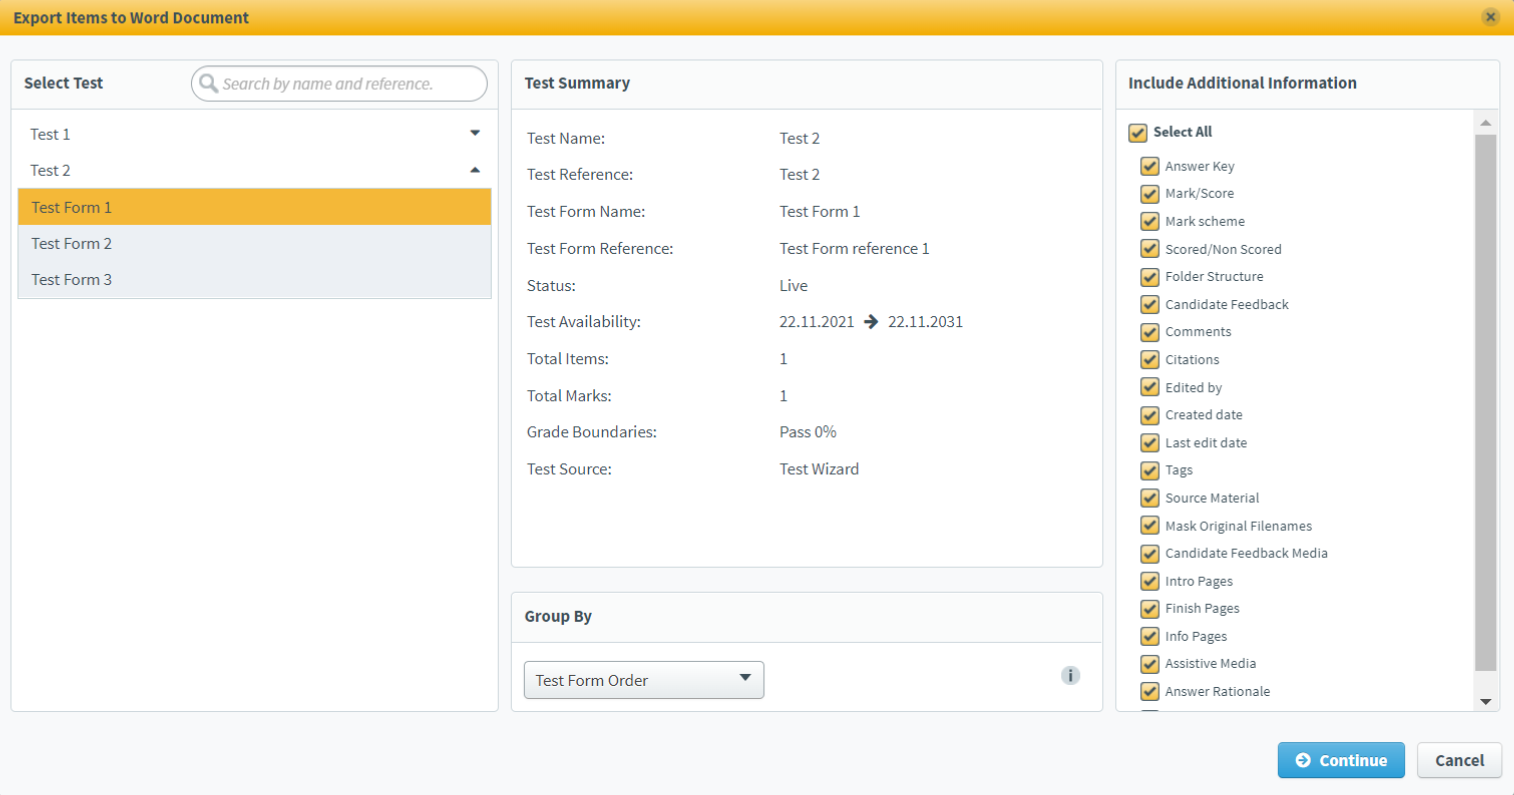
In the Export Items to Word Document dialog, choose the test and test form you want to export. You can search for a test using the free text search bar.
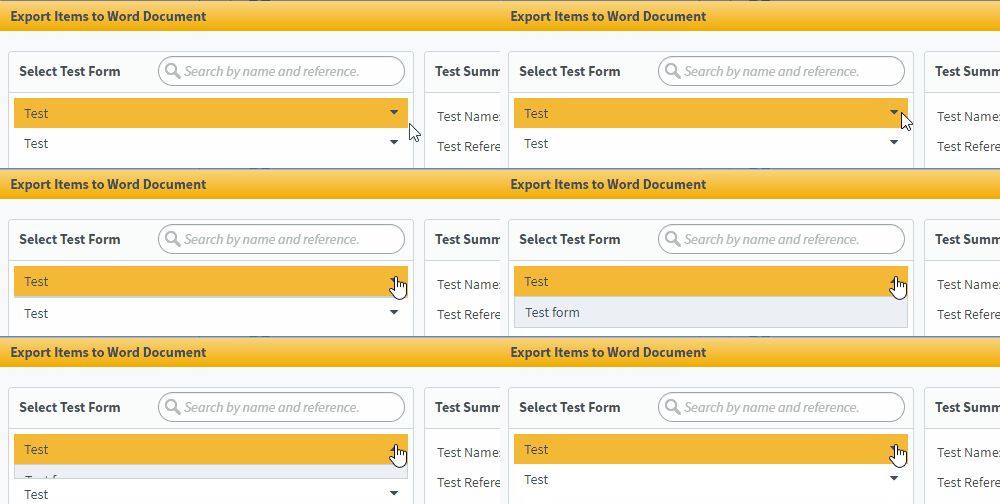
Select the arrow to expand the test and select a test form.
When you have selected a test, you can view a summary of the test you want to export. The following table displays the details in the Test Summary panel:
| Detail | Description |
|---|---|
| Test Name | The test’s name. |
| Test Reference | The test’s reference. |
| Test Form Name | The test form’s name. |
| Test Form Reference | The test form’s reference. |
| Test Status | The test form’s status. |
| Test Availability | The period of time in which the test is available for scheduling. |
| Questions | The total number of questions in the test. |
| Total Items | The total number of items in the test, including Introduction Pages and Finish Pages. |
| Total Marks | The total number of marks available in the test. |
| Grade Boundaries | The test’s grade boundaries. |
| Test Source | The area of Surpass where the test was created. This can either be the Test Wizard or Test Creation. |
4. Choose document structure
In the Group By panel, you can choose how the information in the test form is grouped in the Word document.
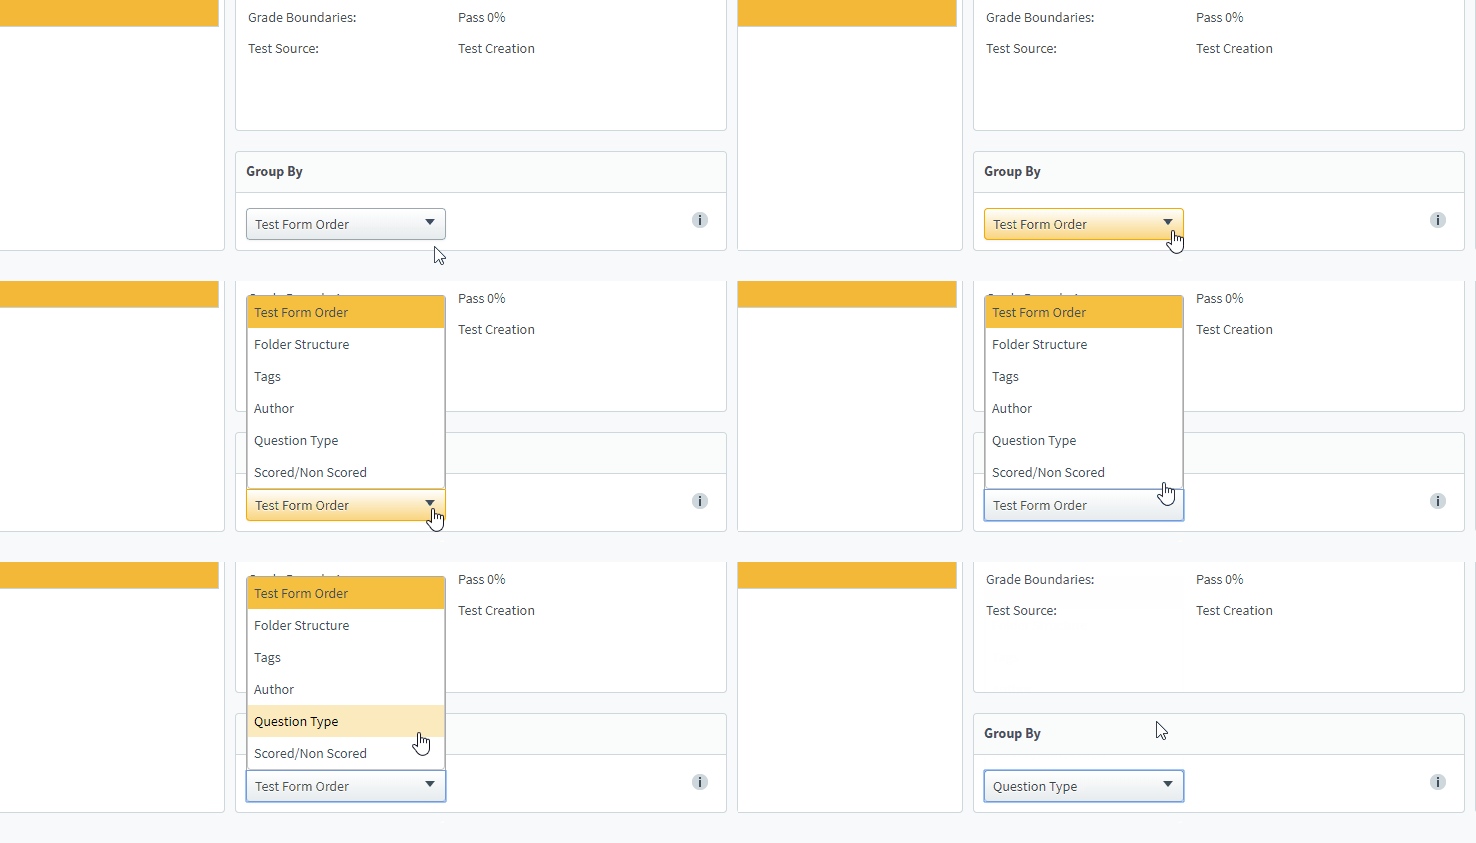
The following table displays the available options you can use to group your items:
| Setting | Description |
|---|---|
| Test Form Order | Group by the order of the items in the test form. |
| Folder Structure | Group by items organised into folders. |
| Tags | Group by tags attached to the items. |
| Author | Group by author. |
| Question Type | Group by question type. |
| Scored/Non Scored | Group by scored and non-scored items. |
5. Choose additional information
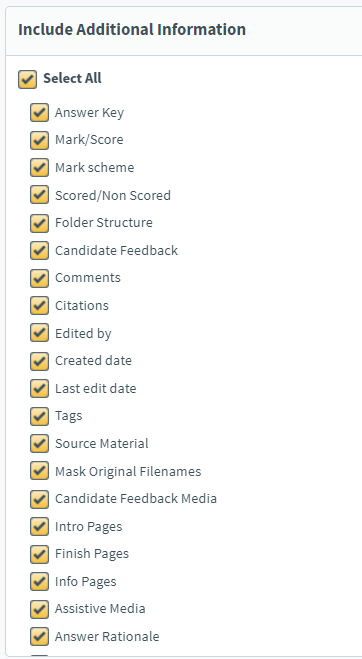
You can choose the additional information displayed in your item export. The following table explains the available options under Include Additional Information. All options are enabled by default. You can clear any elements you do not want in your export.
| Option | Description |
|---|---|
| Answer Key | Includes asterisks (*) to indicate which answers are correct. |
| Mark/Score |
Includes information about the the items’ marks. |
| Mark Scheme |
Includes any mark schemes attached to the items. For more information, read Uploading a mark scheme to an item. |
| Scored/Non Scored |
Includes any scored and non-scored items. |
| Folder Structure |
Includes items organised in folders. |
| Candidate Feedback |
Includes any candidate feedback attached to the items. For more information, Adding candidate feedback to items. |
| Comments |
Includes any comments left on the items. For more information, Leaving comments on items. |
| Citations |
Includes any citations left on the items. For more information, Adding citations to an item. |
| Edited By | Includes information on who has edited the items. |
| Created Date | Includes information on when the items were created. |
| Last Edit Date | Includes information on when the items were last edited. |
| Tags |
Includes any tags attached to the items. For more information, Using tags in items. |
| Source Material |
Includes any source material attached to the items. For more information, read About source material. |
| Mask Original Filenames |
Includes GUID filenames instead of the original filenames. |
| Candidate Feedback Media | Includes any candidate feedback media attached to the items. |
| Intro Pages | Includes any Introduction Pages attached to the items. |
| Finish Pages | Includes any Finish Pages attached to the items. |
| Info Pages | Includes any Information Pages attached to the items. |
| Assistive Media |
Includes any assistive media attached to the items. For more information, read Adding assistive media to an item. |
| Answer Rationale | Includes any rationale that has been added to Multiple Choice and Multiple Response answer options. |
| Inline Comments |
Includes any inline comments left on the items. For more information, read Leaving comments on items. |
Select Continue to confirm your additional options and start the export process.
6. Confirm export
Select Generate Items as Word Document to generate your items. This process runs in the background.

When you have generated your items, you can see an export summary of your items.
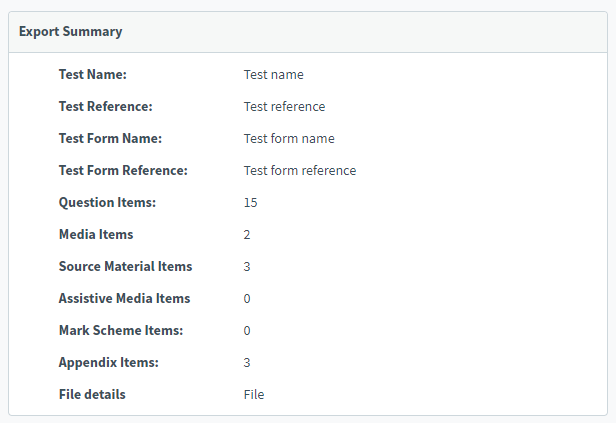
The following table displays the details in the Export Summary:
| Detail | Description |
|---|---|
| Test Name | The test’s name. |
| Test Reference | The test’s reference. |
| Test Form Name | The test form’s name. |
| Test Form Reference | The test form’s reference. |
| Question Items | The amount of question items in the test. |
| Media Items | The amount of items in the test with media attached. |
| Source Material Items | The amount of items in the test with source material attached. |
| Assistive Media Items | The amount of items in the test with assistive media attached. |
| Mark Scheme Items | The amount of items in the test with a mark scheme attached. |
| Appendix Items | The amount of Basic Pages and Survey Items in the test. |
| File Details | The details of the uploaded file. |
Select Export Items as Word Document to export your items. You can save the Word document to your device.

Further reading
Now you know how to export items to a Word document, read the following articles to learn more:
