Working in a Shared Review task as a lead assignee
Review tasks allow you to inspect an item list on an item-by-item basis. As a lead assignee, you can count assignees’ votes on each item, edit items in the task, and read comments to make a final decision and change the item’s workflow status. In a Shared Review task, all assignees work on the same copy of the item.
This article explains how to work in a Shared Review task as a lead assignee, including how to make final decisions on items.
In this article
1. Open the task
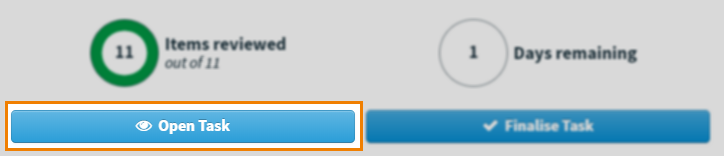
On the Tasks list, select the Review task you want to work on. The task details panel displays the task’s description and doughnut charts representing the number of submitted items and days until the deadline. You can also download attachments if the task has any. For more information, read About the Tasks screen.
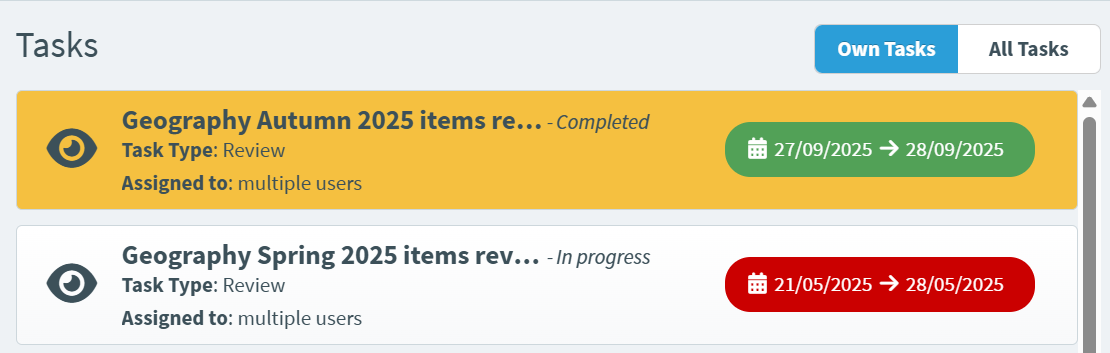
Select Open Task to open the Item Review screen and start working on the Review task. This changes the task’s status to In progress.
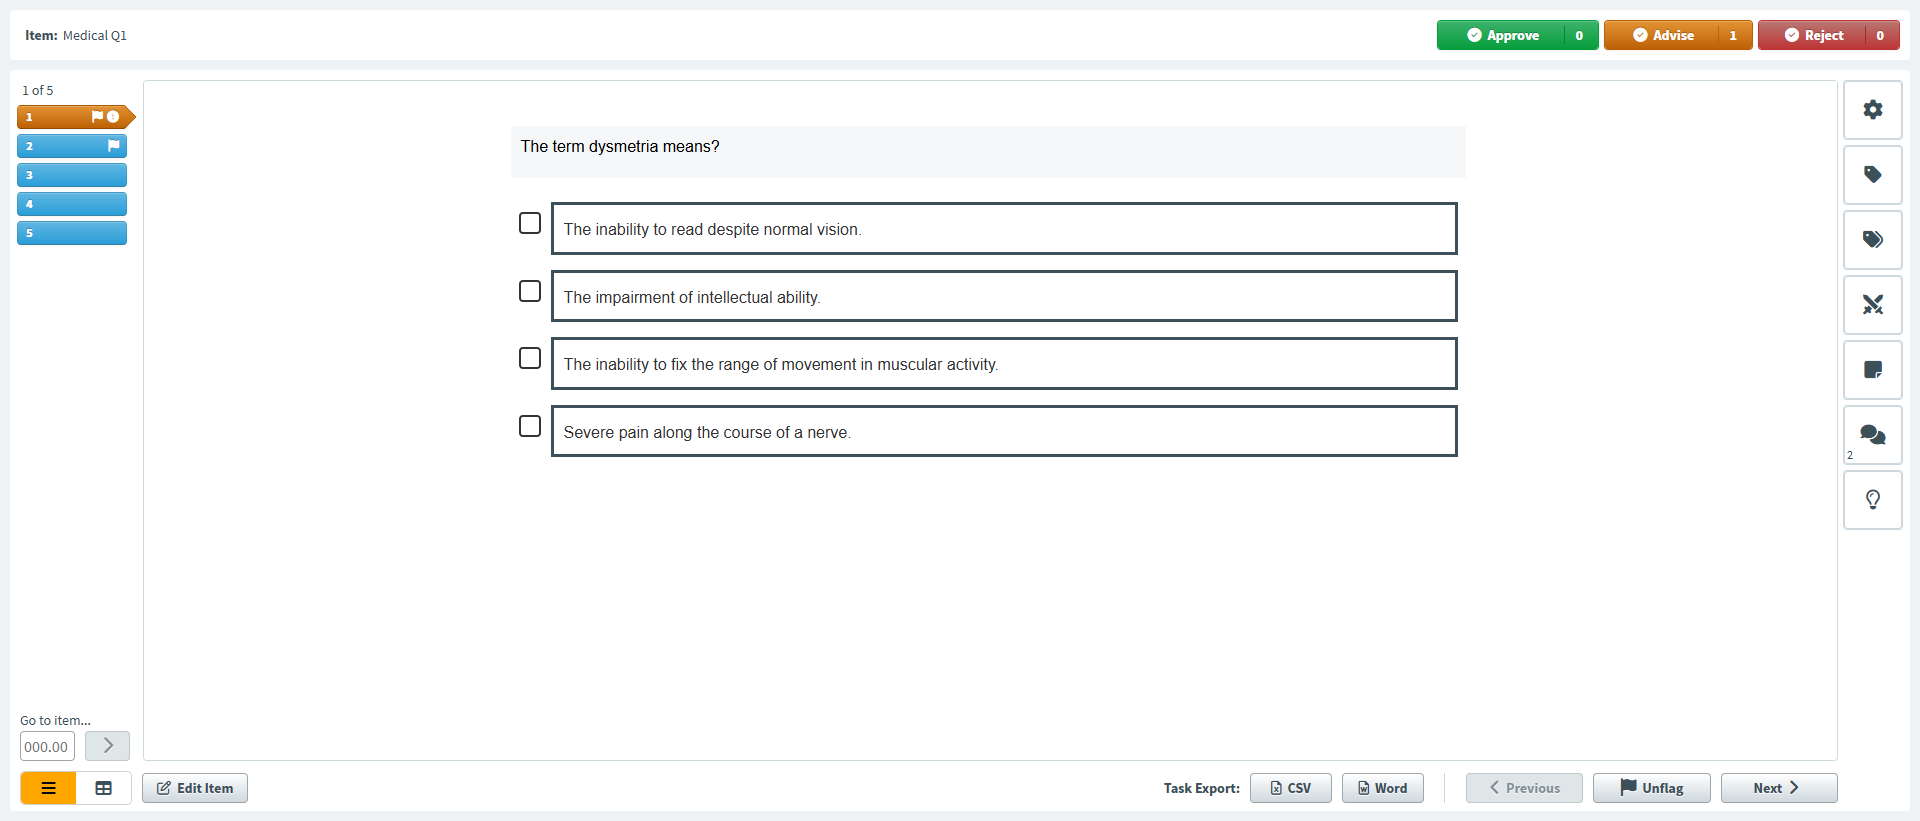
2. Preview an item
The Item Review screen contains all items in the associated item list. Items are displayed in the test driver, allowing you to see the items from a candidate’s perspective.
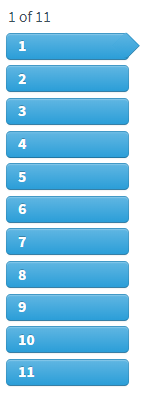
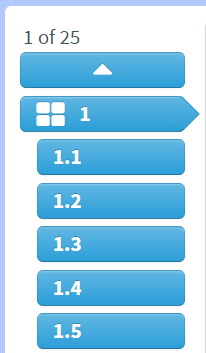
Navigating between items
There are multiple ways to navigate between items in the task.
Select an item breadcrumb on the item navigation panel to go to another item.
Alternatively, you can enter a specific item number into the Go to item field to navigate directly to that item.
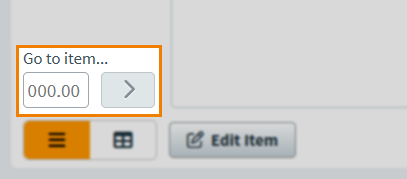
If an item is in an item set, you can enter a decimal (such as 1.3) in the Go to item field to navigate directly to that item.
You can also select Previous and Next to move through the item list.

Previewing items in table view
You can switch between the standard list view or a table view.
Select the Table icon to open table view.

The table view sits above the item preview and lists up to 10 items per page. Select an item from the table to preview it below.

Filter the order of items in the table by selecting the Filter icon on the Question Type, State, Flag (), and all default and custom tag group columns. Choose your filters and select OK.

You can also sort your items by item list position (Item), Item Name, and number of Comments (). Select the corresponding column header to sort.
If any changes have been made to an item by a lead assignee while you are using the table view, select Refresh data for the changes to be reflected in the table.

The Next and Previous buttons load items in the order they are sorted and/or filtered in the table, rather than by item list position – as happens in the standard list view.
Select Reset and choose between Reset filters, Reset sorting, and Reset filters and sorting, before selecting Reset to reset the table accordingly.

Use the expander at the top of the screen to collapse the task information header and expand your view of the table vertically. You can also click and drag the separator between the table and loaded item preview to adjust your view of both.

To view the currently selected item in full, use the expander at the bottom right of the table view, above the loaded item preview.

Select the List icon to return to the standard list view.

The order of items in list view always remains the same. Any sorting or filtering applied in table view are still applied the next time you open table view.
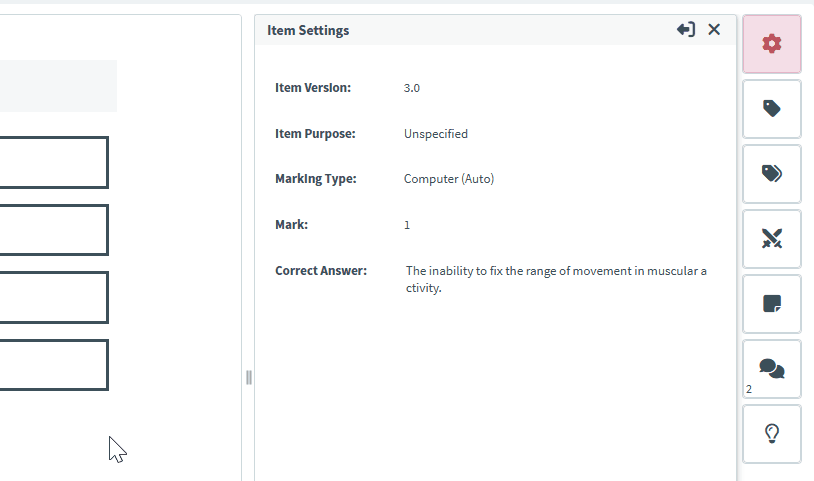
Viewing the item’s settings
Use the item information panel to view the item’s settings. Expand the following section for more information.
The following table details each available setting:
| Icon | Setting | Description |
|---|---|---|
| Item Settings |
View information about Item Version, Item Purpose, Marking Type, Mark, and Correct Answer. |
|
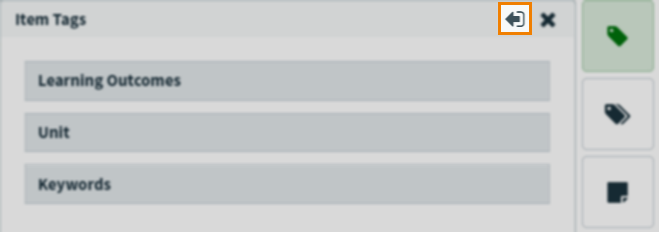
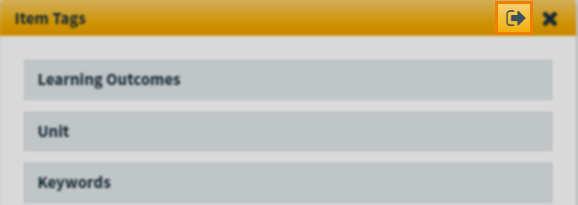
| Item Tags |
View the item’s assigned tag groups and tag values. For more information, see Using tags in items. |
|
| Item Tag Collections |
View the item’s assigned tag collections. For more information, read Using tag collections in items. |
|
| Item Enemies |
View any enemy items associated with the item. For more information, see Adding enemies to an item. |
|
| Citations |
View the item’s citations. For more information, see Adding citations to an item. |
|
| Comments |
View the item’s comments. Public Comments are item comments and Task Comments are comments left by other assignees within the task. For more information, see Leaving comments on items. |
|
| Candidate Feedback |
View the correct answer and any candidate feedback that has been added to the item. For more information, see Adding candidate feedback to items.
NOTE: Correct answer may not always show as it depends on the item type.
|
Use the resizer () to change the panel width.
Select Undock to pop out the dialog windows for any information available in the panel. Select and drag the dialog window to move it around the screen.
Select Dock to return the dialog window to the right-hand side panel.
Flagging items
You can flag items to mark them for an action at a later time. As lead assignee, you can see all assignees’ flagged items.
Select Flag when editing or previewing an item to mark it for later action.

Flagged items are indicated by a flag in the item navigation panel.

To remove a flag, select Unflag .

Exporting task items
As lead assignee, you can export the task items to analyse them in further detail. For further information, read Downloading Review task reports and Exporting Review task items.
Select CSV to download an excel spreadsheet of the task items and the data attached to them.

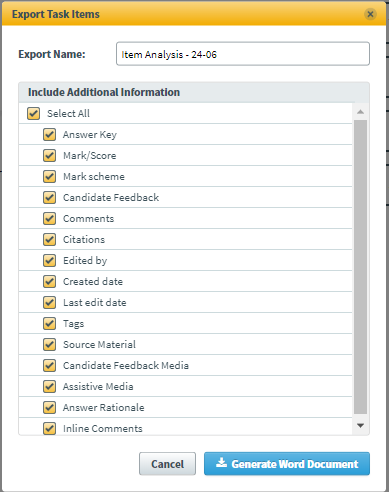
Select Word to download a word document of the task items and the data attached to them.

Tick the boxes as appropriate to include additional information to the Word document. For further information regarding the additional information, read Exporting Review task items.
3. Edit the item
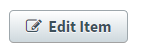
You can amend items from the Item Review screen. Select Edit Item to go to the Edit screen.
You can edit question stems, answer options, media, tools, and item settings. For more information on editing items, read Creating items.
After saving the item, your changes are reflected in Item Authoring. However, the item will be locked for editing until you or a manager finalise the task.
About tracked changes
Task managers can enable tracked changes at the task creation stage to record certain text edits made to items as part of the task. Additions and deletions are colour-coded by user and tracked in question stems, answer options, and the Candidate Feedback field.
As a lead assignee, you can accept or reject changes.
If Track Changes is enabled, items with pending changes are indicated in the item navigation panel.

Changes made by different assignees appear in different colours.

Hover over highlighted text to see who made the change and when their first and last edits were.

You can choose to show or hide tracked changes by selecting Show Tracked Changes / Hide Tracked Changes on the Advanced formatting toolbar.

You can action assignees’ suggested changes either individually or in bulk by using the following buttons in the Advanced toolbar:
| Icon | Option | Description |
|---|---|---|
| Accept all changes | Automatically approves all changes in the current text field. | |
| Reject all changes | Automatically deletes all changes in the current text field. | |
| Accept change |
Approves the selected change. Accept change is not available if you do not have a change selected. |
|
| Reject change |
Deletes the selected change. Reject change is not available if you do not have a change selected. |
Tracked changes are available for all items’ question text. See the following table for further information regarding which item types’ answer option text can be tracked.
| Item Type | Answer option changes tracked? |
|---|---|
|
|
|
|
|
|
|
|
|
|
|
|
|
|
|
|
|
|
|
|
|
|
|
|
|
|
|
|
|
|
|
|
|
|
Table |
|
|
Spreadsheet |
|
|
|
|
|
Custom Questions |
|
|
|
|
|
Survey Multiple Choice |
|
|
Survey Multiple Response |
|
|
Survey Essay |
|
|
Survey Likert |
|
Duplicating items
Lead assignees can duplicate existing items in a Review task.
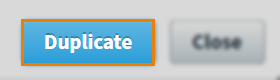
To duplicate an item, select Duplicate.

You can then choose which tag collections to duplicate along with the item. To duplicate a tag collection, select the corresponding checkbox in the Tag Collection Group section of the Duplicate item dialog.
Once selected, a list of individual tags that make up the tag collection are displayed in the Tag Collection Selection Summary section. These can be removed from the duplicate item by selecting the corresponding Remove icon.
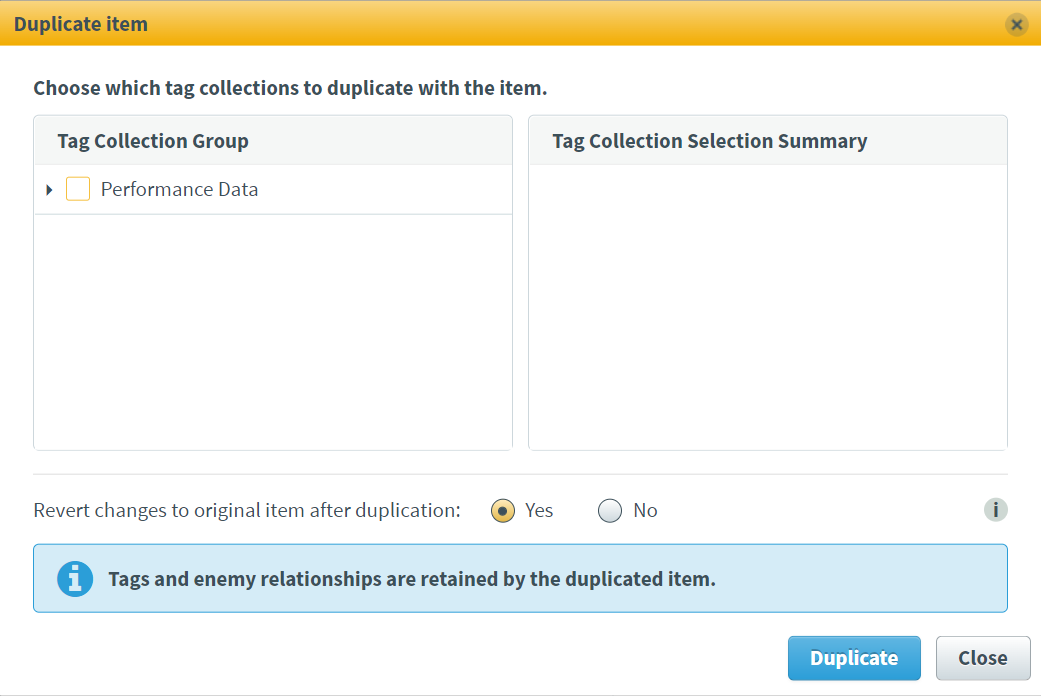
You can also choose to revert the item back to its original state after it has been duplicated, regardless of any saved changes made to it prior to duplication. Select the Yes/No radio buttons to choose whether this option is applied.
Select Duplicate to confirm the duplication, or Close to cancel.
4. Review vote results
In Shared Review tasks, assignees vote on the quality of items. There are three vote types:
Reject votes are for poor items that do not meet the standards for testing.
Advise votes are for items that will be suitable for testing after minor amendments, but are not satisfactory in their current state.
Approve votes are for items that need no corrections.
As lead assignee, you have the ability to tally all assignees’ votes. Assignees’ votes are represented as a bar chart on each item in the Item Review screen. Hover over each segment of the chart to reveal more information.
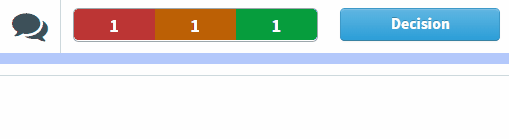
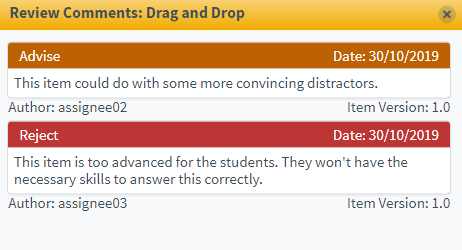
Select Comments to open the Review Comments dialog and see the comments assignees left when they voted on the item.
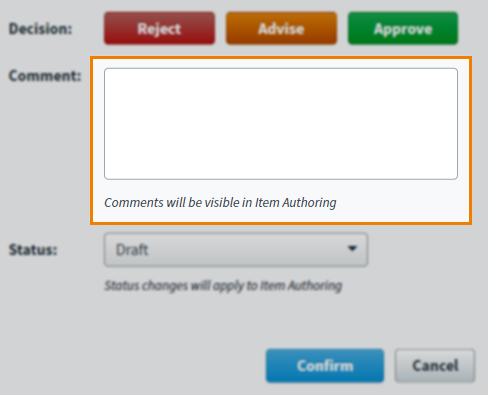
5. Make a final decision
After reviewing assignees’ votes, select Decision to make a final decision on the item and change its workflow status.

In the Decision dialog, select either Reject, Advise, or Approve as your final decision. You do not have to follow the majority of votes.
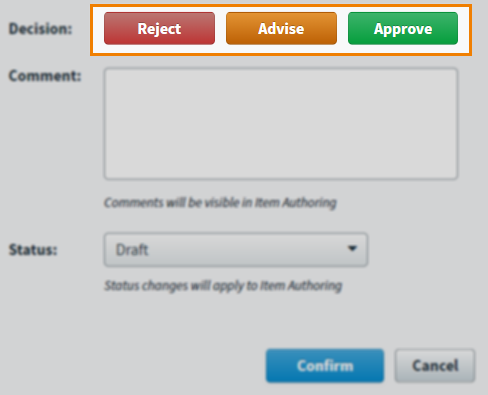
You can add explanations to your decision in the Comment section. Comments are required when Reject or Advise is selected. Comments are optional when Approve is selected. This explanation is saved as a comment against the item and is visible in Item Authoring. For more information, read Leaving comments on items.
Finally, use the Status menu to choose a new workflow status for the item.
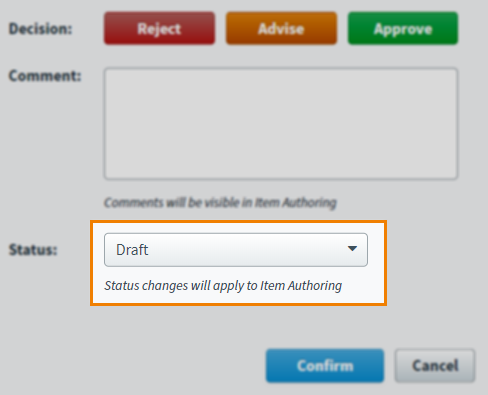
Select Confirm when done to submit your final decision.
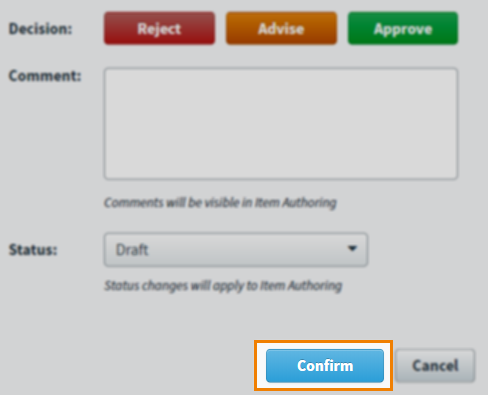
Your decision is now visible on the Item Review screen.

6. Close the task
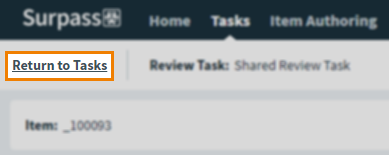
After making a final decision on all items, you can close the Review task.
Select Return to Tasks to close the task and return to the Tasks screen.
7. Finalise the task
Select Finalise Task in the task details panel when you are satisfied that the task is complete.
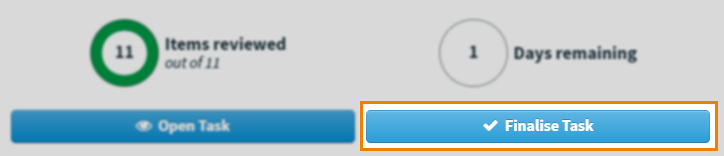
This changes the task’s status to Complete.
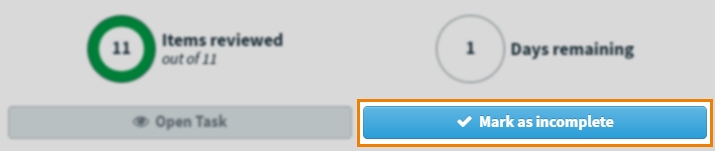
Marking a task as incomplete
You can mark a task as incomplete if you incorrectly select Finalise Task or the task needs to be reopened for further work.
By default, completed tasks are not shown in the Tasks list. To display completed tasks on the Tasks list, open Filter and select Show Completed.

Find and select your completed task. Select Mark as incomplete to mark the task as incomplete. The task’s status reverts to In progress.
Further reading
For more information on Review tasks, or working in other task types as a lead assignee, read the following articles:
- About task types
- About the Tasks screen
- About task managers, assignees, and lead assignees
- Working in an Authoring (Edit Existing Items) task as a lead assignee
- Working in an Authoring (Create New Items) task as a lead assignee
- Working in an Individual Review task as a lead assignee
- Working in an Item Analysis Review task as a lead assignee
- Working in a Standard Setting task as a lead assignee