Surpass Help Site
  • Skip to search
  • Skip to content
  • Surpass Platform
    • Surpass Platform Basics
    • Changelog (Resources)
    • Item Authoring
    • Surpass Copilot
    • Tasks
    • Reporting
    • Surpass Publisher
    • Test Wizard
    • Test Creation
    • Test Administration
    • Test Delivery
    • Setup
    • Site Settings
  • SecureClient
    • SecureClient Basics
    • System Requirements (Resources)
    • SecureClient for Windows Troubleshooting
    • Best Practice
    • iPad/Mac Changelog (Resources)
    • iPad/Mac Limitations
    • Invigilate (Surpass Platform)
    • Test Driver (Surpass Platform)
    • Admin Console
  • SecureMarker
    • Surpass SecureMarker Basics
    • Changelog (Resources)
    • Roles
    • Users
    • Site Settings
    • Examiners
    • Item Groups
    • Quality Control
    • Quotas
    • Marking
    • Escalations
    • Adjudication
    • Script Review
  • Developer
    • Surpass API v2
    • Surpass OAPI
    • SecureMarker OAPI
    • Single Sign-On
    • Scheduling System
  • Resources
    • Accessibility
    • Changelogs
    • Glossary
    • Limits
    • Release Schedule
    • Surpass Certifications
    • Surpass Learning
    • System Requirements
Suggested Search: create an item

Surpass Platform Articles

Introduction

  • Surpass Platform Basics
    • What is Surpass?
    • Using Surpass for end-to-end digital testing
    • About Surpass test delivery options
    • Setting up a new Surpass user account
    • Logging in to Surpass
    • About the Surpass home screen
    • Logging out of Surpass
    • Enabling Flash for Surpass
    • Installing the Surpass Viewer
  • Surpass Platform Changelog

Test Development

  • Item Authoring
    • Getting started in Item Authoring
      • About the Subjects screen in Item Authoring
      • Creating a subject in Item Authoring
      • Managing items in a subject
    • Creating items
      • Creating a Multiple Choice question
        • Generating Multiple Choice questions with Surpass Copilot
      • Creating a Multiple Response question
      • Creating an Either/Or question
      • Creating a Numerical Entry question
      • Creating a Short Answer question
      • Creating an Essay question
      • Creating a Select From a List question
      • Creating an Extended Matching question
      • Creating a File Attach question
      • Creating a Drag and Drop question
      • Creating a Hotspot question
      • Creating an Audio Capture question
      • Creating a Fraction Entry question
      • Creating Custom Question Types
        • Creating a Bar Chart custom question
        • Creating a Diagram Creator custom question
        • Creating a Graph Selector custom question
        • Creating a Hot Text custom question
        • Creating a Line and Scatter Graph custom question
        • Creating a Pie Chart custom question
        • Creating a Spreadsheet custom question
        • Creating a Custom Drag and Drop custom question
      • Creating a Table question
      • Creating a Fill in the Blank question
      • Creating an Equation Entry question
      • Creating a Table (Legacy) question
      • Creating a Spreadsheet question
      • Creating an Audio Capture (Legacy) question
      • Creating survey items
        • Creating a Multiple Choice survey item
        • Creating a Multiple Response survey item
        • Creating an Essay survey item
        • Creating a Likert survey item
      • Creating basic pages
        • Creating an Introduction Page
        • Creating an Information Page
        • Creating a Finish Page
      • Importing items
        • Importing items from another subject
        • Importing items from other sources
      • About item sets
        • Creating an item set
        • Adding tags, enemies, and source material to an item set
        • Adding images to an item set
        • Adding audio to an item set
        • Adding video to an item set
        • Leaving comments on item sets
        • Using the item set history
    • Using media
      • About the Surpass media library
      • Importing files to the media library
      • Grouping media in the media library
      • About source material
        • Creating HTML source material
        • About the Surpass PDF viewer
        • Creating URL source material
        • Adding source material to an item
        • Using the Source Material panel in Item Authoring
      • About images
        • Adding images to an item
        • About the Surpass high-fidelity image viewer
      • About audio
        • Adding audio to an item
        • About the Surpass audio player
      • About video
        • Adding video to an item
        • About the Surpass video player
    • About Item Search
      • Searching for items with Item Search
      • About the Item Search results grid
      • Creating an item list using Item Search
      • Moving items to another subject from the Item Search screen
      • Sharing items with a subject master list from the Item Search screen
      • About the Saved Searches screen
        • Saving a search in Item Search
        • Using saved searches in Item Search
        • Editing saved searches in Item Search
    • About Item Lists
      • About the Item Lists screen
      • Managing an item list
      • Adding items to lists in the Item Lists screen
      • Creating an item list from the Item Lists screen
      • Moving items to another subject from the Item Lists screen
      • Sharing items with a subject master list from the Item Lists screen
    • About Templates
      • Creating an item template
      • Creating a component template
      • Using templates to create items
      • Managing templates
    • About Unit Conversions
      • Uploading a conversion profile
      • About the Unit Conversions screen
      • Performing a unit conversion
    • Setting up items
      • Using the formatting toolbar
      • Creating tables in items
      • About special characters
      • Adding assistive media to an item
      • Adding candidate feedback to items
      • Leaving comments on items
      • Adding tools to an item
      • Setting the item purpose
      • Setting the marking type
      • Uploading a mark scheme to an item
      • Using tags in items
      • Using tag collections in items
      • Setting up enemy items
      • Setting item duration
      • Setting item content delays
      • Adding citations to an item
      • Using the Item Lists panel
      • Creating and managing language variants
      • About item owners
      • Using the item history
      • Comparing item versions
      • About workflow statuses in Item Authoring
      • Using bulk update
  • Surpass Copilot
    • Surpass Copilot best practice
  • Tasks
    • Getting started in Tasks
      • About task types
      • About task managers, assignees, and lead assignees
      • About the Tasks screen
    • Working as a task manager
      • Preparing for tasks
      • Creating a General task
      • Creating an Authoring task
      • Creating a Review task
      • Creating a Standard Setting task
      • Editing tasks
      • Downloading Review task reports
      • Downloading Standard Setting task reports
      • Exporting Review task items
      • Exporting Standard Setting task items
      • Finalising tasks
    • Working as a task assignee
      • Working in an Authoring (Edit Existing Items) task as an assignee
      • Working in an Authoring (Create New Items) task as an assignee
      • Working in a Shared Review task as an assignee
      • Working in an Individual Review task as an assignee
      • Working in an Item Analysis Review task as an assignee
      • Working in a Standard Setting task as an assignee
      • Working in a General task as an assignee
    • Working as a lead assignee
      • Working in an Authoring (Edit Existing Items) task as a lead assignee
      • Working in an Authoring (Create New Items) task as a lead assignee
      • Working in a Shared Review task as a lead assignee
      • Working in an Individual Review task as a lead assignee
      • Working in an Item Analysis Review task as a lead assignee
      • Working in a Standard Setting task as a lead assignee
  • Reporting
    • About the Analytical Data screen
      • Viewing Test Forms reports
        • Viewing Tests Delivered reports
        • Viewing Items Delivered reports
      • Viewing Item Bank reports
    • About the Operational Data screen
    • About Rescoring
      • Creating a rescoring session
      • Editing scoring data in Rescoring
      • Changing answers in Rescoring
      • Awarding full marks in Rescoring
      • Adding and removing a score in Rescoring
      • Reverting changes in Rescoring
    • About Custom Reports
      • Creating a custom report template
      • Generating a custom report
  • Surpass Publisher

Test Assembly

  • Test Wizard
    • Getting started in the Test Wizard
      • Differences between the Test Wizard and Test Creation
      • About test types in the Test Wizard
    • About tests in the Test Wizard
      • Creating a test in the Test Wizard
        • About test settings in the Test Wizard
        • Reviewing a test in the Test Wizard
      • Editing existing tests in the Test Wizard
      • Creating a computer-based project in the Test Wizard
      • Creating a Paper and Onscreen test in the Test Wizard
      • Downloading printable tests in the Test Wizard
    • About test forms in the Test Wizard
      • Creating a test form in the Test Wizard
        • About test form settings in the Test Wizard
          • Setting up grade boundaries in the Test Wizard
        • Adding items to a test form in the Test Wizard
        • Adding dynamic content to test forms in the Test Wizard
        • Adding sections to a test form in the Test Wizard
        • Adding basic pages to a test form in the Test Wizard
        • Grouping items in a test form in the Test Wizard
      • Editing existing test forms in the Test Wizard
    • Sharing tests in the Test Wizard
      • About the Quality Review panel
    • Exporting items to Microsoft Word
  • Test Creation
    • Getting started in Test Creation
    • About tests
      • About the Tests screen
      • Creating tests
        • About test settings
        • Creating a computer-based project in Test Creation
        • Configuring a test for SecureClient
        • Setting up a test for invigilation
        • Setting up a test for paper marking
        • About Surpass test driver languages
        • Assigning users to mark tests
        • Applying a test profile to a test
      • Cloning tests
      • Deleting tests
    • About test forms
      • About the Test Forms screen
      • Creating test forms
      • About test form content
        • About the Test Form Rules tab
        • Adding Introduction and Finish Pages to a test form
        • Adding sections to a test form
        • Adding section selectors to a test form
        • Adding items to a fixed section
        • Adding rules to a dynamic section
        • About test form search parameters
        • Grouping items in a test form
        • Adding non-scored items to a test form
        • Adding tools to a test form
        • Previewing a test form
      • About test form duration
        • Adding scheduled breaks to a test form
      • About test form settings
        • Setting up grade boundaries
        • Setting up Learning Outcome boundaries
        • Configuring a test form for SecureMarker
      • Checking test forms in and out
      • Cloning test forms
      • Packaging test forms
      • Printing test forms in Test Creation
      • Deleting test forms
    • About test profiles
      • About the Test Profiles screen
      • Creating test profiles
        • About test profile settings
    • About LOFT/Adaptive tests
      • About the LOFT/Adaptive screen
      • Editing a LOFT/Adaptive test form
        • Defining rules for a LOFT section
        • Simulating a LOFT test form
        • Uploading psychometric targets to a LOFT test form
        • Uploading rules to a LOFT section
      • LOFT troubleshooting
    • About item pools
      • About the Item Pools screen
      • Creating an item pool

Test Delivery

  • Test Administration
    • About the Schedule (Standard) screen
      • Scheduling a test session in the Schedule (Standard) screen
      • Using Bulk Schedule
      • Printing an invigilation pack from the Schedule (Standard) screen
      • Deleting a scheduled test session in the Schedule (Standard) screen
    • About the Schedule (Legacy) screen
      • Scheduling a test session in the Schedule (Legacy) screen
      • Printing an invigilation pack from the Schedule (Legacy) screen
      • Deleting a scheduled test session in the Schedule (Legacy) screen
    • About the Invigilate screen
      • Unlocking an invigilated test in the Invigilate screen
      • Voiding a test in the Invigilate screen
      • Modifying the duration of a test in the Invigilate screen
      • Printing an invigilation pack from the Invigilate screen
      • Invigilating a paper test in the Invigilate screen
      • Modifying the submission date of a computer-based project in the Invigilate screen
      • Re-assigning user associations in the Invigilate screen
    • About the Mark (Standard) screen
      • Marking a script in the Mark (Standard) screen
      • Adding additional files to File Attach items in the Mark (Standard) screen
      • Exporting scripts from the Mark (Standard) screen
      • Escalating a script in the Mark (Standard) screen
      • Re-assigning user associations in the Mark (Standard) screen
      • Changing associated centre of a computer-based project in the Mark (Standard) screen
    • About the Mark (Legacy) screen
      • Marking a script in the Mark (Legacy) screen
      • Adding additional files to File Attach items in the Mark (Legacy) screen
      • Escalating a script in the Mark (Legacy) screen
      • Exporting scripts from the Mark (Legacy) screen
    • About the Paper Mark screen
      • Marking a paper test in the Paper Mark screen
      • Escalating a script in the Paper Mark screen
    • About the Moderate (Standard) screen
      • Moderating a script in the Moderate (Standard) screen
      • Editing grade boundaries in the Moderate (Standard) screen
      • Escalating a script in the Moderate (Standard) screen
      • Re-assigning user associations in the Moderate (Standard) screen
      • Changing associated centre of a computer-based project in the Moderate (Standard) screen
    • About the Moderate (Legacy) screen
      • Moderating a script in the Moderate (Legacy) screen
      • Packaging a script in the Moderate (Legacy) screen
      • Editing grade boundaries in the Moderate (Legacy) screen
      • Escalating a script in the Moderate (Legacy) screen
    • About the Results screen
      • Generating results reports in the Results screen
      • Uploading OMR results in the Results screen
    • About the Re-mark (Standard) screen
      • Re-marking a script in the Re-mark (Standard) screen
    • About the Re-mark (Legacy) screen
      • Re-marking a script in the Re-mark (Legacy) screen
    • About the Audit screen
      • Viewing an audit report in the Audit screen
      • Flagging a script for re-marking in the Audit screen
      • Exporting scripts from the Audit screen
      • Allowing users to view responses in Results from the Audit screen
    • About the Candidate Review screen
      • Scheduling a candidate review session
      • Sitting a candidate review session
  • Test Delivery
    • About standard browser delivery
    • About secure browser delivery
      • About SecureClient
      • About online-only secure browser delivery
        • Starting online-only secure browser tests
    • Using the Surpass test driver
      • Starting a test
        • Opening the Surpass test driver
        • Checking your system
        • Entering your keycode and confirming your details
        • Starting invigilated tests
      • During a test
        • About the Surpass test driver interface
        • Navigating a test in the Surpass test driver
        • Flagging items in the test driver
        • About test sections
        • Leaving comments on a test as a candidate
        • Viewing candidate feedback in the test driver
        • Taking breaks in the test driver
        • Using the highlighting tool in the test driver
        • Using the strikethrough tool in the test driver
        • Using the Calculator in the test driver
        • Using the Caliper tool in the test driver
        • Using the Notepad tool in the test driver
        • Using the Protractor tool in the test driver
        • Viewing HTML and URL source material in the test driver
        • Using the PDF viewer in the test driver
        • Using the high-fidelity image viewer in the test driver
        • Watching video in the test driver
        • Listening to audio in the test driver
        • Using assistive media in the test driver
        • Closing and resuming a computer-based project
      • Finishing a test
        • Submitting a script in the test driver
        • Viewing summary feedback in the test driver

System Administration

  • Setup
    • About the Centres screen
      • Creating a centre
      • Editing a centre
      • Deleting a centre
      • Retiring a centre
    • About the Subjects screen
      • Creating a subject in Setup
      • Editing a subject
      • Managing subject team members
      • Setting up subject tags
      • Importing a tag structure
      • Setting up tag groups
      • Setting up tag categories
      • Setting up tag hierarchies
      • Setting up tag collection groups
      • Importing tags with a spreadsheet
      • About IRT tags
      • Setting up a subject group
      • Sharing a subject
      • Setting up Surpass Copilot
      • Deleting a subject
    • About the Users screen
      • Creating a user
      • Editing a user
      • Deleting a user
    • About the Candidates screen
      • Creating a candidate
      • Importing candidates with a spreadsheet
      • Setting up candidate tags
      • Editing a candidate
      • Retiring a candidate
  • Site Settings
    • About My Profile options
    • About Site Settings options
    • About Branding options
    • About Customise Columns options
    • About Roles
      • About roles and permissions
      • Creating a new role
      • Editing a role
    • About Regional Settings options
    • About Assignment Groups options
Breadcrumbs Item Authoring > Setting up items > Setting up enemy items

Setting up enemy items

When creating an item, you can set up enemy relationships with other items. Enemy items can never appear in the same test.

EXAMPLE: You might want to create an enemy relationship between an item that gives away the answer of another item.

You can create enemy relationships on both the test form and section level. Section enemies can be defined in Item Authoring and used as a search parameter in Item Search. However, section enemies act as test form enemies when used in Test Wizard or Test Creation. To enable section enemies, you must enable Item Enemies in Site Settings > Item Authoring.

This article explains how to set up enemy relationships between items and includes information on the difference between principal and acquired enemy relationships.

TIP: You can also create friend relationships between items. For more information, read Creating an item set.
In this article
  • 1. Go to your item’s Edit screen
  • 2. Open the Select Enemy Items dialog
  • 3. Choose your enemy items
  • Inheriting enemy relationships
  • About principal and acquired relationships
  • Further reading

1. Go to your item’s Edit screen

Select an item in your subject to open it and go to the Edit screen.

2. Open the Select Enemy Items dialog

NOTE: You cannot edit an item's enemy relationships if the item is locked for editing by another user.

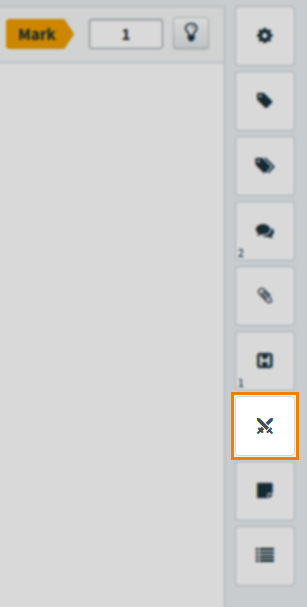
Select the Enemies panel.

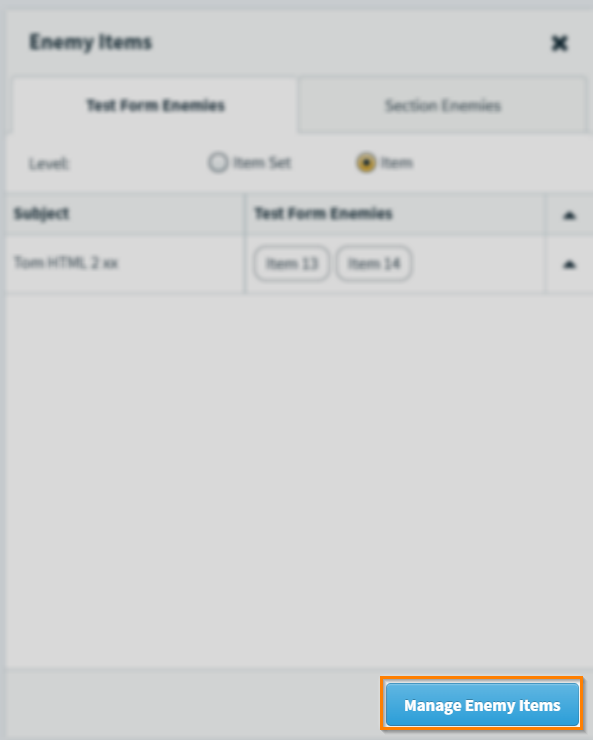
Select either the Test Form Enemies tab or Section Enemies tab as appropriate.

Any enemy relationships already established will be visible in the Test Form Enemies column.

3. Choose your enemy items

Open the Enemy items tab and select Manage Enemy Items.

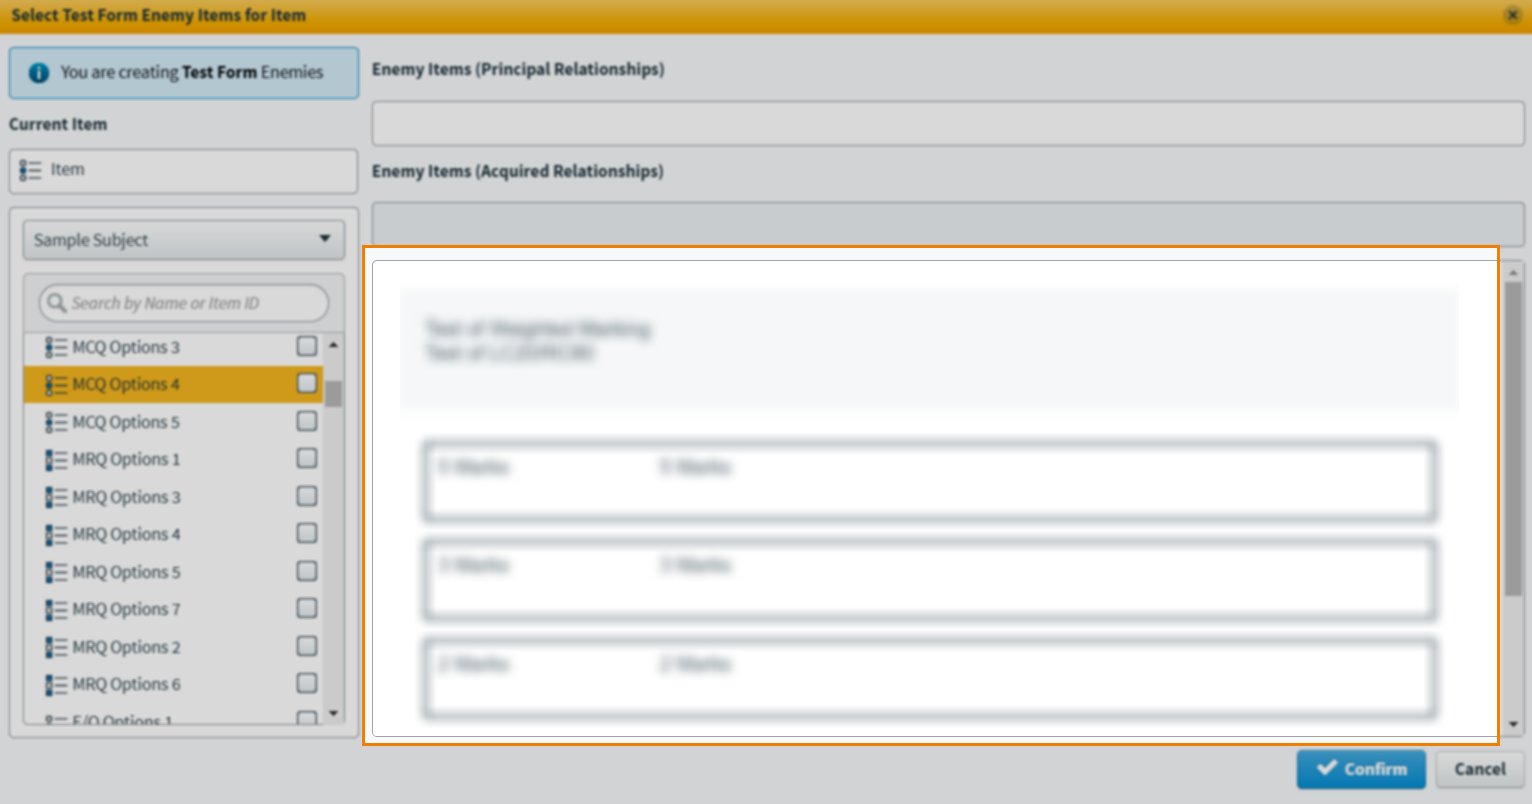
Select the subject containing the items you want to establish enemy relationships with.

NOTE: The current subject is selected by default.

The chosen subject’s items are listed in the item panel. Use the search field to filter the visible items on the basis of their name or item ID.

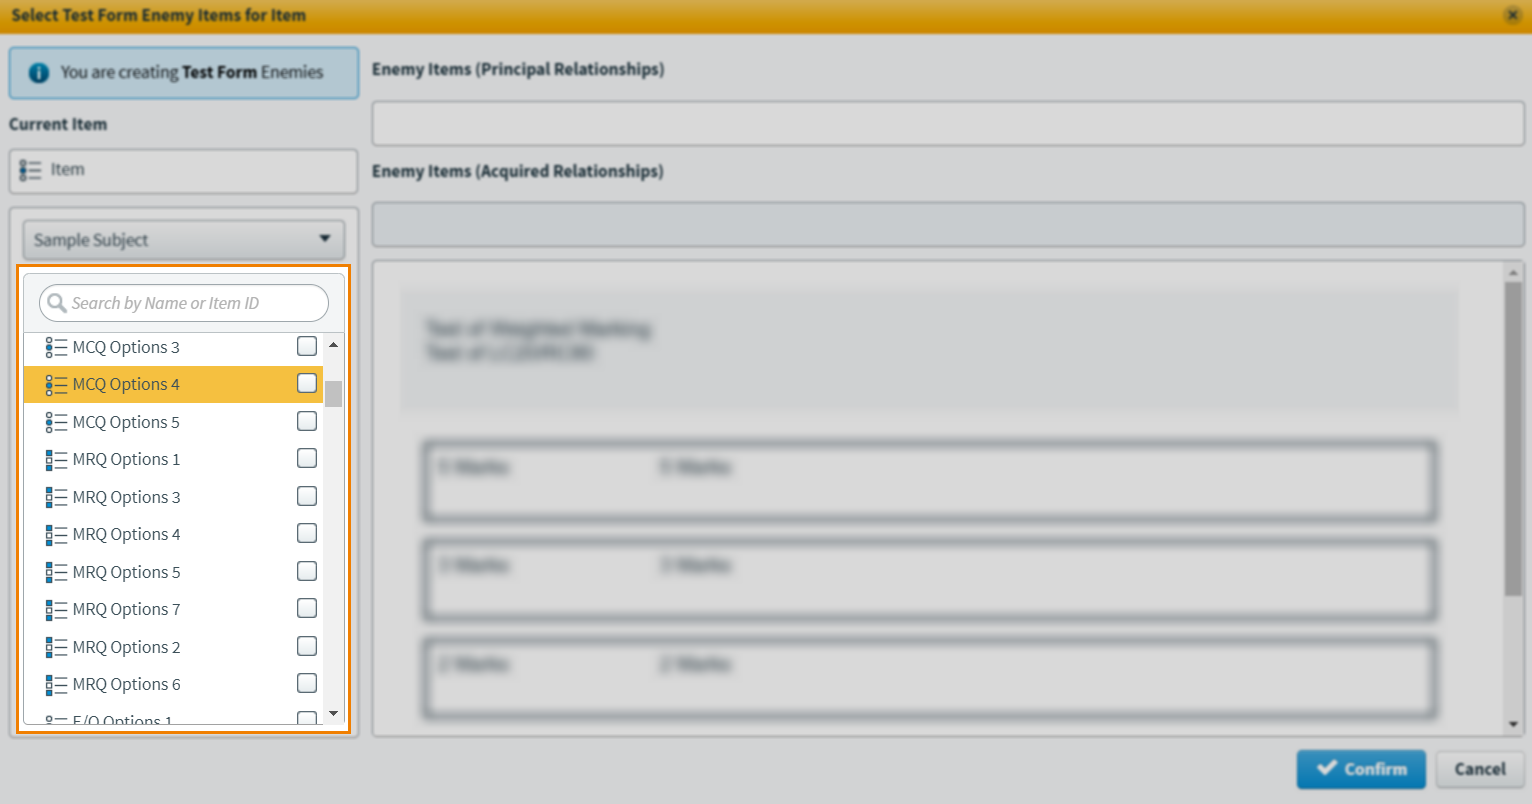
Highlight an item to preview of its content.

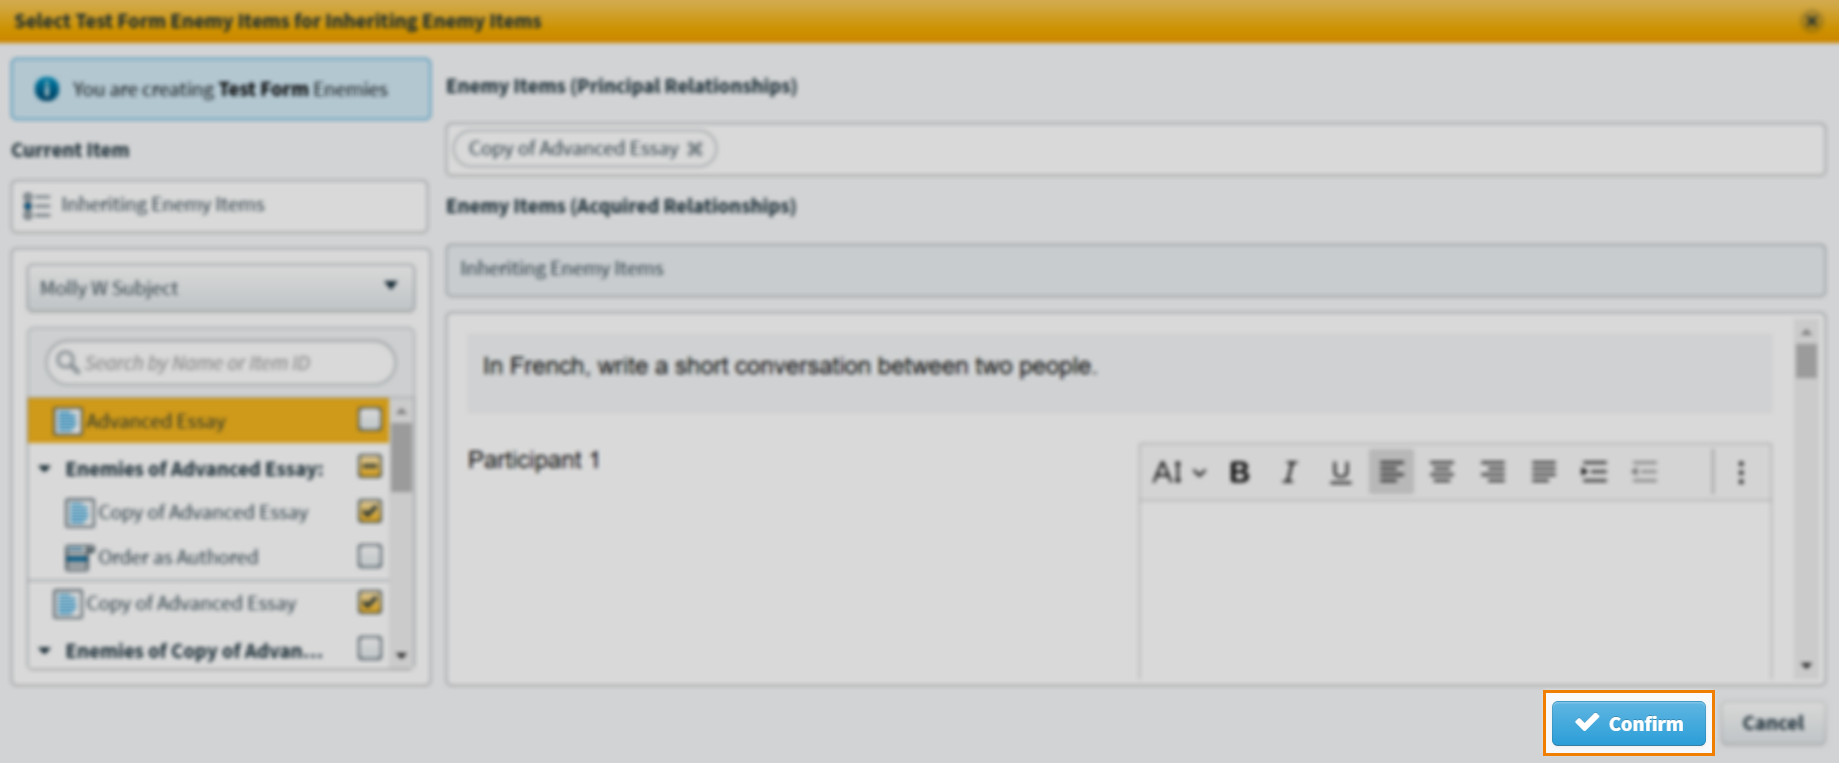
Select an item’s checkbox to set an enemy relationship. The new enemy item appears under Enemy Items (Principal Relationships).

TIP: Hovering over an enemy item in the Enemy Items (Principal Relationships) section reveals a tooltip that shows you which subject that item is from.

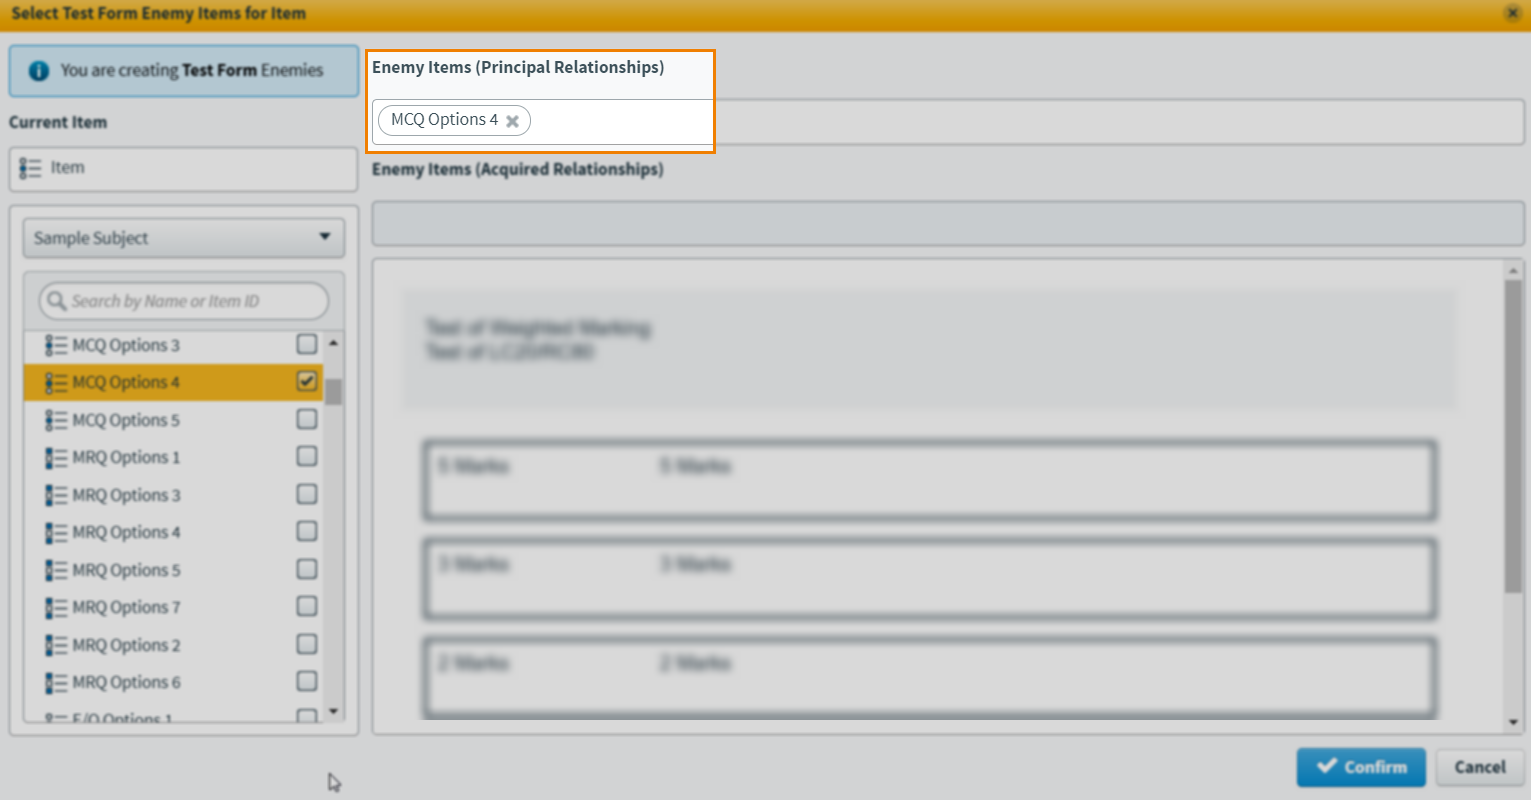
To remove an enemy item, select Delete .

After you have defined your enemy relationships, select Confirm to save your new enemy relationships.

Inheriting enemy relationships

You can add inherited enemies to your item from the Manage Enemy Items screen. This means that when adding an enemy relationship to your item you can also add any enemies of that enemy item.

From the Manage Enemy Items screen select the checkbox next to Enemies of… to automatically add all inherited enemies to your item.

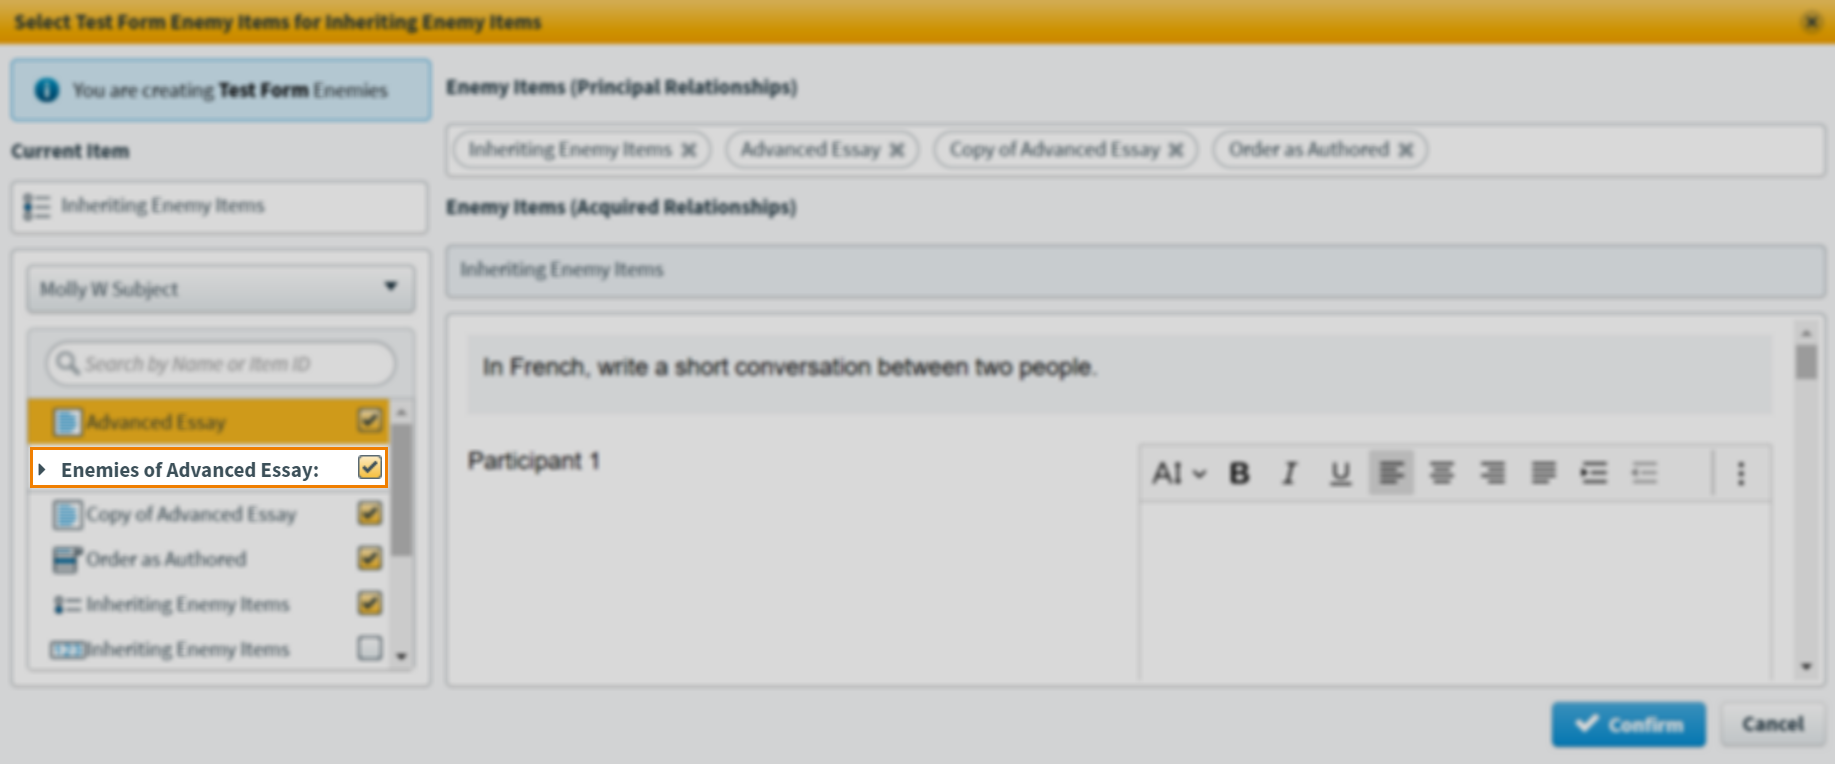
Alternatively, you can manually select specific inherited enemies from the list.

TIP: If an item is locked you can still add inherited enemies manually.

To remove an inherited enemy item, uncheck the checkbox.

NOTE: You can only remove principal relationships from your item.

Select Confirm to save and close.

About principal and acquired relationships

A principal relationship is one that has been created from the current item. An acquired relationship is one that the current item has gained by being made an enemy of another item.

EXAMPLE: If you are editing ‘Item A’ and make ‘Item B’ and ‘Item C’ enemies, ‘Item A’ has principal enemy relationships with ‘Item B’ and ‘Item C’. ‘Item B’ and ‘Item C’ instead have an acquired enemy relationships with ‘Item A’.
NOTE: Creating a principal enemy relationship with an item that already has an acquired enemy relationship with the current item overrides the acquired relationship.

Further reading

Read the following articles for more information on item settings:

  • Setting the item purpose
  • Setting the marking type
  • Uploading a mark scheme to an item
  • Using tags in items
  • Setting item duration
  • Setting item content delays
  • Adding citations to an item

About the site

The Surpass Help Site is an award-winning, comprehensive documentation resource for Surpass Assessment products.


2020 UK Technical Communication Awards Overall Winner (link opens in new tab) 2022 UK Technical Communication Awards Merit Award (link opens in new tab)

© Surpass Assessment | Terms and Policies