Exporting items to Excel from the Item Search screen
You can export items to Excel from the Item Search screen.
This article explains how to export items to Excel from the Item Search screen.
In this article
1. Search for your items
Search for your items in the Item Search screen. For more information, read Searching for items with Item Search.

2. Choose your items
Select the items you want to export.
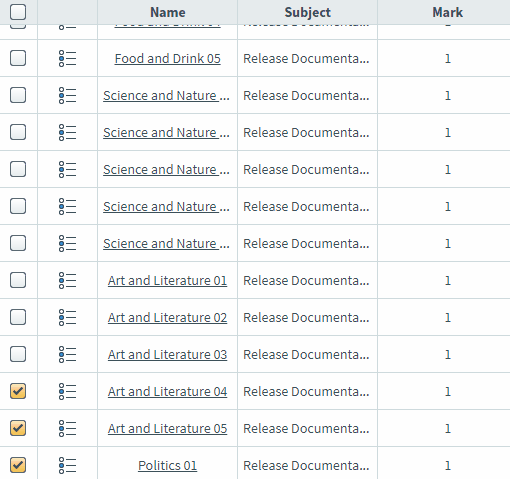
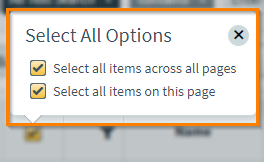
Select the checkbox in the header row to open the Select All Options menu. You can select all items on the current page (Select all items on this page) or select all items across all pages (Select all items across all pages).
3. Select Export to Excel
Select Export to Excel.

4. Choose data to include
By default, all data is included in the export for the selected items (‘Include all data‘). To choose specific data, select Include selected data.
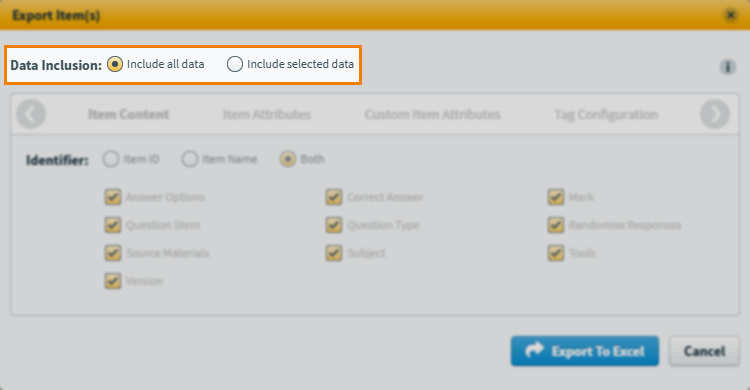
Select the headings or use the navigation arrows to choose between the available data groupings.

Expand the following section and refer to the tables for information on each option.
Item Content
| Data | Description |
|---|---|
| Identifier | Choose between Item ID, Item Name, or Both (also includes item set IDs and names). |
| Answer Options | The item’s answer options, in HTML format. |
| Correct Answer | The item’s correct answer. |
| Mark | The item’s total mark. |
| Question Stem | The item’s question stem content, in HTML format. |
| Question Type | The item’s question type. |
| Randomise Responses | Whether the item’s answer options are randomised (Multiple Choice, Multiple Response, and Either/Or item types). |
| Source Materials | Any source material attached to items, included in a folder within the ZIP and referenced in the spreadsheet. |
| Subject | The item’s subject. |
| Tools | Any tools added to the item. |
| Version | The item’s version number. |
Item Attributes
| Data | Description |
|---|---|
| Centre | The centre the item’s subject is in. |
| General Feedback | Any candidate feedback added to the item, in HTML format. |
| Item Owner | The first and last name of the item owner. |
| Item Set | If the item is in an item set, the name of the item set. |
| Item Set ID | The item set’s unique identifier. |
| Lists | Any item lists the item is in. |
| Marking Type | The item’s marking type. |
| Media | Any media material attached to items, included in a folder within the ZIP and referenced in the spreadsheet. |
| Shared | Whether the item has been shared with a subject master list. |
| Status | The item’s workflow status. |
Custom Item Attributes
| Data | Description |
|---|---|
| Citations | Any citations added to the item. |
| CQT Name | The Custom Question Type package. |
| CQT Version | The Custom Question Type package’s version number. |
| Created At | The date the item was created. |
| Created By | The first and last name of the user who created the item. |
| Enemy Items | The unique identifiers of any items the item has a test form-level enemy relationship with. |
| Item Purpose | The item’s person. |
| Last Edited At | The date the item was last edited. |
| Last Edited By | The first and last name of the user who last edited the item. |
| Section Enemy Items | The unique identifiers of any items the item has a section-level enemy relationship with. |
Tag Configuration

There are three ways you can control the tags included in the export:
- Include All Tags exports all tags.
- Customise Tags lets you specify which tag groups (and all their associated tag values) are exported.
- Omit All Tags exports no tags.
5. Confirm your export
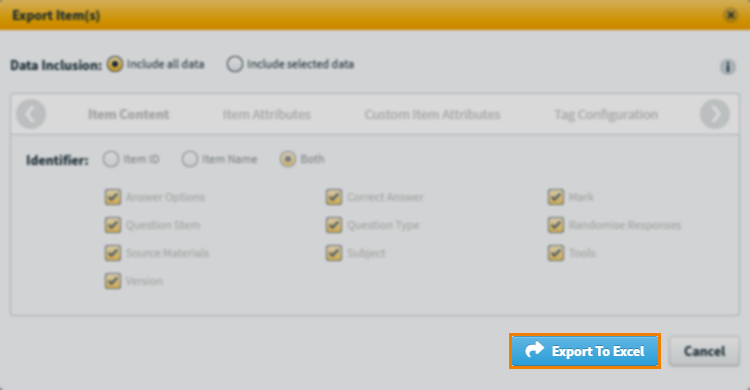
Select Export to Excel.
6. Download your export
You will receive an email once your export is complete, containing a link to download a ZIP file. The exported information is in an XLSX file within the ZIP, along with a folder containing any media. The link is valid for 7 days.
Further reading
Now you know how to export items from Item Search, read the following articles to learn more: