
Creating tables in items
Tables are data grids that arrange information cells in horizontal rows and vertical columns. Use tables in items to present contextual information to candidates.
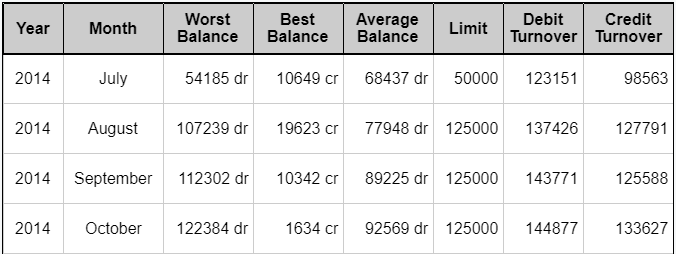
This article explains how to create tables.
In this article
1. Insert table
You can create tables inline with question stem or answer option content. Select Table Editor on the Advanced formatting toolbar.

2. Configure table
Edit your table options from the Table Properties dialog.
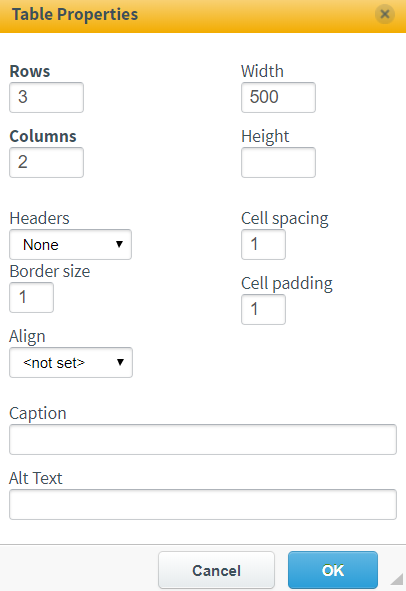
Refer to the following table for the table’s configurable properties:
| Setting | Description |
|---|---|
| Rows | The number of rows (default value: 3). |
| Columns | The number of columns (default value: 2). |
| Width | The width of cells in pixels (default value: 500). |
| Height | The height of cells in pixels. |
| Headers | Sets either the first row or column (or both) as headers. Content in header rows/columns is automatically bolded and centre-aligned. |
| Cell spacing | The space between cells in pixels. |
| Cell padding | The space between cell walls and content in pixels. |
| Border size | The thickness of table borders in pixels. Enter 0 for invisible borders. |
| Align | The alignment of the table in the content area. Available options are Left, Centre, and Right. |
| Caption | A short title that appears above the table. |
| Alt Text | A summary of table content for the benefit of those who may be unable to see the table in delivery. |
Select OK to insert your table.
Edit the Cell Properties
You can edit the individual cell(s) of the table. Right-click in the cell and navigate to the Cell Properties dialog.
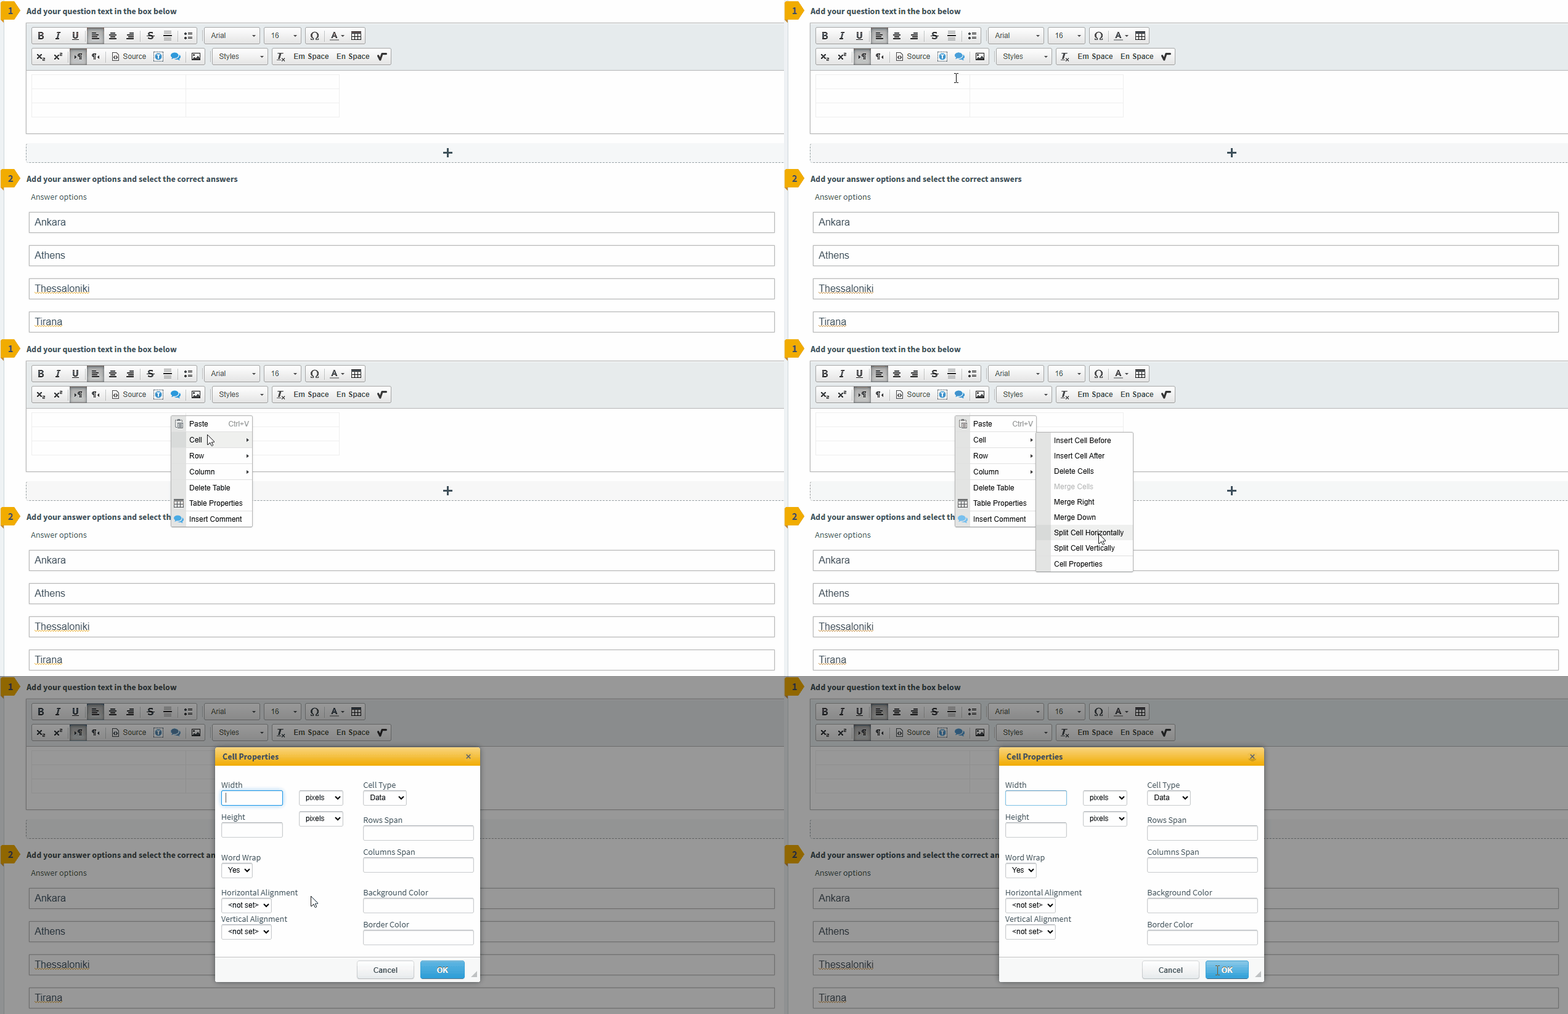
Refer to the following table for the configurable cell properties:
| Setting | Description |
|---|---|
| Width | Sets the width in pixels, or as a percentage of the whole table. For example, setting the width to 25% would be a quarter of the total table width. |
| Height | Sets the height of the cell in pixels, or as a percentage. |
| Word Wrap | Determines whether text wraps within the cell. If enabled, content moves to the next line when it reaches the cell boundary. |
| Horizontal Alignment | Sets the horizontal position of the content within the cell. |
| Vertical Alignment | Sets the vertical position of the content within the cell |
| Cell Type |
Specifies whether the cell is a header or data cell. Header cells are typically used for column or row headings.
|
| Rows Span | Merges the selected cell vertically across the specified number of rows. |
| Columns Span | Merges the selected cell horizontally across the specified number of columns. |
| Background Colour | Sets the background colour of the cell. |
| Border Colour | Sets the colour of the cell border. |
3. Fill table
Select a table’s cell to begin adding content to it.
Creating tables in legacy subjects
In legacy subjects, you can add tables at either the item or stem-level.
Item-level tables appear underneath the question stem in delivery. Stem-level tables appear within the question stem block in delivery and are added by selecting Table Editor on the formatting toolbar. For more information, read Using the formatting toolbar.
Refer to the following steps to add an item-level table.
1. Select Advanced Options > Add Table .

2. Configure table
After you have added your blank table, use the toolbar options to configure your table.

Refer to the following table for the table’s configurable properties:
| Setting | Description |
|---|---|
| Add Row Below | Inserts a new row beneath the selected cell. |
| Add Column Right | Inserts a new column to the right of the selected cell. |
| Delete Row | Deletes the selected row and its contents. |
| Delete Column | Deletes the selected column and its content. |
| Row Height | Sets the height of the selected row in pixels. You can apply this value to all rows. |
| Column Width | Sets the width of the selected column in pixels. You can apply this value to all columns. |
Select Cell Options to configure your table cells’ properties. Refer to the following table for the configurable properties of a table’s cell:
| Setting | Description |
|---|---|
| Merge Cells | Combines the selected cells into one cell. |
| Split Cells | Divides merged cells. |
| Decrease Indent | Moves text in selected cells one pixel to the left. |
| Increase Indent | Moves text in selected cells one pixel to the right. |
| Decrease decimals displayed | Removes one decimal place from table numbers. By default, tables show two decimal places. |
| Increase decimals displayed | Adds one decimal place to table numbers. By default, tables show two decimal places. |
| Border Colour | Edits the colour of cell borders (if set). |
Select Font to change font. Choose from the following fonts:
- Arial
- Comic Sans MS
- MS Gothic
- Times New Roman
- Trebuchet MS
- Verdana
3. Fill table
Select a table’s cell to begin adding content to it.
Refer to the following table for the available formatting options:
| Icon | Setting | Description |
|---|---|---|
 |
Undo | Reverses the previous action. |
 |
Text Size | Choose the size of text. |
 |
Bold | Makes text darker. |
 |
Italic | Makes text slant to the right. |
 |
Underline | Adds a horizontal line below the text. |
 |
Text Colour | Choose the colour of your text. |
 |
Cell Fill Colour | Choose the colour of your cells. |
 |
Cell Borders | Choose the border for selected cells. |
 |
Text Margins (Left) | Moves selected cells’ left margin one pixel to the left. |
 |
Text Margins (Right) | Moves selected cells’ left margin one pixel to the right. |
 |
Text Alignment | Sets the alignment of text in selected cells. |
Further reading
For more information on tables in Surpass, read the following articles: