Managing control items in SecureMarker
Control items in SecureMarker are pre-marked items that have been approved by senior examiners and are used to test whether examiners are marking within accepted tolerances. You can manage control items in the Quality Control screen.
This article explains how you can manage control items in the Quality Control screen of SecureMarker, including how to view examiner feedback added to control items.
In this article
1. Go to the Quality Control screen
To view the Quality Control screen, select Quality Control on the top navigation bar.

2. Select a subject and test
Select the Subject/Test menu on the navigation bar.

3. Choose an item
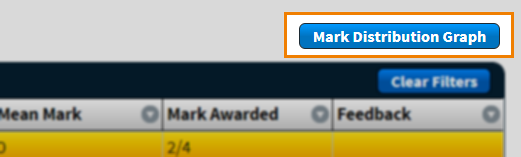
In the Items grid, select the item or item group that contains the control items you want to manage.

4. Select Manage CIs
Select Manage CIs to open the Manage Control Items screen.

5. Choose a control item
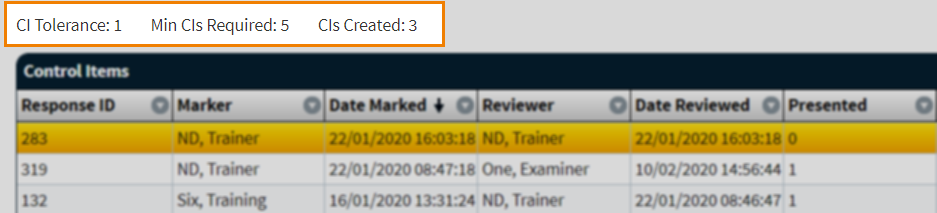
Choose a control item to manage in the Control Items grid of the Manage Control Items screen.

The Control Items grid displays all existing control items for the selected item or item group. Refer to the following table for more information on each column in the Control Items grid.
| Column | Description |
|---|---|
| Response ID | Displays the response’s unique ID code. |
| Marker | Displays the name of the examiner. |
| Date Marked | Displays the date on which the response was marked. |
| Reviewer | Displays the name of the user who reviewed the control item. For more information, read Reviewing control items in SecureMarker. |
| Date Reviewed | Displays the date on which the control item was reviewed. |
| Presented | Displays the number of times the control item has been presented to an examiner during marking. |
| Failed – Out of Tolerance | Displays the number of times the control item has been marked out of tolerance as a percentage. |
| Passed – Not Exact | Displays the number of times as a percentage the control item has been marked within tolerance but not awarded the exact mark. |
| Mean Mark | Displays the average mark awarded to the control item. |
| Mark Awarded | Displays the agreed mark for the control item. |
| Feedback | Displays examiner feedback attached to the control item. |
You can navigate through pages of data using the Page menu. Use the Rows entry field to define how many rows are displayed in the Escalated Responses grid. Select Refresh to update the number of rows.

The CI Tolerance, Min CIs Required, and CIs Created fields display the tolerance set for the control item, the minimum number of control items required for the item or item group, and the number control items that have been created for the item or item group, respectively.
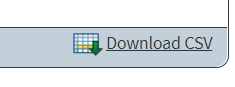
Select Download CSV to export the Control Items data to a spreadsheet.
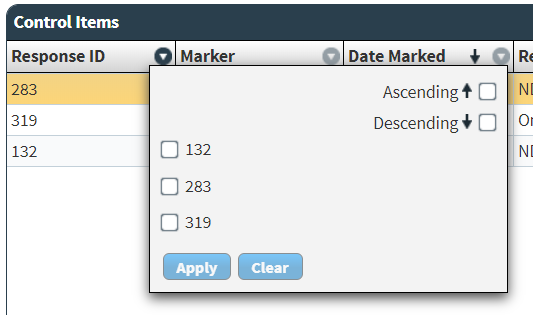
Filtering control items
Select the expander () on a column header to open a filter menu. Columns with filters applied are indicated by the filter icon: . You can combine filters across multiple columns.
For Response ID, Marker, Reviewer, and Feedback, select Ascending to filter the column content in ascending order (A-Z). Select Descending to filter the column content in descending order (Z-A). Use the text field to filter column contents based on a specified string. Select Apply to save the filter. Select Clear to reset the filter.
For Date Marked and Date Reviewed, you can either select Today to only display control items that match the current date or use the date picker to choose a date range. Select Apply to save the filter. Select Filter off to reset the filter.

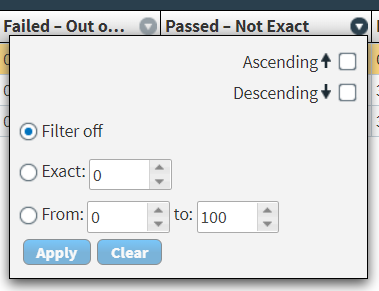
For Presented, Failed – Out of Tolerance, Passed – Not Exact, Mean Mark, and Mark Awarded, you can either select Exact to display an exact value or use the From and to picker to choose a range of values. Select Apply to save the filter. Select Filter off to reset the filter.
Select Clear Filters to reset all filters.
Viewing the Mark Distribution Graph
In the Manage Control Items screen, you can view statistical information about control items. This allows you to compare the distribution of marks awarded to control items. You might want to monitor the mark distribution graph to determine if an examiner is marking too harshly.
Select a control item in the Control Items grid and select Mark Distribution Graph.
In the Mark Distribution dialog, you can view the number of control items created for the item or item group, and the average mark awarded to the control item.
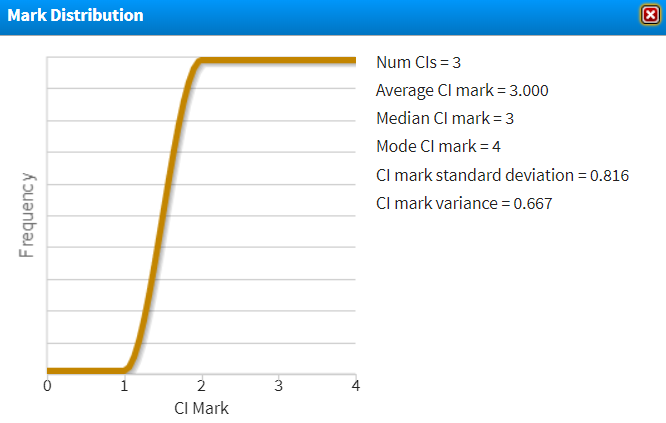
Refer to the following table for more information on the available data in the mark distribution graph.
| Field | Description |
|---|---|
| Number of CIs | Displays the number of control items created for the item or item group. |
| Average CI Mark | Displays the average mark awarded to the control. |
| Median CI Mark | Displays the middle mark awarded to a control item when arranged in ascending order. |
| Mode CI Mark | Displays the most commonly awarded mark for the control item. |
| CI Mark Standard Deviation | Displays the number used to determine how far marks are spread out from the average mark. A low standard deviation means that most of the numbers are close to the average. A high standard deviation means that the numbers are more spread out. |
| CI Mark Variance | Displays the mark variance. A high variance indicates that marks are very spread out from the average mark. |
6. Select View CI
Select View CI to open the Manage Control Items screen.

7. Manage the control item
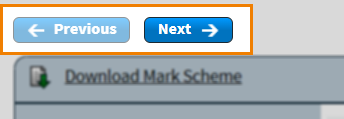
The View Control Items screen displays the control item. In this screen, you can view responses, download mark schemes, and read examiner feedback.

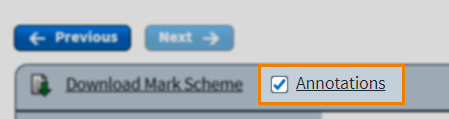
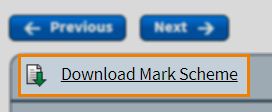
Select Previous and Next to navigate each control item.
Viewing examiner feedback
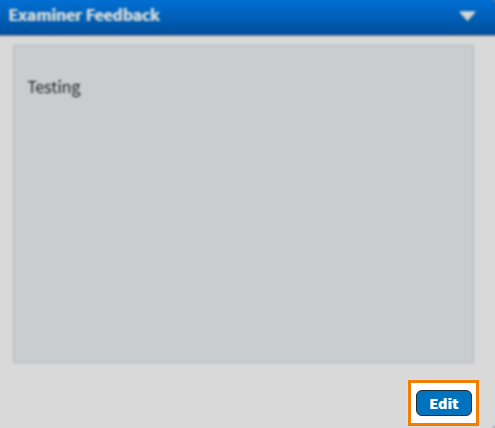
Select the Examiner Feedback dialog to view examiner feedback added to the control item. You can add examiner feedback when creating control items. For more information, read ‘Adding examiner feedback’ in Creating control items in SecureMarker.
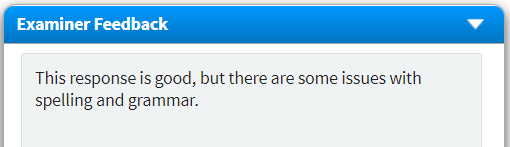
Select Edit in the Examiner Feedback dialog to edit the feedback. For more information on how to add feedback, read ‘Adding examiner feedback’ in Creating control items in SecureMarker.
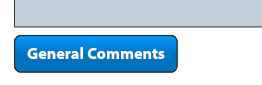
Select General Comments to view comments added to the control item by the examiner, if added.
Select Annotations to view annotations added to the control item by the examiner, if added.
Downloading mark schemes
Select Download Mark Scheme to download a mark scheme attached to the item. Mark schemes are uploaded to items in Surpass. For more information, read Uploading a mark scheme to an item.
Further reading
To learn more about working in Quality Control, read the following articles: