Creating a user in SecureMarker
In SecureMarker, a “user” is someone who interacts with the system. A user can view candidate responses, mark scripts, and perform administrative tasks. You can assign roles at the global level in the Users screen.
This article explains how to create a user in the Users screen of SecureMarker, including details on how to assign roles at the global level.
In This Article
1. Go to the Users screen
To view the Users screen, select Users on the navigation bar.

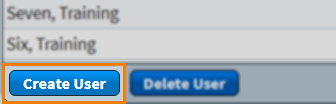
2. Select Create User
Select Create User to create a new user.
3. Fill out user details
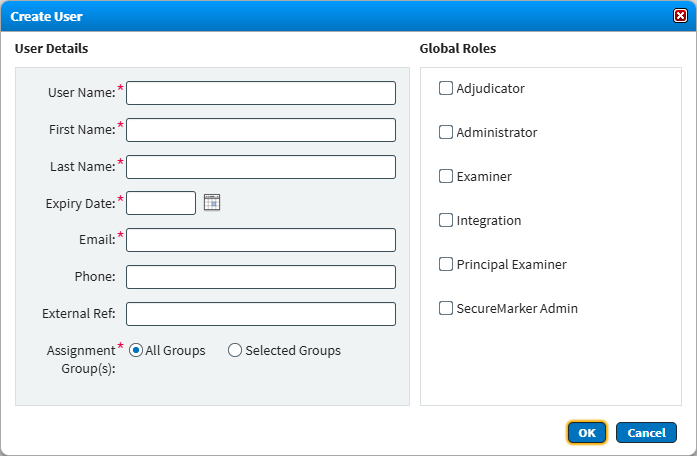
Fill out the User Details dialog with your new user’s information. Refer to the following table for information about each field.
|
Field |
Description |
|---|---|
| User Name* | Enter the user’s user name. User names are used to log into SecureMarker along with a password. |
| First Name* | Enter the user’s first name. |
| Last Name* | Enter the user’s last name. |
| Expiry Date* | Choose a date when the user expires. After the expiry date, the user will be unable to access SecureMarker. |
| Email* | Enter the user’s email address. They are emailed a link to create a password before logging in for the first time. |
| Phone | Enter the user’s phone number. |
| External Ref. | Enter an external reference number. This allows you to cross reference user data in SecureMarker with an external system. |
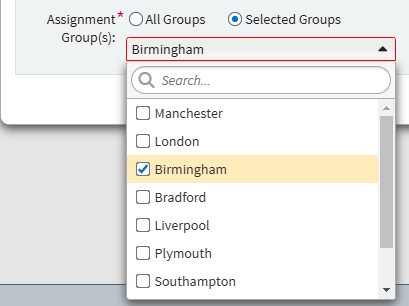
| Assignment Group(s) |
Choose between All Groups or select one or more assignment groups. Read ‘Allocating assignment groups’ below for more information. |
Assigning roles at the global level
You can choose to assign roles at the global level to your new user, if applicable. This allows the selected user to access all tests across SecureMarker. The options available in the Global Roles list depend on the roles created in the Roles screen. For more information, read Creating a role in SecureMarker.

Allocating assignment groups
Assignment groups let you ensure candidates scripts are marked by a specific pool of markers. After assigning a centre to an assignment group in Surpass, any tests taken in a subject that belongs to that centre can be marked by the corresponding assignment group users in SecureMarker.
You can choose between All Groups or select one or more assignment groups.
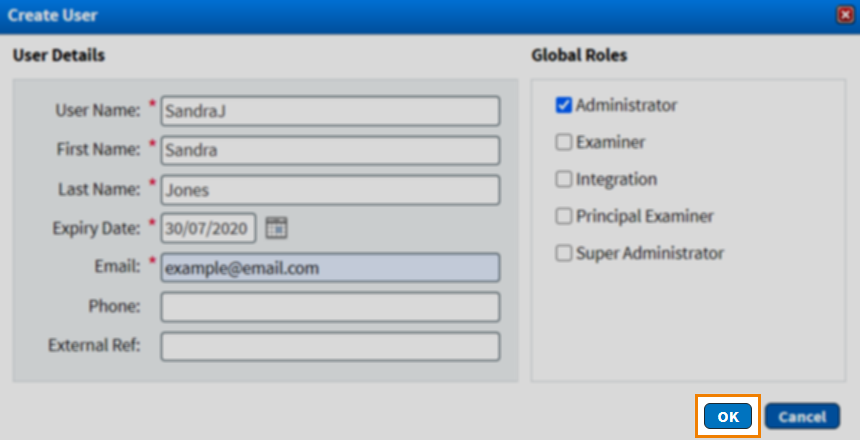
4. Confirm user details
Select OK to create the user. An email is sent to the user’s registered email address containing their user name and password.
Further reading
To learn more about Users, read the following articles: