Releasing a test for marking in SecureMarker
SecureMarker includes several quality control features that ensure scripts are marked fairly within accepted tolerances. When you have configured your test’s quality control settings in the Quality Control screen, you can release the test for marking.
This article explains how to release a test for marking in the Quality Control screen of SecureMarker, including how to stop an examiner from marking.
In this article
1. Go to the Quality Control screen
To view the Quality Control screen, select Quality Control on the top navigation bar.

2. Select a subject and test
Select the Subject/Test menu on the navigation bar.

3. Select Release Test For Marking
Select Release Test For Marking to release all items and item groups in the test for marking. For more information about test-level actions in the Quality Control screen, read ‘About test-level actions’ in About the Quality Control Screen in SecureMarker.

Releasing items for marking
Select Release Item for Marking to release a specific item or item group for marking. For more information, read ‘About item-level actions’ in About the Quality Control Screen in SecureMarker.

4. Confirm release
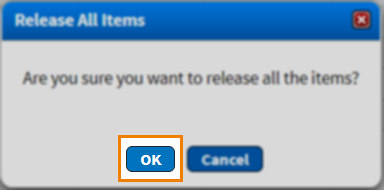
Select OK in the Release All Items dialog to confirm you want to release the test for marking.
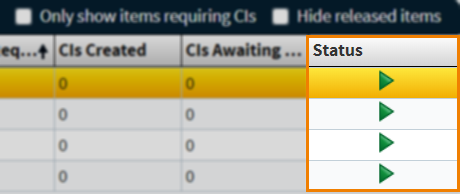
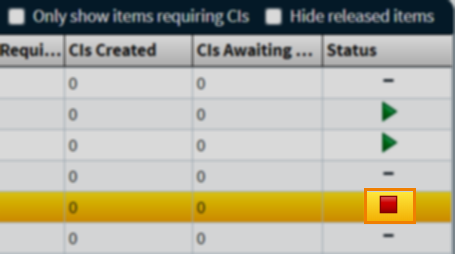
When a test has been released for marking, all items and item groups in the test appear as Released () in the Status column of the Items grid.
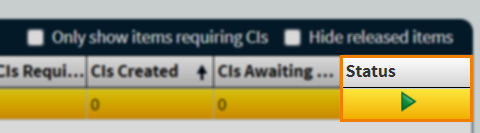
When a specific item or item group has been released for marking, they appear as Released () in the Status column of the Items grid.
Stopping marking
You can stop marking for released tests and items in the Quality Control screen. Select Stop Marking to stop marking for all items and item groups in a test.

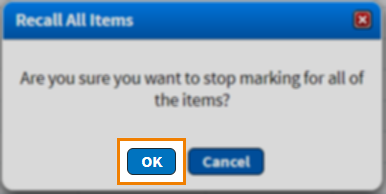
Select OK in the Recall All Items dialog to confirm you want to stop marking for all items and item groups in a test.
To suspend marking for a specific item or item group in a test, select Stop Marking.

When marking has been stopped for tests and specific items, they appear as Stopped () in the Status column of the Items grid.
Further reading
To learn more about working in Quality Control, read the following articles:
- About the Quality Control screen in SecureMarker
- About control item settings in SecureMarker
- Creating control items in SecureMarker
- Reviewing control items in SecureMarker
- Managing control items in SecureMarker
- Discarding control items in SecureMarker
- Revoking control items in SecureMarker
- Setting up double marking in SecureMarker