About the Quality Control screen in SecureMarker
SecureMarker includes several quality control features that ensure scripts are marked fairly within accepted tolerances. You can configure all quality control features in the Quality Control screen. This includes setting up control items and defining ongoing marking rules.
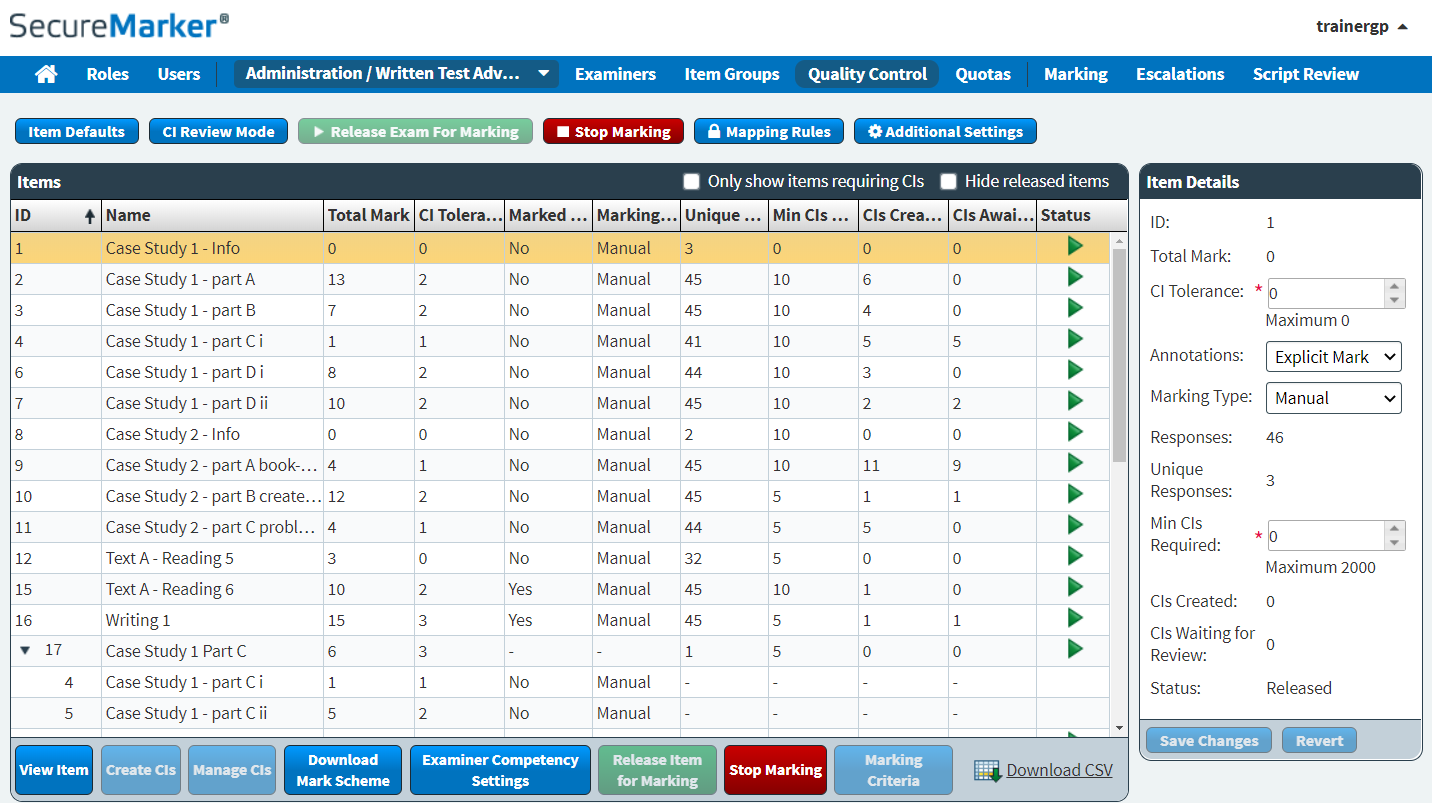
This article explains how to navigate the Quality Control screen and use its features, including how to configure exam- and item-level actions.
In this article
Navigating to the Quality Control screen
To view the Quality Control screen, select Quality Control on the navigation bar.

Selecting a qualification and exam
About the Items grid
The Items grid lists all items in your chosen exam.
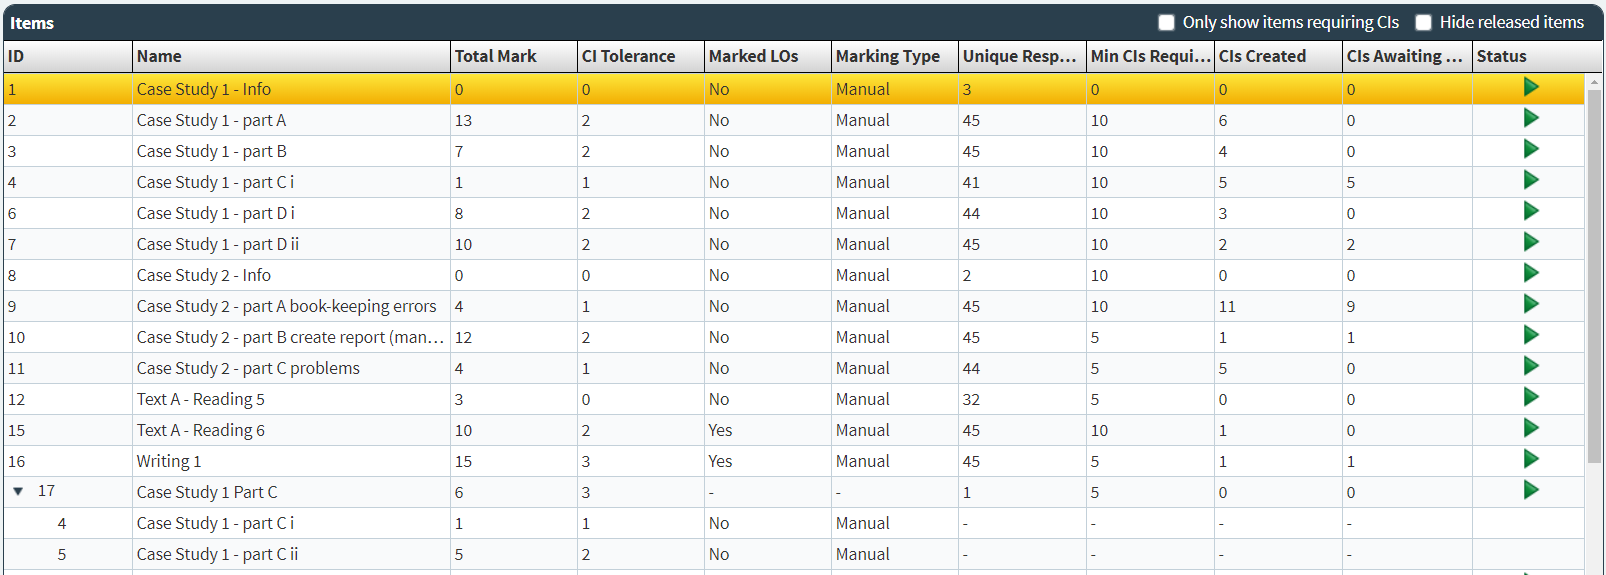
Refer to the following table for information on each column in the Items grid.
| Column | Description |
|---|---|
| ID | Displays the unique ID code of the item or item group. |
| Name | Displays the name of the item or item group. |
| Total Mark | Displays the total number of marks available for the item or item group. |
| CI Tolerance | Displays the number of marks set in the CI Tolerance field for the item or item group. For more information, read ‘About the Item Details panel’ later in this article. |
| Marked LOs | Displays whether the item contains Marked Learning Outcomes. For more information, read Using tags in items. |
| Marking type | Displays the marking type of the item. This can be Automatic (computer marked) or Manual (human marked). |
| Unique Responses |
Displays the number of unique responses for the item or item group. A unique response is a group of identical candidate responses that can be marked at the same time. |
| Min CIs Required | Displays the minimum number of control items required for the item or item group. Fore more information, read ‘About the Item Details panel’ later in this article. For more information on how to create control items, read Creating control items in SecureMarker. |
| CIs Created | Displays the number of control items that have been created. For more information, read Creating control items in SecureMarker. |
| CIs Awaiting Approval | Displays the number of control items that are currently awaiting approval. For more information, read Reviewing control items in SecureMarker. |
| Status | Displays the release status of the item or item group. This can be Released or Stopped . For more information, read Releasing an exam for marking in SecureMarker. |
Sorting columns
Select a column header in the Items grid to sort the cell data alphabetically or numerically.
The arrow icon on the column header represents whether the information in the column is sorted in ascending () or descending () order. You can toggle between ascending or descending order by selecting the column header.
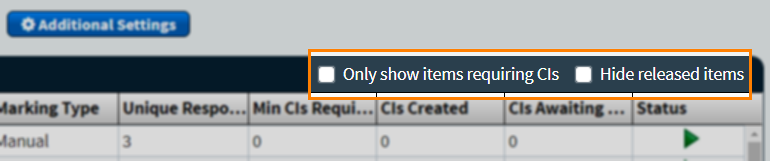
Filtering items
Select Only show items requiring CIs to view items that require control items. Select Hide released items to remove any items that have already been released for marking.
About exam-level actions
You can take some actions in the Quality Control screen at the exam level. These actions apply to all items in an exam.

Refer to the following table for information about the available exam-level actions.
| Action | Description |
|---|---|
| Item Defaults |
IMPORTANT: Any changes you make in Item Defaults do not apply to existing responses in the system. Changes to these settings only apply when new responses come through to SecureMarker.
Changes some of the default item settings when new responses come into SecureMarker. You can change the default for the following settings at exam level:
|
| CI Review Mode |
Changes the review mode for control items created for all items in the exam.
|
| Release Exam for Marking |
IMPORTANT: It is advised that you define all required settings in Quality Control before releasing an exam for marking.
Releases all items and item groups in an exam for marking by examiners. For more information, read Releasing an exam for marking in SecureMarker. |
| Stop Marking | Stops examiners from being able to mark all items and item groups in an exam. |
| Mapping rules |
IMPORTANT: You can only upload Mapping Rules before an exam has been released for marking.
Allows you to upload score mapping rules for the exam to map raw marks to scores on a scale. This allows you to apply marking criteria to items. For more information, read Setting up mapping rules and marking criteria in SecureMarker. |
| Additional Settings |
Provides access to additional exam-level settings.
NOTE: Marking Restriction does not affect users with the Unrestricted Examiner permission.
TIP: If you enable Marking Restriction, make sure the pool of examiners is large enough to mark the responses across all candidate scripts.
|
About item-level actions
You can take some actions in the Quality Control screen at the item level. You must select an item in the Items grid before you can perform these actions.

Refer to the following table for information about the available item-level actions.
| Action | Description |
|---|---|
| View Item |
Allows you to view the item or item group. This displays a preview of the item as it appears in delivery. For more information, read ‘Viewing items’ later in this article. |
| Create CIs |
Allows you to create or review control items for the item or item group. For more information, read Creating control items in SecureMarker. |
| Manage CIs |
Allows you to view and manage existing control items for the selected item or item group. For more information, read Managing control items in SecureMarker. |
| Download Mark Scheme |
Allows you to download the mark scheme for the selected item. The mark scheme opens in the appropriate application for the file type.
NOTE: Changes to the mark scheme attached to the item in Item Authoring will affect the mark scheme available to download in SecureMarker.
|
| Examiner Competency Settings |
Allows you to change the control item settings for the item or item group. Any changes you make to the Examiner Competency Settings will affect live marking. For more information, read Setting up control item rules in SecureMarker. |
| Release Item for Marking |
Allows you to release the item or item group for marking. |
| Stop Marking |
Allows you to stop examiners from being able to mark the item or item group. |
| Marking Criteria |
IMPORTANT: You can only edit the Marking Criteria for items or item groups before an exam has been released for marking.
Allows you to define the marking criteria for an item or item group when mapping rules have been defined for the exam. For more information, read Setting up mapping rules and marking criteria in SecureMarker. |
About the Item Details panel
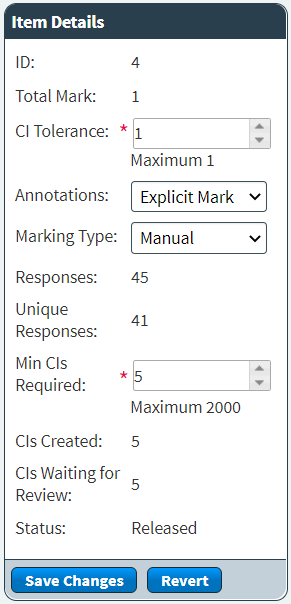
The Item Details panel displays information about the selected item or item group.
Refer to the following table for information about the Item Details panel.
| Information | Description |
|---|---|
| ID | Displays the unique ID of the item or item group in SecureMarker. |
| Total Mark | Displays the total number of marks available for the item or item group. |
| CI Tolerance |
Displays the CI Tolerance for the item or item group. This is the number of marks away from the agreed control item mark that an examiner can be before their mark considered is out of tolerance. Enter the number of marks appropriate for the CI Tolerance for the selected item or item group. Enter a number in the entry field or use the Up () and Down () arrows to change the value.
NOTE: The CI Tolerance cannot exceed the total number of marks for the item or item group.
|
| Annotations |
Displays the annotation type for the selected item.
NOTE: Derived Mark is an option for legacy tests only, and should not be used for items containing Marked Learning Outcomes or marking criteria.
|
| Marking type |
Displays the marking type for the selected item. This can be Automatic (computer marked) or Manual (human marked). You can choose to manually mark items that were marked automatically. To change the marking type, select the drop-down menu and choose Manual.
NOTE: You may want to change the marking type from Automatic to Manual to rescore an item. You can also rescore items in Surpass. For more information, read About Rescoring.
|
| Responses | Displays the total number of responses for the item or item group. This number indicates the total number of candidates who responded to the item. |
| Unique Responses | Displays the number of unique responses for the item or item group. A unique response is a group of identical candidate responses that can be marked at the same time. |
| Min CIs Required |
IMPORTANT: The Min CIs Required value is intended as a guide only and is not enforced.
Displays the minimum number of control items required for the item or item group. You can enter a number in the entry field or use the up () or down () arrows to change the value. For more information, read Creating control items in SecureMarker. |
| CIs Created | Displays the number of control items that have been created. For more information, read Creating control items in SecureMarker. |
| CIs Awaiting Approval |
Displays the number of control items that are currently awaiting approval. For more information, read Creating control items in SecureMarker. |
| Status | Displays the release status of the item or item group. This can be Released or Stopped . For more information, read Releasing an exam for marking in SecureMarker. |
About control item settings
In the Quality Control screen, you can configure how control items are used to manage the quality of examiners’ marking. You can configure settings related to control items from Item Defaults, Examiner Competency Settings, and the Item Details panel.
- Daily competency run − Affects the control items an examiner sees every day when they start marking. The daily competency run checks the quality of an examiner’s marking before they are allows to start marking candidate responses.
- Ongoing marking rules − Affects the control items an examiner sees during normal marking.
- Rolling review − Reviews the control items an examiner has previously marked.
To learn more about the settings available in Item Defaults and Examiner Competency Settings, read About control item settings in SecureMarker. For more information on the options in the Item Details panel, see ‘About the Item Details panel’ earlier in this article.
Creating and managing control items
You can create and manage control items in the Quality Control screen. To create new control items or review control items awaiting approval, select Create CIs.

To view and manage existing control items, select Manage CIs.

For more information on creating and managing control items, read Creating control items in SecureMarker or Managing control items in SecureMarker.
Viewing items
You can view items and item groups in the Quality Control screen. This allows you to preview the item as it appears in the marking interface or to view these items as part of item groups.
To view an item or item group, select View Item.

You can preview the item and download mark schemes in the View Item screen.
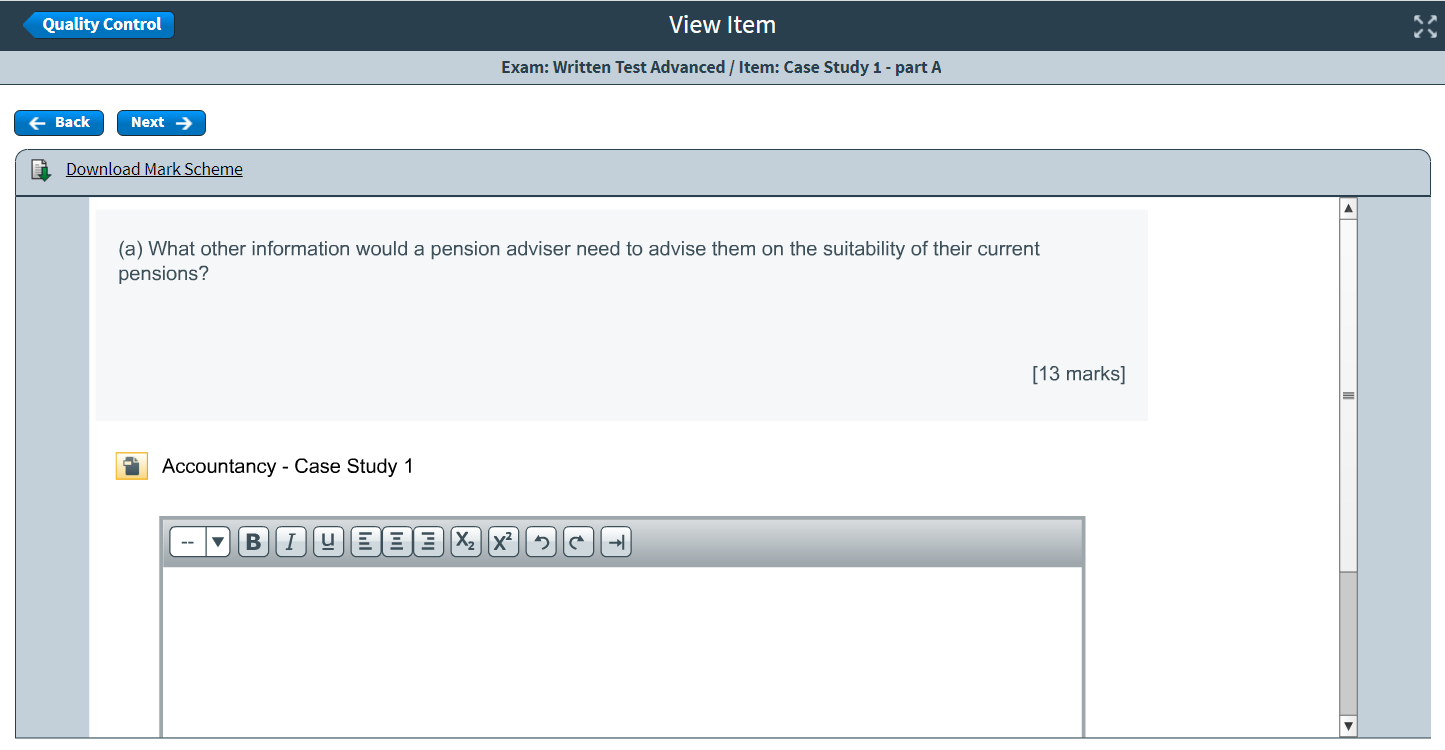
You can view basic details about the selected item in the View Item screen:
- Exam – Displays the name of the exam.
- Item – Displays the name of the item.

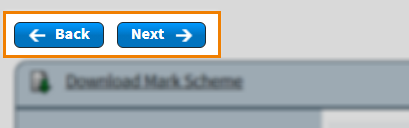
Select Back or Next to navigate to other items or item groups in the exam.
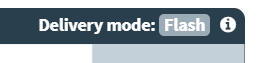
About the Delivery Mode toggle
The Delivery mode toggle in the View Item screen displays whether the item was delivered in the standard or legacy test driver.
Delivery mode: Flash indicates that the item was delivered in the legacy test driver.
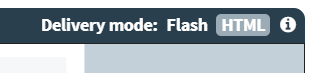
Delivery mode: HTML indicates that item was delivered in the standard test driver.

If the item was created in a Mixed subject and was delivered in both standard and legacy tests, you can choose to view the item in either Flash or HTML. Select HTML on the Delivery mode toggle to view the item as it appeared to candidates in the standard test driver. Select Flash on the Delivery mode toggle to view the item as it appeared to candidates in the legacy test driver. For more information on the available test delivery options in Surpass, read About Surpass test delivery options.
Further reading
To learn more about working in the Quality Control screen, read the following articles: