Connecting to the Surpass OAPI
Requests to the Surpass OAPIs must be authenticated using either user credentials or a bearer token. However, the user specified in the request must also have the Surpass permissions required to authorise the action taken.
This article explains how to connect to the Surpass OAPIs and which permissions are required to successfully call each API.
In this section
Authentication
There are three ways to authenticate and establish communication with the Surpass Platform:
- Basic authentication – a quick way to establish connection with the server, akin to logging in with user credentials.
- JWT authentication – authentication that offers a higher level of security by not putting user credentials at risk of exposure, sending a bearer token instead.
- Single Sign-On (SSO) – SAML header parameter is passed in the request, with its value generated using the credentials specified in the SSO setup. For more information on SSO, read Single Sign-On.
Basic authentication
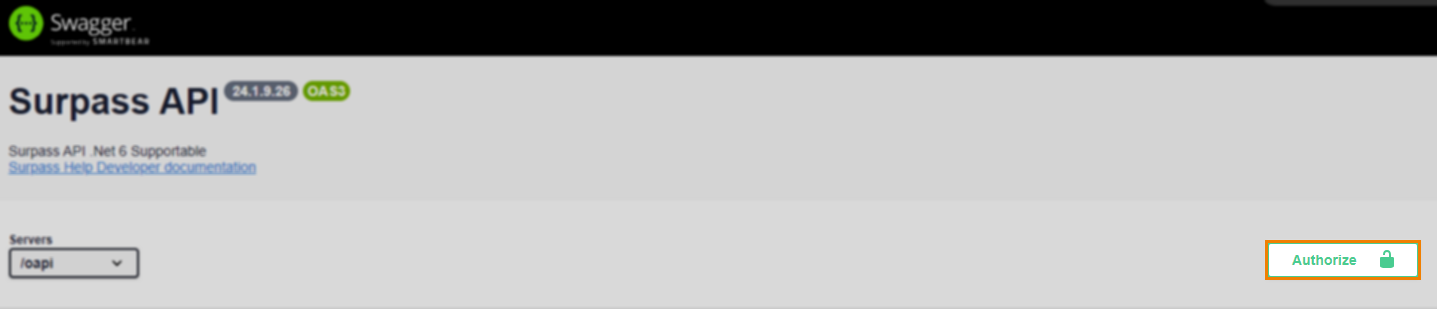
If you are using the Surpass OAPI Swagger console to send requests to the Surpass OAPI, select Authorize to open the Available authorizations dialog.
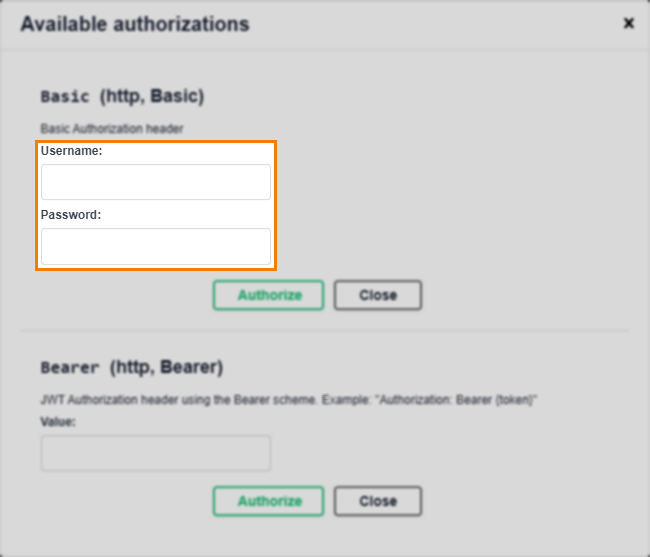
Enter your credentials in the Username and Password fields and then select Authorize. A token is generated from your credentials and sent with each request to the Surpass OAPI in order to authenticate the requests.
To authenticate requests sent to Surpass OAPIs from a different HTTP client, send basic authentication details in an authorization header. This is documented in the parameters tables of the reference documentation as follows:
|
Name |
Parameter |
Input |
Description |
|---|---|---|---|
|
authorization |
header MANDATORY |
Basic {credentials} |
Basic authentication details must be passed to authorise the user’s request, where {credentials} is a Base64 encoded username:password string. |
Connection to the Surpass OAPI can also be authenticated using SAML if using Single Sign-On (SSO) to access Surpass. A SAML header parameter is passed in the request, with its value generated using the credentials specified in the SSO setup. For more information on SSO, read Single Sign-On.
JWT authentication
JWT (JSON web token) authentication securely transfers information between client and server as a JSON object. Tokens are generated from a public and private key pair and used to identify the authenticated user without having to pass user credentials with each API request.
To authenticate requests sent to Surpass OAPIs using a JWT, follow these steps:
1. Generate a public and private key pair
Generate a 2048-bit public and private key pair using an RSA key generator. Public keys are used on the client-side to validate each request, and the private key is stored on the server to sign (and authenticate) each token.
2. Store private key on your server
Store your generated private key on your server, such as in the config file within the application from which you are generating tokens.
If using the Surpass JWT application for testing token authentication (contact support@surpass.com if you need this application), add your private key to the appSettings object in the Surpass.OAPI.JwtTokenGenerator.exe config file. You must also add your Surpass instance username to the UserName key-value pair, a token expiry value (in minutes) to Expires, and your Surpass instance URL to Issuer.
3. Add public key to your Surpass instance
Use the Settings OAPI to add the private key’s corresponding public key to your instance.
4. Generate a token
Generate your JWT. It is best practice to write something into your application that is calling the Surpass OAPI, to generate your tokens.
If using the Surpass JWT application, launch it. The application uses your configured private key to generate a JWT. Copy the token’s string (not including the Bearer prefix).
5. Use token to authenticate requests
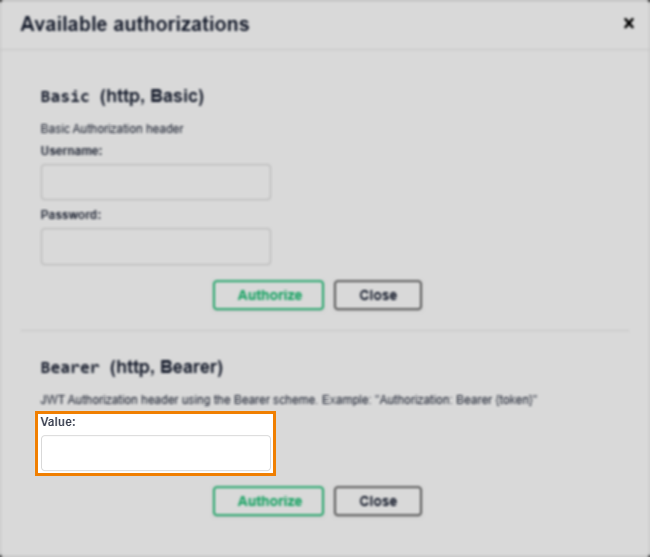
If using the Surpass OAPI Swagger console, enter your JWT in the Value field of the Available authorizations dialog, and then select Authorize.
To authenticate requests sent to Surpass OAPIs from a different HTTP client, send your bearer token in an authorization header. This is documented in the parameters tables of the reference documentation as follows:
|
Name |
Parameter |
Input |
Description |
|---|---|---|---|
|
authorization |
header MANDATORY |
Bearer {token} |
A bearer token must be passed to authorise the user’s request, where {token} is a JWT (JSON web token). |
Equally, if the Settings OAPI contains an incorrect public key, although a lost public key can be derived from its private key and re-added to your Surpass instance, with basic authentication disabled you would not be able to authenticate a request to do this.
Authorisation
For requests sent to Surpass APIs to be authorised, the user sending the request must have the requisite Surpass permission(s). Each part of the system has a unique permission, which acts as a key.
Users can also be assigned roles at subject, centre, and site-level. If the user making the request only has subject or centre-level access, then whatever it is they are requesting needs to be in the relevant subject and/or centre. For more information on roles and permissions in Surpass, read About roles and permissions.
Requisite permissions
Expand the following section for tables detailing which permission is needed to successfully call each Surpass OAPI.
Further reading
Now you are connected to the Surpass OAPI, read the following articles to learn more: