Setting up Single Sign-On with Azure AD
Azure Active Directory (AD) is an identity management platform that can enable Single Sign-On (SSO) authentication/authorisation. It is a claims-based authentication process; users are identified using a set of claims that are packaged into a secure token.
This article explains how to set up SSO for Surpass using Azure AD.
In this section
1. Create your application in Azure AD
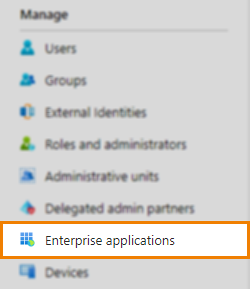
From Azure Active Directory, select Enterprise applications.
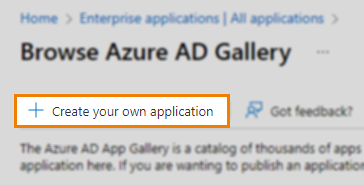
Select New application.

Select Create your own application.
Give your application a name and select the Integrate any other application you don’t find in the gallery (Non-gallery) option. Select Create.
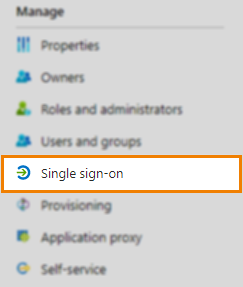
2. Navigate to Enterprise applications > Manage > Single sign-on
From All applications, select your application. Select Manage > Single sign-on.
3. Select SAML single sign-on method
Select SAML from the available single sign-on methods.

4. Complete Basic SAML Configuration
Select Edit to complete the Basic SAML Configuration fields.
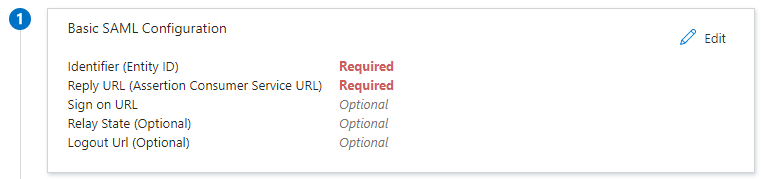
Read the following table for a sample setup:
| Property | Value |
|---|---|
|
Identifier (Entity ID) |
Demo_SurpassEditions
IMPORTANT: This must match the Name/Identity ID in Surpass Site Settings > Single Sign On.
|
|
Reply URL (Assertion Consumer Service URL) |
https://{your Surpass instance}.surpass.com/Saml/SingleSignOnService |
|
Sign on URL |
https://{your Surpass instance}.surpass.com/Saml/login |
|
Relay State |
Blank |
|
Logout URL |
https://{your Surpass instance}.surpass.com/Saml/SingleLogOutService |
5. Configure Attributes & Claims
Select Edit to complete the Attributes & Claims fields.
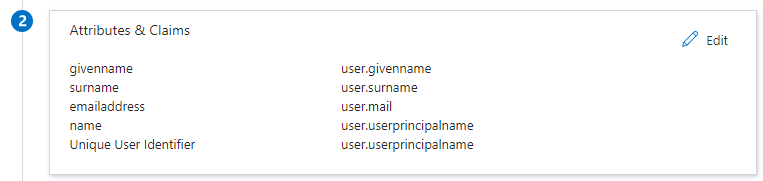
To authenticate where the user already exists in Surpass, enter the following outgoing Surpass attribute along with your value:
| Attribute | Surpass Input | Value |
|---|---|---|
|
Unique User Identifier (Name ID) |
|
|
To authenticate and create new users, enter the following outgoing Surpass attributes along with your values:
| Attribute | Surpass Input | Value |
|---|---|---|
| Unique User Identifier (Name ID) |
|
{username} |
|
http://schemas.xmlsoap.org/ws/2005/05/identity/claims/name |
Username |
|
|
http://schemas.xmlsoap.org/ws/2005/05/identity/claims/emailaddress |
|
{email address} |
|
http://schemas.xmlsoap.org/ws/2005/05/identity/claims/givenname |
First Name |
{First Name} |
|
http://schemas.xmlsoap.org/ws/2005/05/identity/claims/surname |
Surname |
|
|
CentreReference |
Centre Reference |
{Centre Reference} |
For more information, read ‘Mapping SAML attributes to Surpass centre and user attributes’ in Configuring Surpass for Single Sign-On.
6. Download SAML Signing Certificate
Download the SAML Signing Certificate from the SAML Signing Certificate section.
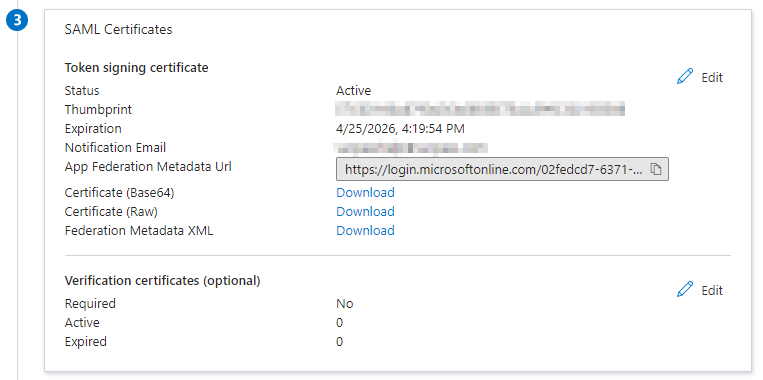
Use the Certificate (Base64) or Certificate (Raw) download options to ensure your certificate is saved in CER format.
7. Configure Surpass
Retrieve the Login URL, Azure AD identifier, and Logout URL from the Set up application section to complete the Surpass Site Settings > Single Sign On configuration.
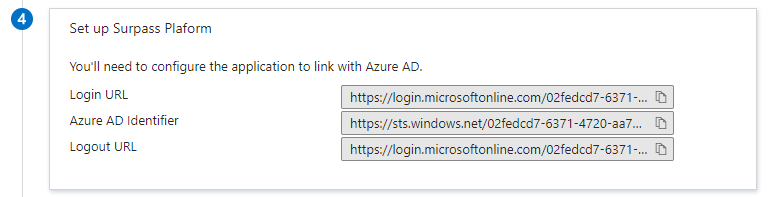
For more information, read Configuring Surpass for Single Sign-On.
8. Upload the Surpass Service Provider Certificate
In Surpass, select Download Certificate from the Single Sign On page in Site Settings to download the certificate.

This certificate is the token-encryption certificate used to encrypt the SAML assertion. The SP (Surpass) decrypts the SAML assertion using the associated private key. Ignore any warnings about the key length.
In Azure AD, navigate to Security > Token encryption.
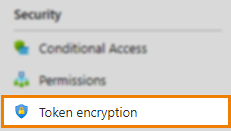
Select Import certificate and find your Surpass Provider Certificate. Select Yes to import the certificate. For more information, read Microsoft’s SAML token encryption article.
9. Test sign-on
From Manage > Single sign-on you can select Test to test and troubleshoot the integration.

Further reading
Now you know how to set up Single Sign-On using Azure AD, read the following articles to learn more: