Publishing items for Pearson VUE
The Surpass Publisher can publish items retrieved from the Surpass Platform for use in the Pearson VUE test driver.
This article explains how to publish items for use in the Pearson VUE test driver.
In this section
1. Select items to publish
Select the items you want to publish by selecting their corresponding checkboxes.

You can select all items in the list using the checkbox in the header row. All items in the list are selected by default.
For more information on the Surpass Publisher item grid, read About the Surpass Publisher item grid.
Setting items as scored/non-scored
The fifth column of the Surpass Publisher item grid determines whether the item on the corresponding row is a scored or non-scored item.
De-select the items you want to mark as non-scored by selecting their corresponding checkboxes.

Select the checkbox in the column header to mark all items in the grid as scored or non-scored.
2. Select Publish selected items
Select Publish selected items.

3. Configure exporting options
In the first step of the Publish wizard, Exporting Options, select Pearson VUE QTI from the Publishing Format drop-down menu.

Specify a Target Platform: Desktop edition or Browser edition.
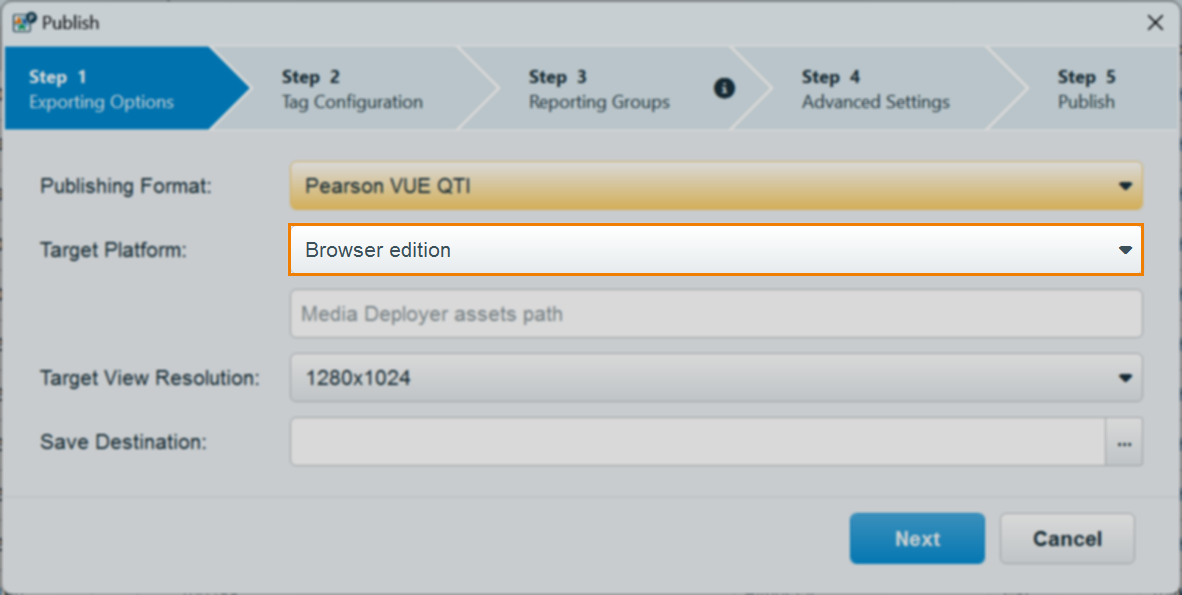
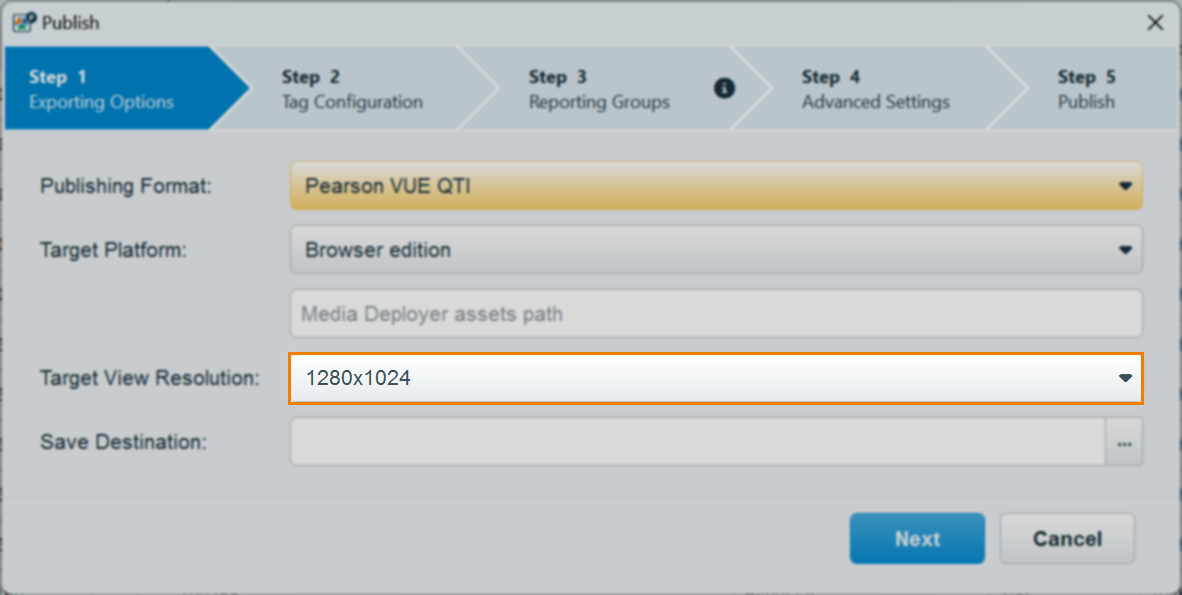
Choose a resolution from the Target View Resolution drop-down menu to determine the target width and height of the test driver on candidate devices.
Select […] to choose a save destination for your published items. You must give the ZIP file a name.

Select Next to continue.
Specifying a Media Deployer assets path
If your items contain media and your target platform is Browser edition, you can specify a file path for your media files in the Media Deployer assets path field.
Specifying a path is useful if the Pearson VUE Media Content Deployer will be the source of any media files used in a test. Media files can be nested in a folder structure in the Media Deployer.
Enter your file path in the Media Deployer assets path field.

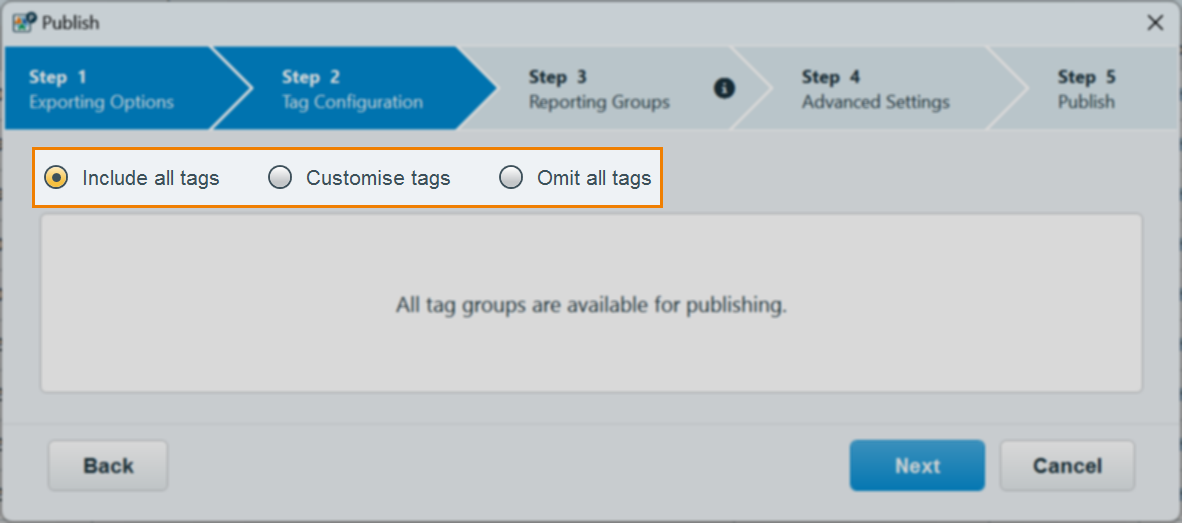
4. Configure tags
In Step 2 – Tag Configuration, choose between including all tags (Include all tags), a subset of tags (Customise tags), or no tags (Omit all tags) in your package. The available tag groups are the tag groups in the subject(s) of the items in the item list.
If you choose to Customise tags, select from the available tag groups in the Select Tag Group drop-down menu.
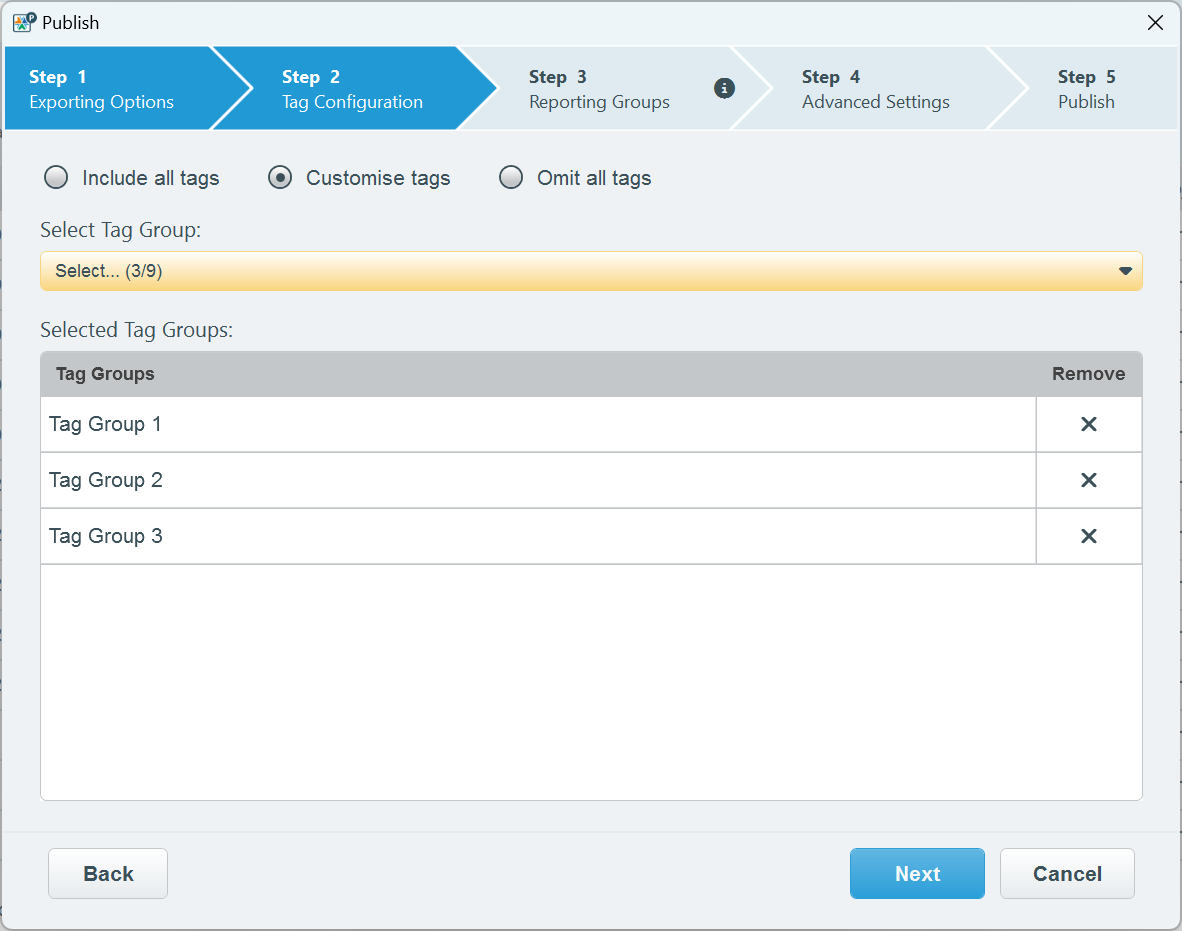
Use the corresponding Remove icons to omit any selected tag groups.
Select Next to continue.
5. Configure reporting groups
In Step 3 – Reporting Groups, you can choose which reporting groups to include in your package. Reporting groups are tag values against which candidate performance is measured; how many marks a candidate scores out of the available marks for all items tagged with a selected tag value (reporting group) is displayed in a score report.
Choose your tag groups from the Select Reporting Tag Group drop-down menu. The available tag groups are the tag groups in the subject(s) of the items in the item list.
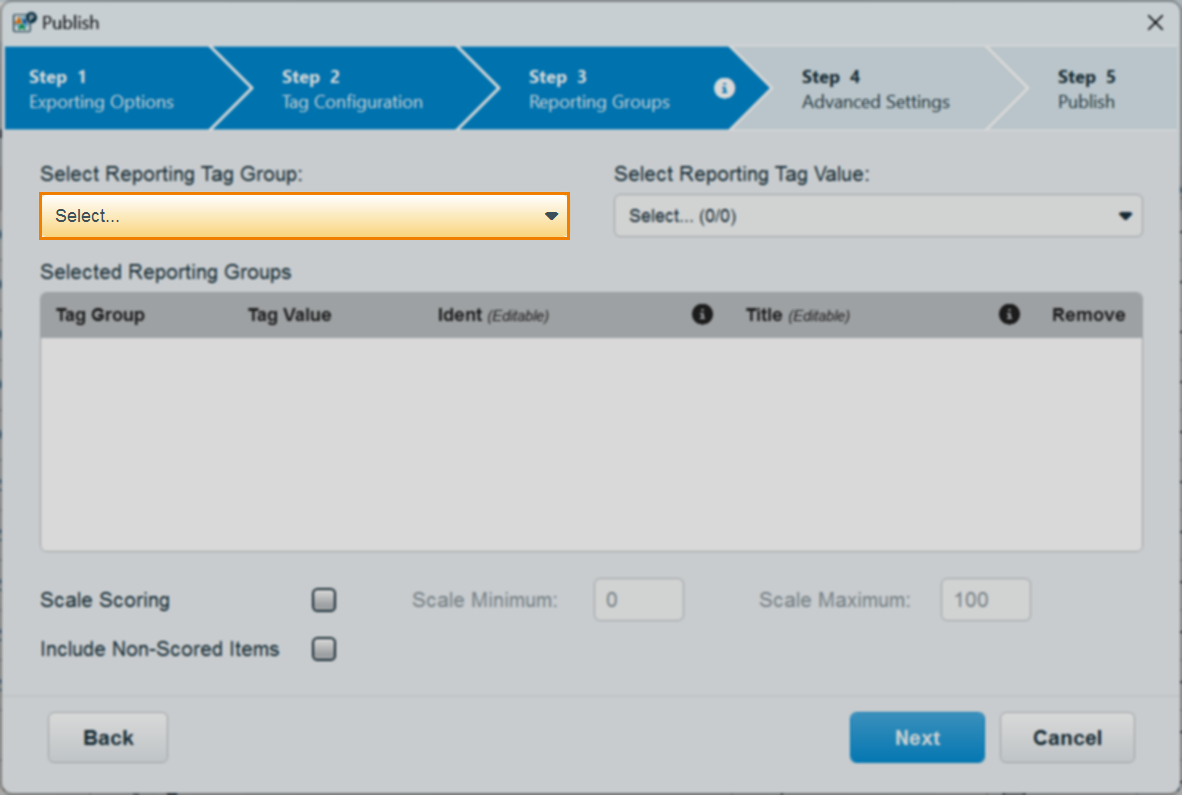
Choose your tag values (available based on your selected tag groups) from the Select Reporting Tag Value drop-down menu.
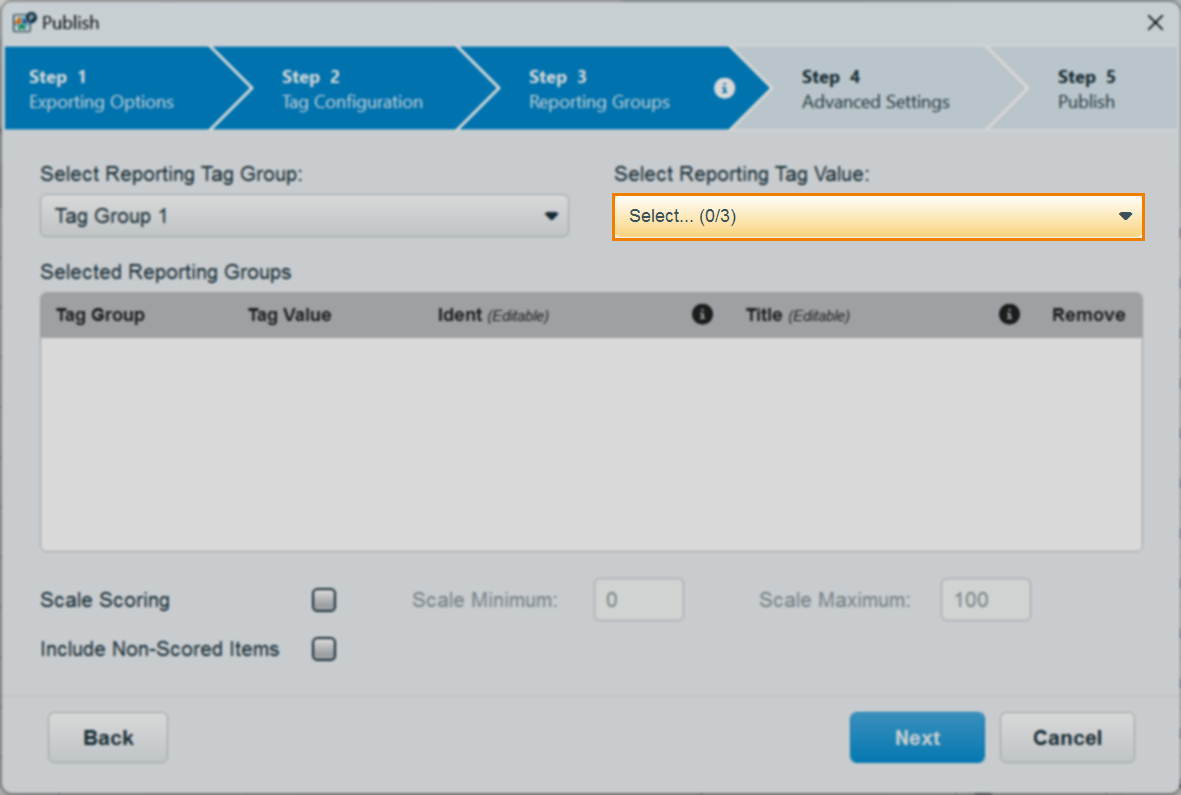
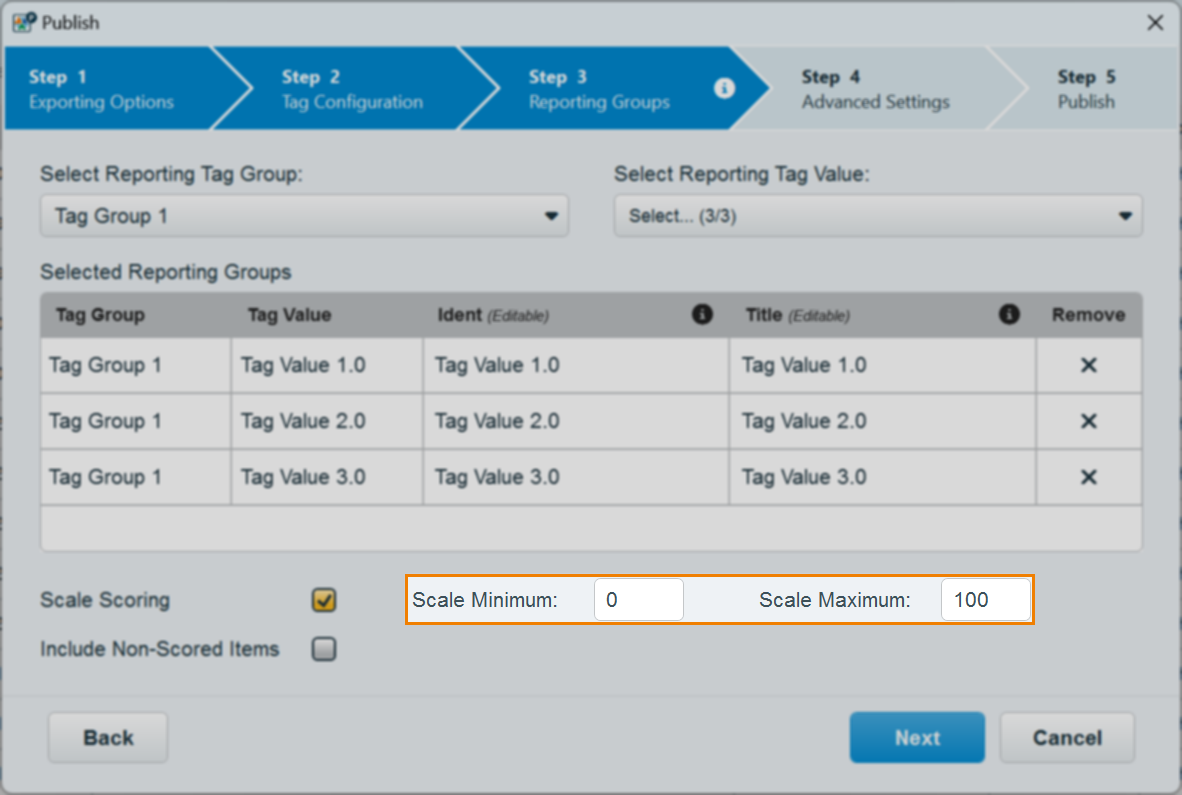
Your chosen tag values populate the Selected Reporting Groups table. Refer to the following table for information on what data the Selected Reporting Groups displays:
| Column | Description |
|---|---|
| Tag Group | The selected tag group. |
| Tag Value | The selected tag value. |
| Ident |
The tag value’s unique identifier. This is editable and can contain up to 36 alphanumeric characters including the following special characters: ., :, -, _. Spaces are not supported. |
| Title | The tag value’s unique reference code, which is displayed on score reports. This is editable and can contain up to 255 characters. |
| Remove | Select to remove the corresponding tag value as a reporting group. |
Select Next to continue.
Enabling scale scoring
You can enable and define scale scoring of your selected reporting groups.
Select the Scale Scoring checkbox to enable scale scoring.

Once enabled, you can define a Scale Minimum and a Scale Maximum between 0-999.
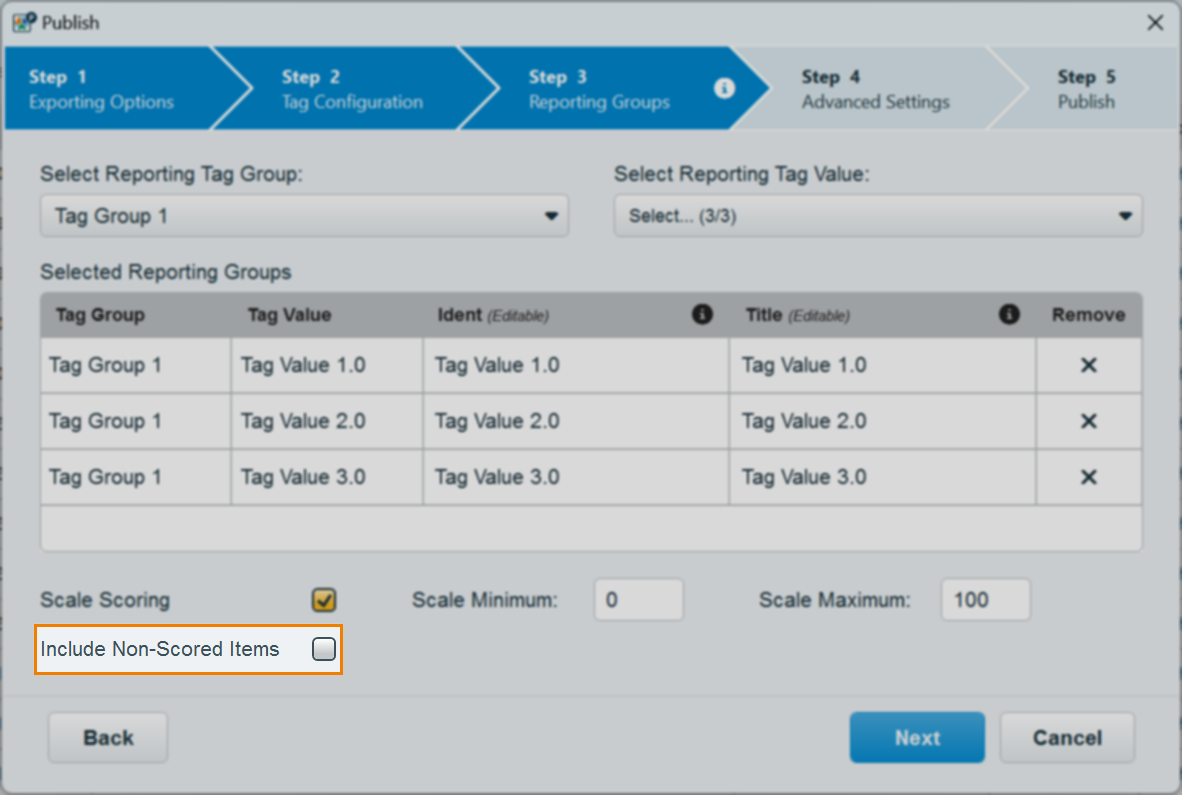
Including non-scored items
You can include non-scored items in your reporting group scoring.
Select the Include Non-Scored Items checkbox to include non-scored items in the reporting groups’ scoring.
6. Configure advanced settings
In Step 3 – Advanced Settings, you can configure various settings related to formatting of question content and media.
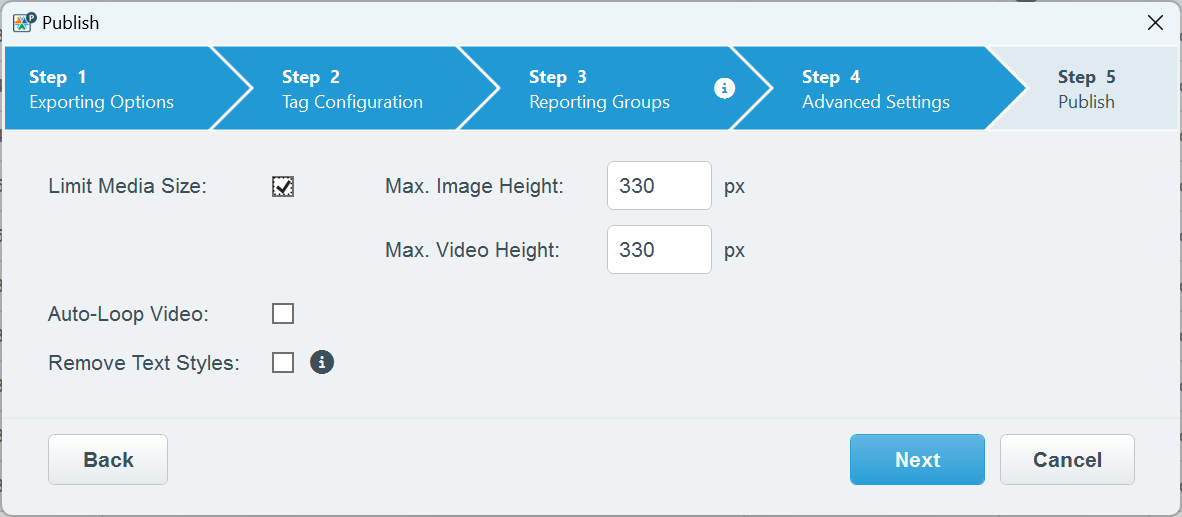
Refer to the following table for information on each setting:
| Setting | Description |
|---|---|
| Limit Media Size | Determines a configurable maximum height for images and videos in the test driver, in pixels. |
| Auto-Loop Video | Determines whether videos in the test driver loop automatically. |
| Remove Text Styles |
Removes font family, size, colour, and margins from text, but will not affect bold, italic, or underlined text.
NOTE: It is best practice to ensure your subjects’ default font for question text and answer options matches any bespoke styling configuration in your Pearson VUE Resource Container. Read Creating a Subject in Setup for more information on configuring a subject’s default font.
|
Select Next to continue.
7. Review and publish package
Review the package summary in Step 4 of the Publish wizard before publishing.

Select Publish to publish your items. Your items are published in a ZIP file in your specified Save destination.
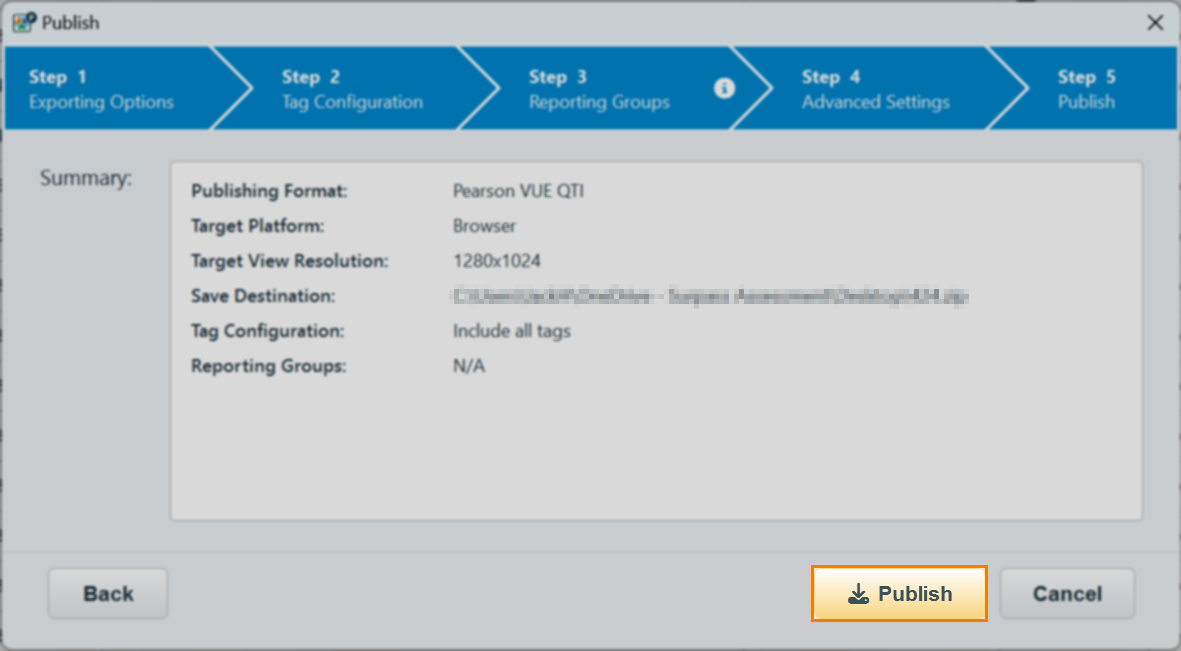
The ZIP file contains an Items XML file, an Assessment XML file, a QTI data (CPF) file, a DriverConfig ZIP, a folder of any media assets if specified, and a readme - publish settings TXT file that details the defined settings.
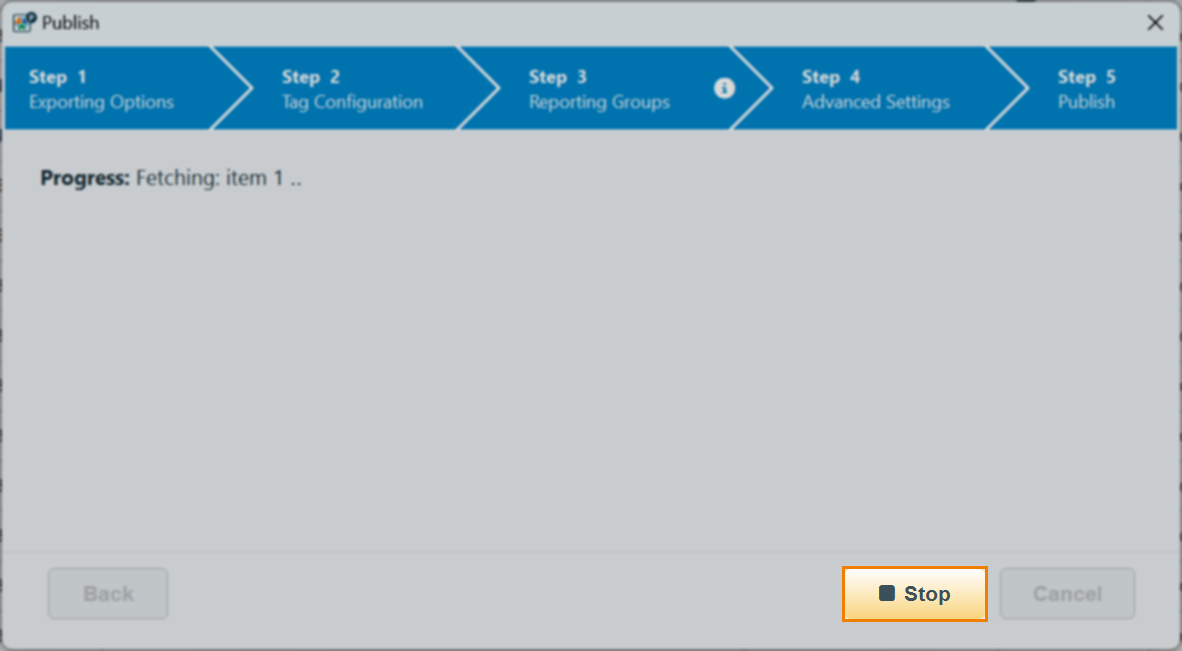
Once Publish has been selected, you can view the progress of the publishing process within the wizard. You can also choose to Stop publishing if required.
Upon completion, a Publish report detailing the success or failure of the publish attempt is generated. For more information on the generated report, read Downloading publish reports.
Further reading
To learn more about publishing items with the Surpass Publisher, read the following articles: