Adding tags, enemies, and source material to an item set
Item sets are groups of items with “friend” relationships. Items with friend relationships cannot be added to a test without their friend items. Friend items always appear next to each other in tests, making them ideal for presenting a number of items on the same theme (such as in a case study).
You can add tags and enemies to all item sets. In HTML subjects, you can add source material to item sets. Tags, enemies, and source material apply to all item set items. If items are removed from an item set, they will lose these inherited elements.
This article explains how to add tags and enemies to an item set. This also includes information on how to add source material to item sets in HTML subjects.
In this article
Adding tags to an item set
You can give an item set its own tag values. Item set tags are applied to all items in the item set. If you search using tag value criteria in Item Search or Test Creation, all items in the set are returned.
To give an item set tag values, open the item set’s Edit screen.
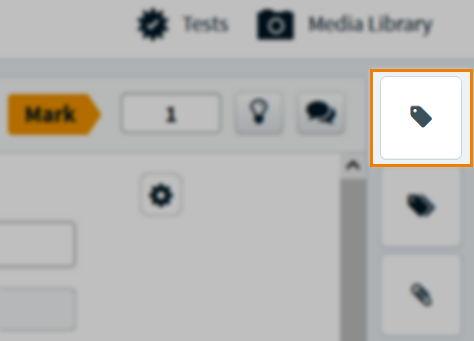
Select Tags to open the Tags information panel. The item tree collapses when the Tags panel is open.
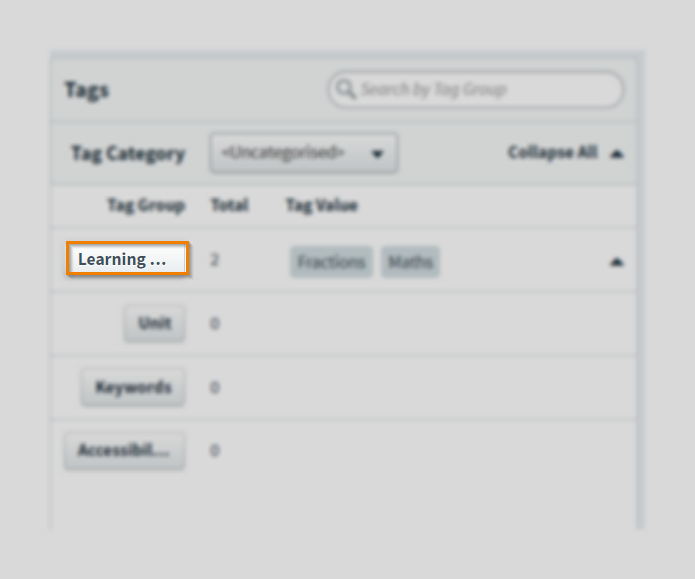
Select any of the Tag Group buttons to add a new tag to that group. This will open the Edit <tag group> dialog.
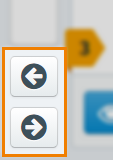
Use Previous item and Next item to navigate the item tree.
Select the Folder icons to open the item tree. The Tags panel closes when the item tree is reopened.

Select Hide to close the Tags panel.
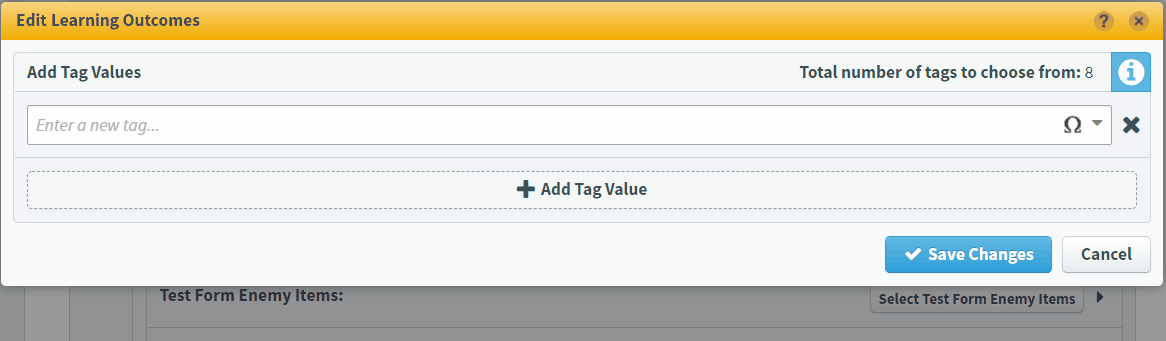
In the Edit <tag group> dialog, use the Enter a new tag field to find a tag value. You can use the text field to search for a tag value or the menu to select a tag value from the list. Select Add Tag Value to add the tag value to the item set. Select Save Changes to close the dialog.
For more information, read Using tags in items.
Adding enemies to an item set
You can set up enemy relationships between your item set and other items or item sets. Enemy items/item sets cannot appear in the same test. Item sets inherit the enemy relationships of all included items. These inherited relationships are applied to all items in the item set. You can only edit these enemy relationships on the individual item.
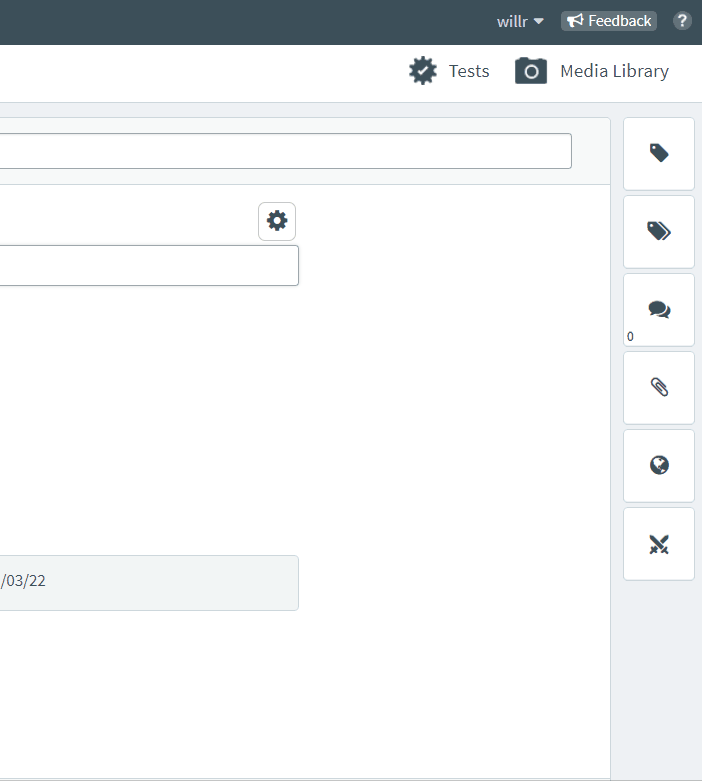
To give an item set enemy relationships, open the item set’s Edit screen. Select the Enemy Items button.

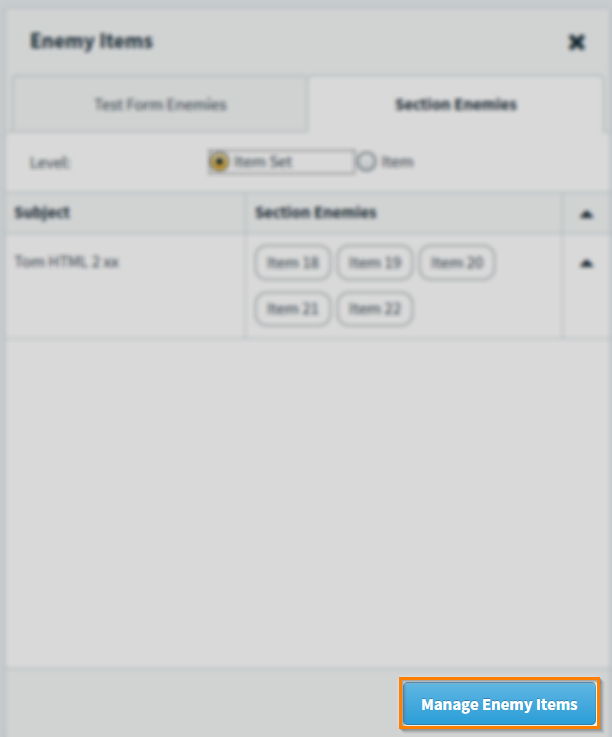
Choose the Section Enemies or Test Form Enemies tab.
Change the level by selecting the Item set or Item radio button.
Select Manage Enemy Items.
Select the subject containing the items you want to establish enemy relationships with. The current subject is selected by default.

The chosen subject’s items are listed in the item panel. Use the search field to filter the visible items on the basis of their name or item ID.
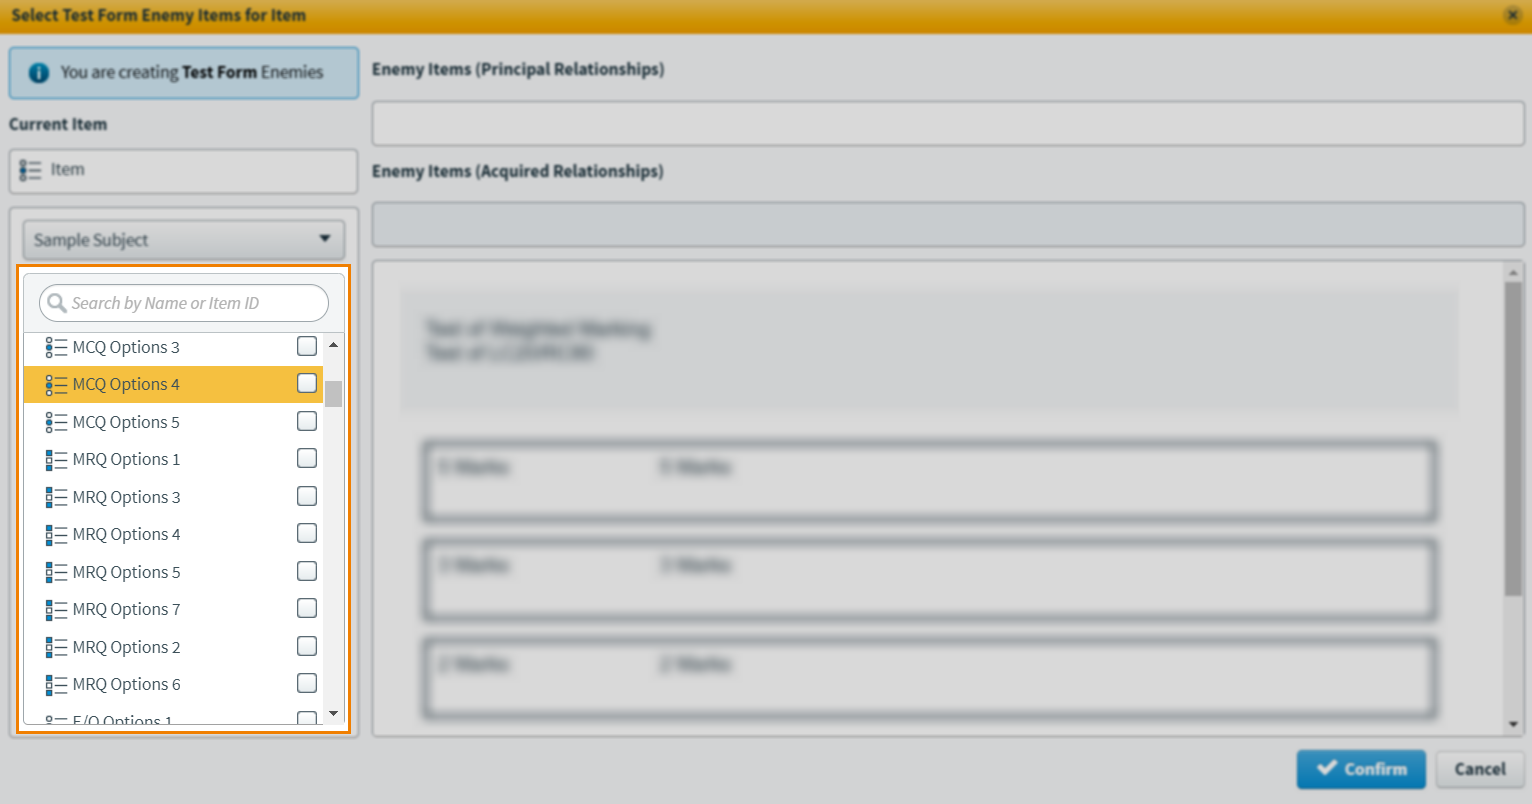
Highlight an item to preview of its content.
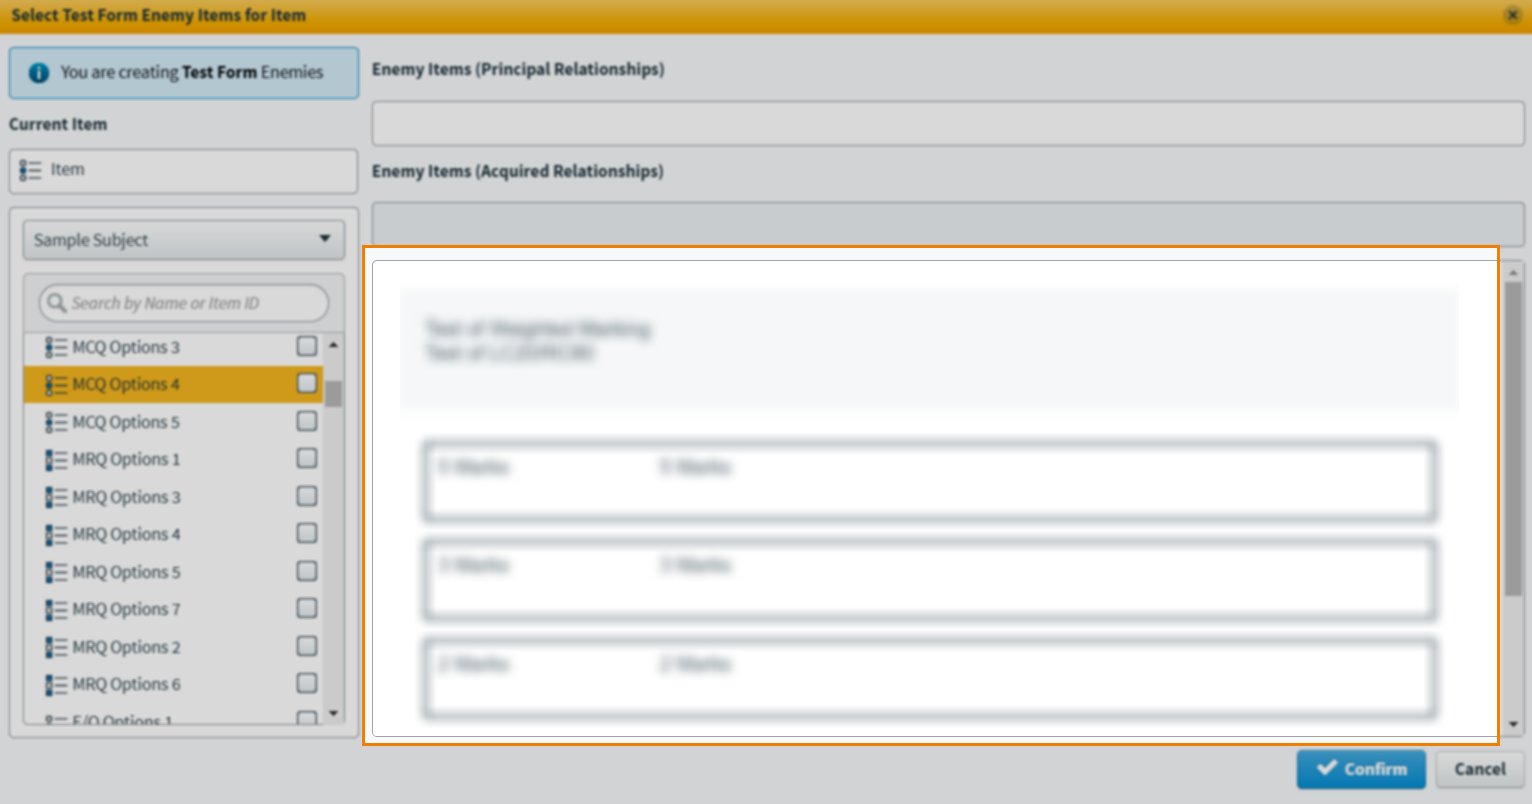
Select an item’s checkbox to set an enemy relationship. The new enemy item appears under Enemy Items (Principal Relationships). To remove an enemy item, select Delete .
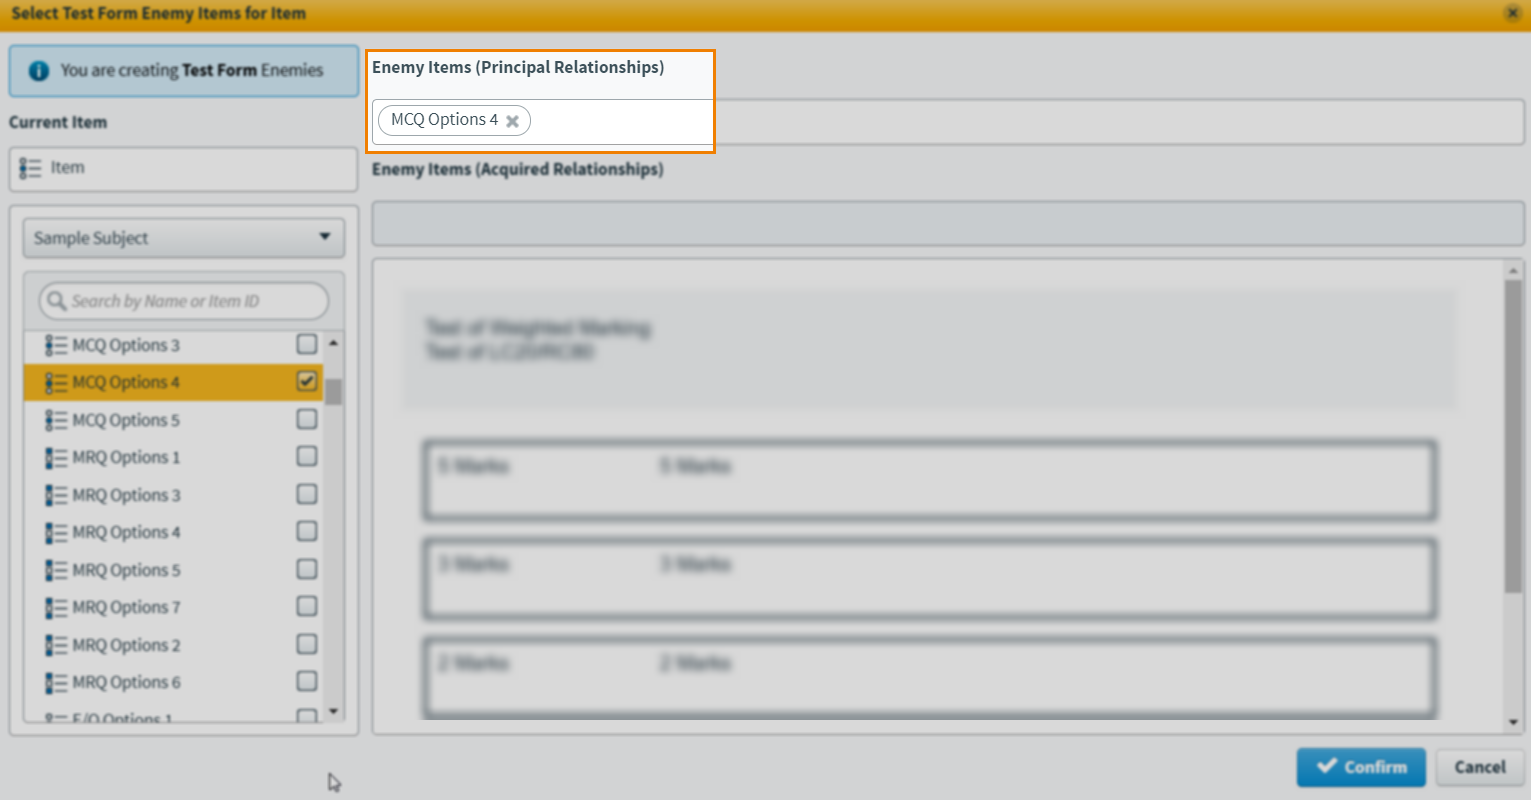
After you have defined your enemy relationships, select Confirm to save your new enemy relationships.
For more information, read Adding enemies to an item.
Adding source material to an item set (HTML subjects only)
You can add source material to item sets in HTML subjects. Source material are files that candidates need to refer to when answering a set of questions. Source material is added to the item set’s question stem and is not visible until candidates select a button. You can use the following media as source material:
- A PDF file
- A custom HTML file (HTML source material)
- An approved webpage (URL source material)
- Images
- Audio
- Video
To give an item set source material, open the item set’s Edit screen. Open the Additional Options menu and select Add Source Material to open the Select Media dialog.

Choose your source material in the Select Media dialog. You can select multiple files at the same time.
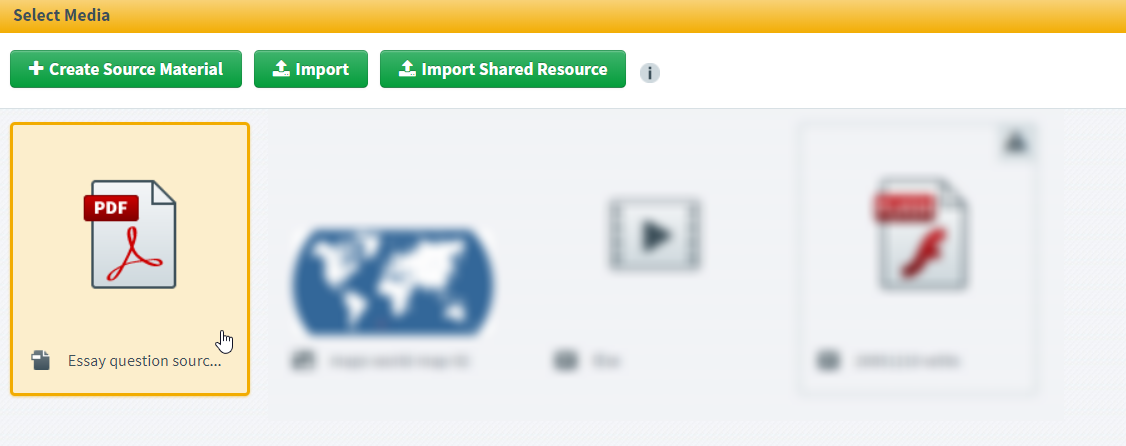
You can upload new source material at this point using Import or Import Shared Resource . For more information, read Importing files to the media library.
You can also create new source material using Create Source Material . For more information, read Creating HTML source material and Creating URL source material.
When you have chosen your media files, select Add media to item.
For more information, read Adding source material to an item.
Further reading
To learn more about item sets, as well as tags, enemies, and source material, read the following articles: